Learn how to repair a roof leak yourself: find the source, apply temporary fixes, and know when Central Texas homeowners should call a pro.

Water stains spreading across your ceiling never wait for a convenient time to show up. Learning how to repair a roof leak starts with tracking down where the water is actually entering, since a stain three feet from the real hole is more common than you'd think. Central Texas storms, hail, and sudden temperature swings all take a toll on shingles, flashing, and sealant, and by the time you notice a drip, the damage has usually been building for weeks.
This guide walks you through finding the source of a leak from inside and outside your home, then applying both temporary fixes you can do this afternoon and more permanent repairs for shingles, flashing, or vents. We'll cover the tools you need, safety steps for working on a sloped roof, and how to tell when a patch will actually hold versus when it's just buying you time.
We'll also be honest about when a DIY repair makes sense and when it doesn't. Some leaks are a quick fix with roofing cement and a putty knife. Others point to bigger problems underneath that need a professional inspection before you spend a weekend chasing the wrong spot. We've seen both scenarios plenty of times here in Austin.
Most roof leaks in Central Texas trace back to a handful of usual suspects. Cracked or missing shingles let water sneak under the surface after hailstorms or high winds, while failed flashing around chimneys, skylights, and vent pipes opens gaps as the sealant dries out and shrinks in our summer heat. Clogged gutters back water up under the roof edge, and old pipe boots crack from years of UV exposure. Even a small nail pop can create a pathway for water to travel along the deck before it ever shows up as a stain on your ceiling.
A leak rarely enters where you see the stain, so chasing the drip instead of the source wastes time and money.
Before you head onto the roof, get everything together on the ground. Working with the wrong tools halfway up a ladder is how small jobs turn into emergency room visits.
| Category | Items |
|---|---|
| Safety | Sturdy ladder, non-slip shoes, safety harness, work gloves |
| Inspection | Flashlight, binoculars, garden hose |
| Temporary fix | Roofing tarp, roofing cement, putty knife |
| Permanent repair | Replacement shingles, roofing nails, flashing, sealant, pry bar |
Quick checklist for a leak-hunting kit:
Grabbing these items upfront means you won't be climbing up and down the ladder five times once you start figuring out how to repair roof leak damage properly.
Start inside on a dry day, since chasing water during an active storm is dangerous and unreliable. Grab your flashlight and head into the attic, looking for water trails, dark streaks, or damp insulation along the rafters. Water travels along the roof deck before dripping down, so the entry point is almost always higher up and often several feet away from the stain on your ceiling.
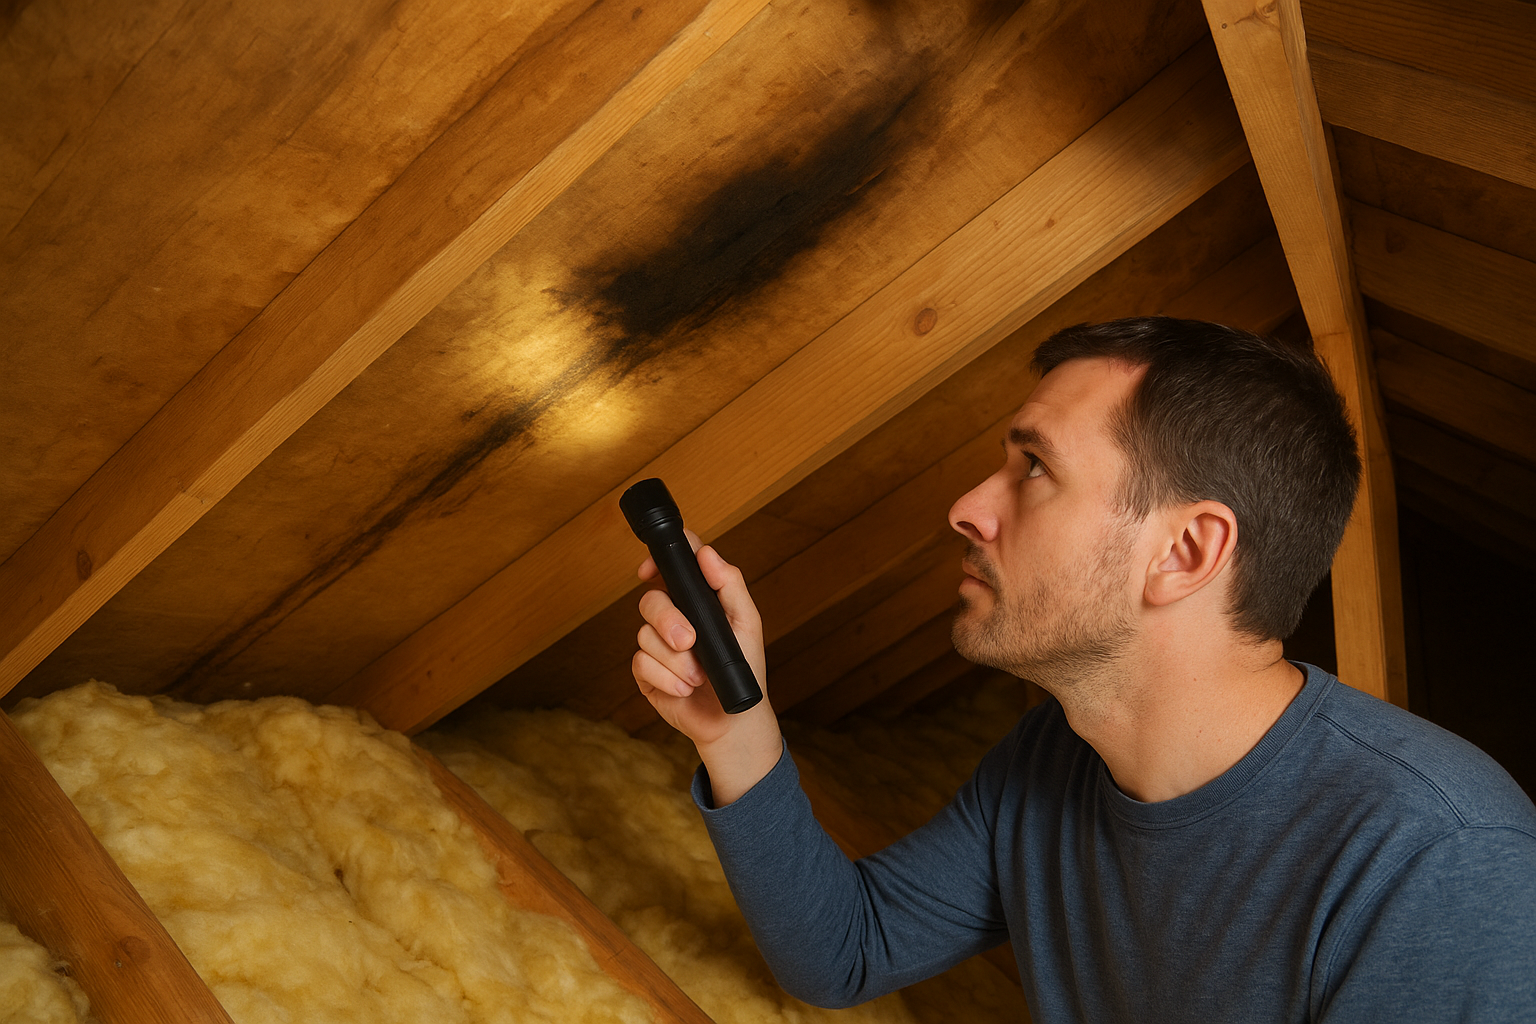
Trace the water trail uphill from the stain, because the leak's true source sits higher on the roof than the damage below it.
Once you have a general area, head outside and inspect that section of roof for the obvious culprits: cracked shingles, lifted flashing, or a cracked pipe boot. If nothing jumps out, have a helper run a garden hose slowly over small sections of the roof while you watch the attic below for drips, working from the bottom up.
This patient approach beats guessing and re-patching the wrong spot twice.
Before you touch a shingle, decide honestly whether this is a job you should be doing at all. A steep pitch, a wet deck, or a roof over two stories calls for a professional inspection instead of a solo climb. Once you've confirmed the area is safe to walk, check how far the damage extends past the visible entry point, since rot and soft decking often spread wider than the leak itself.
No patch is worth a fall, so skip the climb if the pitch, height, or weather isn't cooperating.
Press gently on the decking near the leak with a gloved hand or the end of a pry bar. Spongy or soft spots mean water-damaged wood underneath, not just a surface problem, and that changes your repair plan.
Spotting any of these means it's time to stop and call in help before the small leak becomes a bigger structural bill.
Once you've confirmed the roof is safe to walk, your goal shifts to stopping active water intrusion before the next rain. A tube of roofing cement and a putty knife handle small cracks and pinholes around vents or flashing edges. Spread the cement generously over the gap, feathering the edges so water sheds instead of pooling. This isn't a finished repair, but it buys you time until you can address the real problem properly.
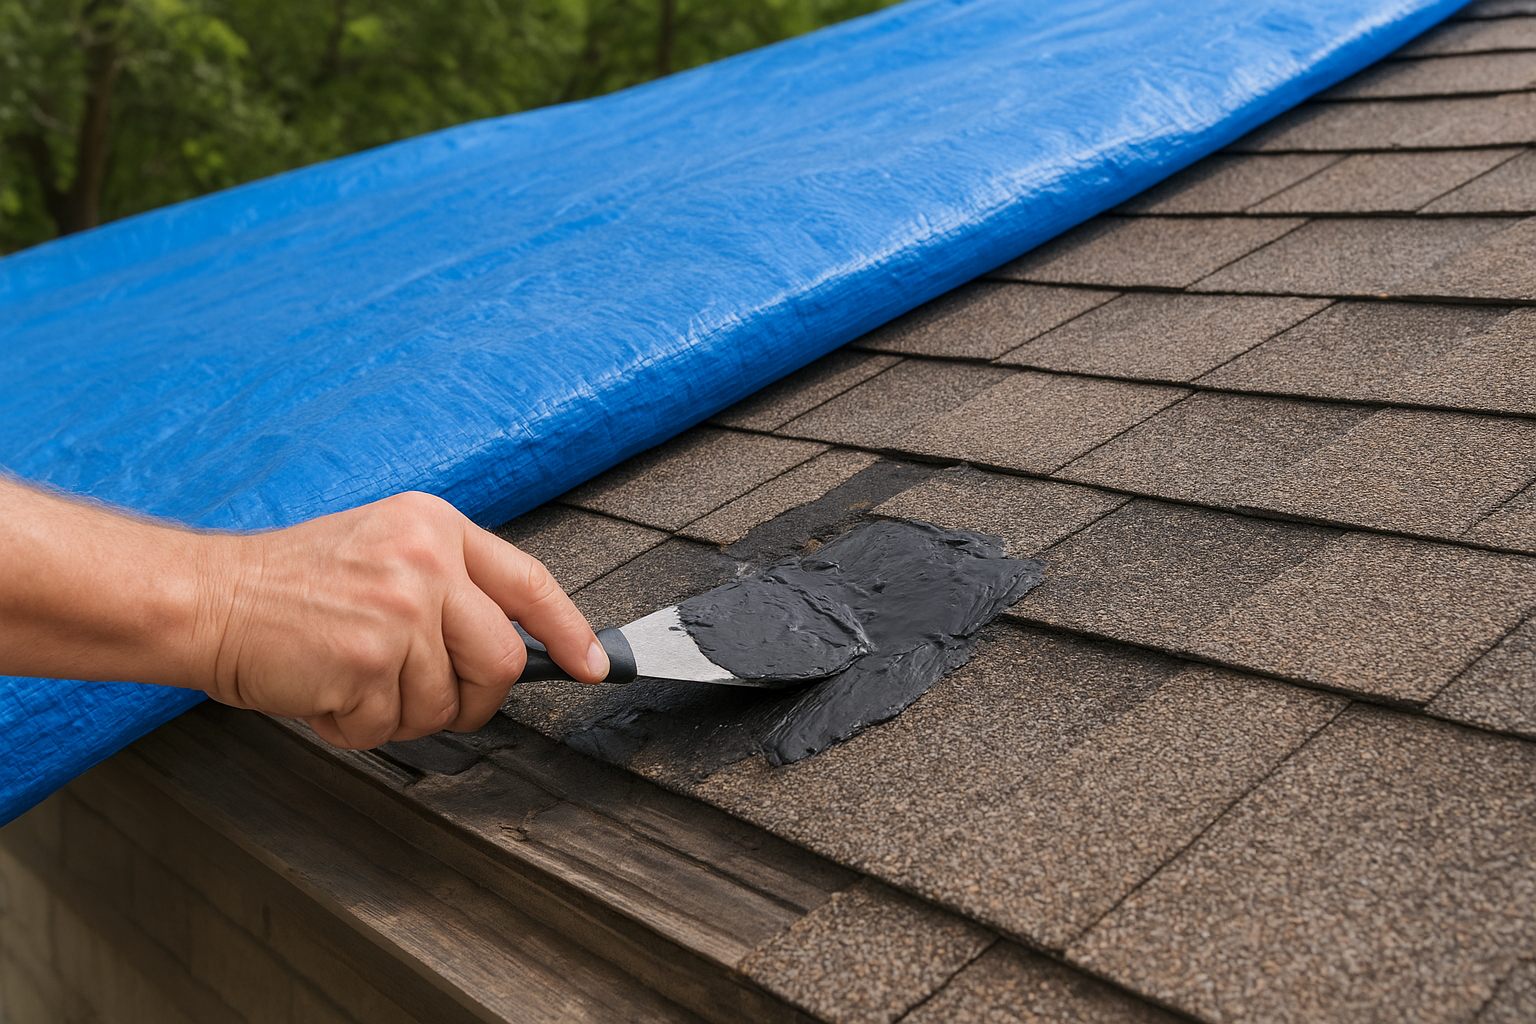
A tarp and roofing cement won't fix the leak, but they'll stop the bleeding until you're ready for a real repair.
For bigger gaps, missing shingle sections, or storm damage, a roofing tarp covers more ground fast. Follow these steps:
Check the tarp after any strong wind, since Central Texas gusts loosen poorly secured coverings quickly.
Replacing a damaged shingle or resealing flashing is where a temporary patch becomes a lasting fix. Slide out the cracked shingle by prying up the nails above it, slot in the replacement, and re-nail following the original pattern. For flashing, remove the old sealant completely before applying new sealant, since layering fresh caulk over old residue never bonds properly and the leak comes back within a season.
A permanent repair only holds if you remove the old, failed material first, not just cover it up.
Sometimes the smartest repair is picking up the phone. Multiple layers of shingles, widespread rot, or a leak near electrical wiring are signs the job has outgrown a weekend project.
Once any of these apply, a licensed contractor protects both your roof and your safety.
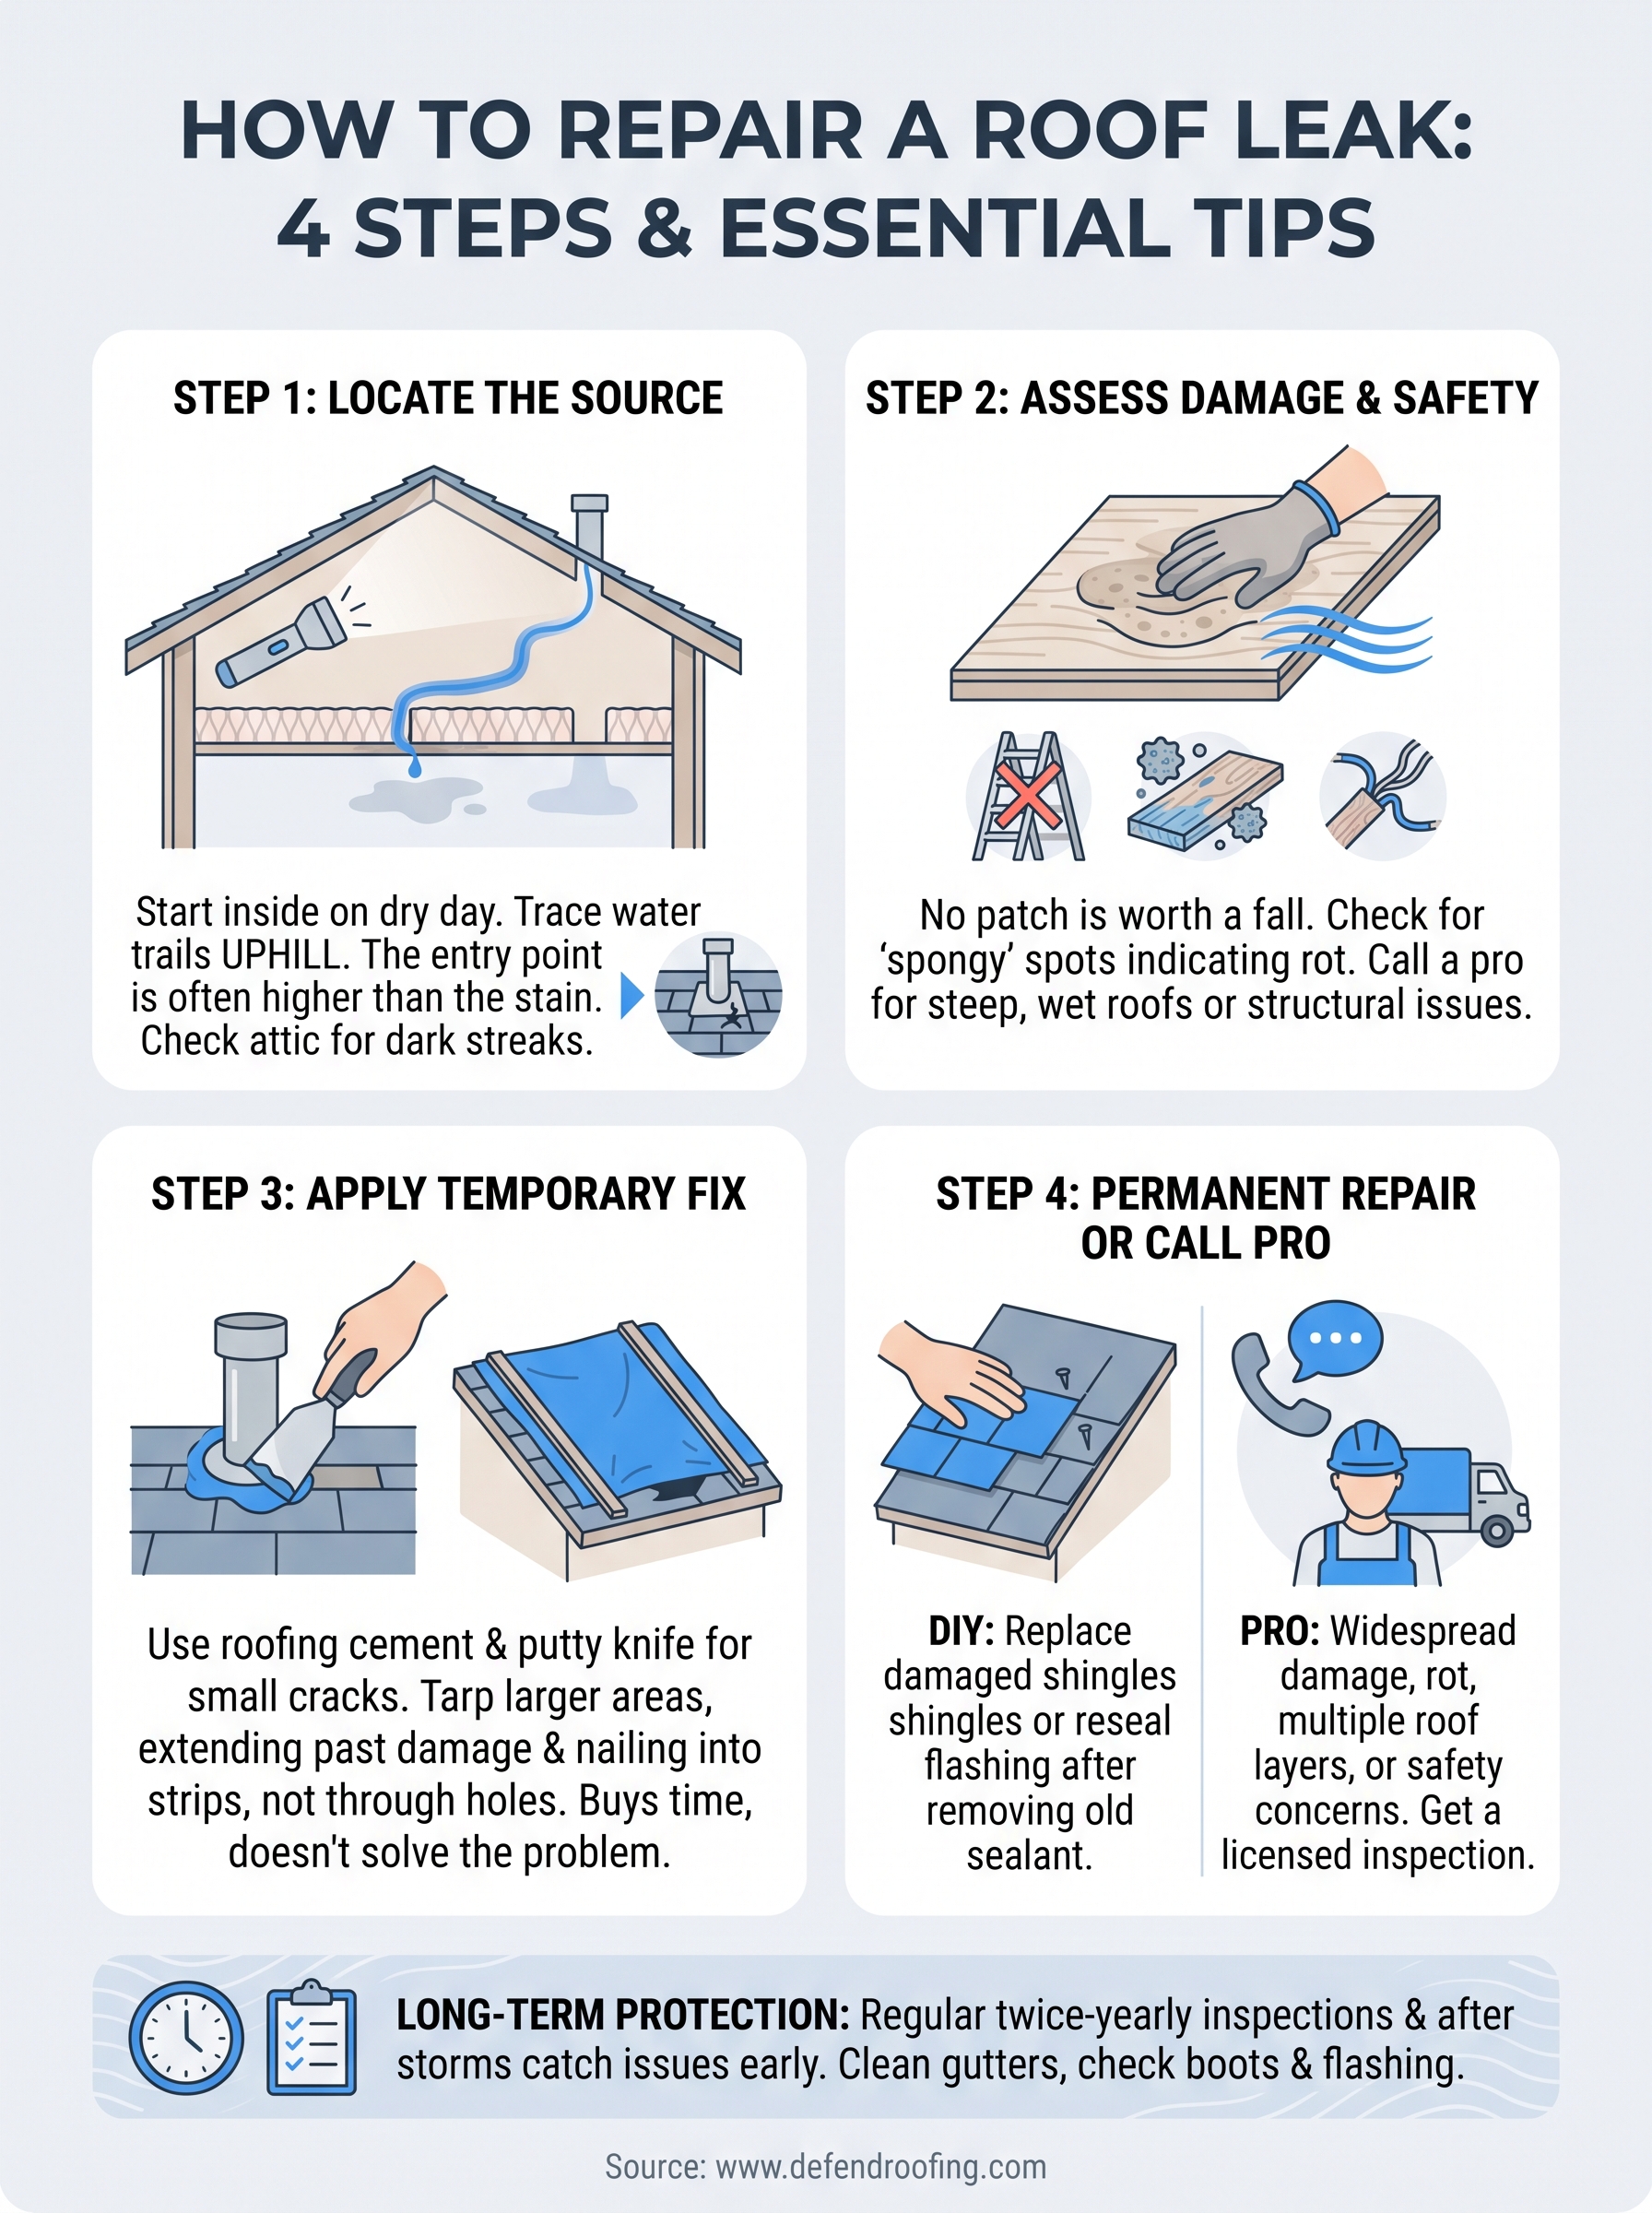
Finding and patching a leak yourself buys you time, but it doesn't erase the underlying wear that caused it. Regular roof inspections, twice a year and after any major storm, catch cracked flashing and lifted shingles before they turn into ceiling stains. Gutters cleared of debris, pipe boots checked for cracking, and prompt attention to missing shingles all keep small problems from becoming expensive ones.
Know your limits, too. A DIY patch is fine for a small hole or a loose shingle, but widespread damage, rot, or anything above a single story deserves a trained eye. Central Texas weather is hard on roofs, and a thorough assessment from someone who does this daily catches what a homeowner on a ladder might miss.
If you'd rather skip the guesswork, get in touch with our team for a straightforward inspection and honest recommendation on your roof.




