Learn how to repair the roof yourself in Central Texas—inspection tips, tools, shingle and flashing fixes, plus when to call Defend Roofing instead.
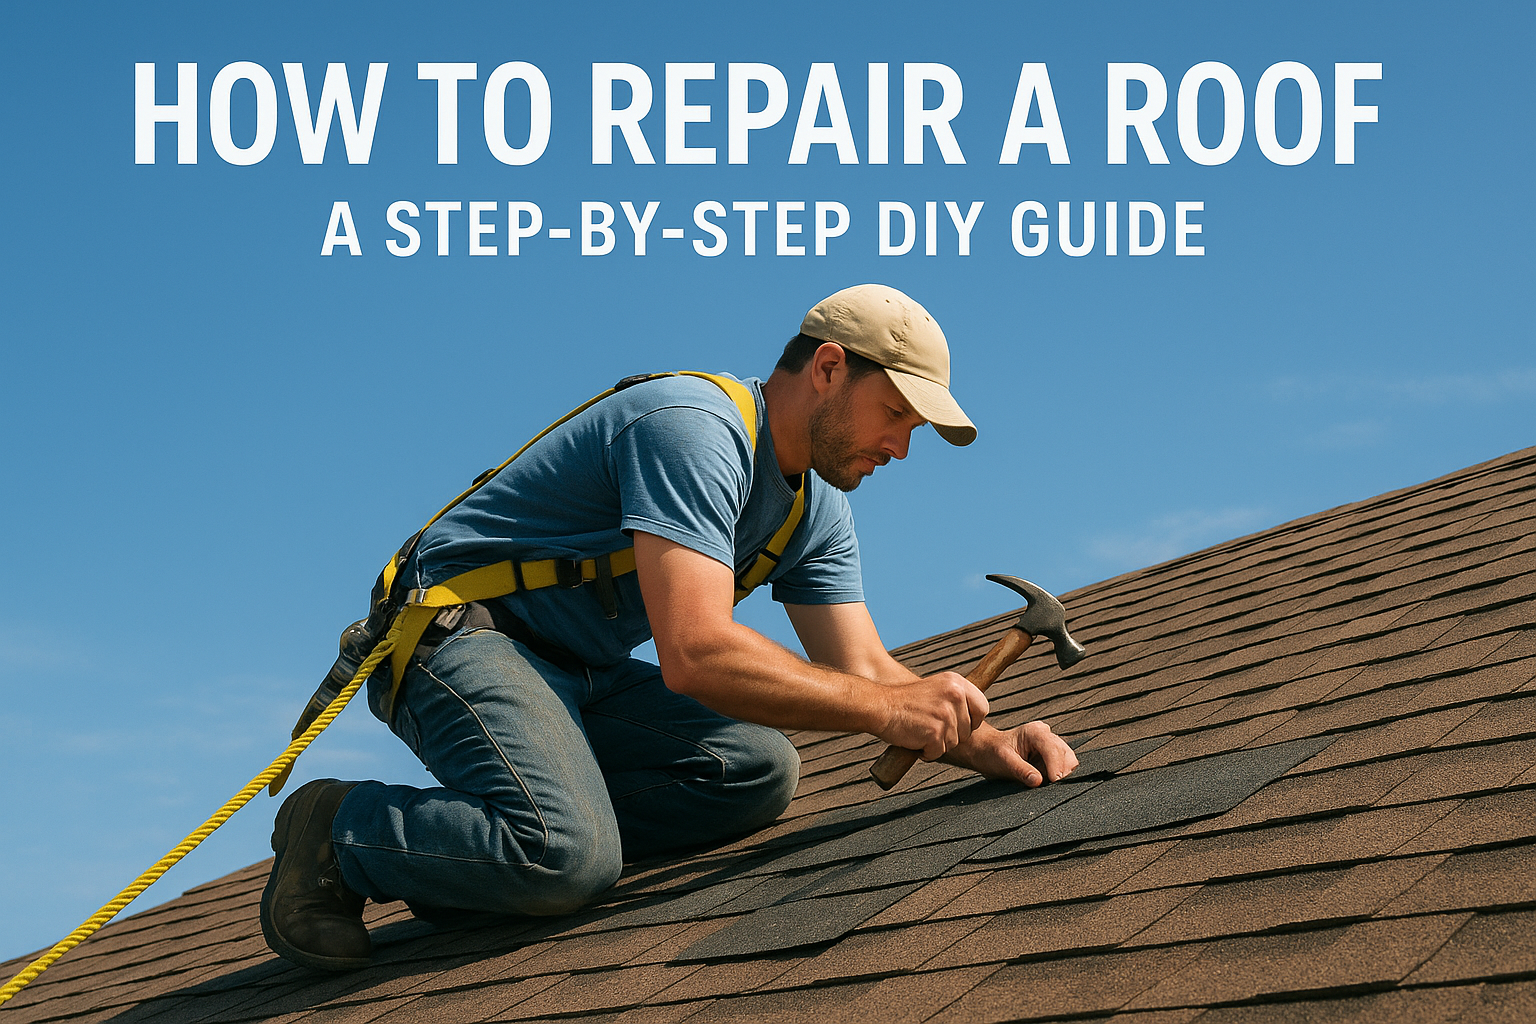
A missing shingle or a wet stain on the ceiling doesn't wait for a convenient weekend. Once you spot damage, you need to know whether you can repair the roof yourself or whether it's time to call in a professional before a small leak turns into rotted decking. This guide walks you through the process homeowners actually use to handle minor to moderate roof problems, from spotting the damage to sealing the repair correctly.
If you're searching for how to repair a roof without guesswork, you're in the right place. We cover the exact materials and tools you'll need, how to safely get on your roof, and the techniques for fixing common issues like cracked flashing, damaged shingles, and small leaks. Each step reflects what we see on real Central Texas roofs, not generic advice pulled from a manual.
We've spent three generations climbing Austin-area roofs, so we know which repairs a capable homeowner can tackle and which ones turn into bigger problems if done wrong. Read through before you grab a ladder, and you'll know exactly where your DIY limits are.
Central Texas weather is brutal on roofing materials. Summers push shingle surfaces past 150 degrees, then a hailstorm rolls through in spring and knocks granules loose or cracks the mat underneath. UV exposure breaks down asphalt over time, making shingles brittle and prone to cracking when wind lifts them. Add in the region's sudden hailstorms and straight-line winds, and you get a combination that ages roofs faster than most homeowners expect. Before you decide to repair the roof yourself, it helps to understand what actually caused the damage, because a roof that's failing from age needs a different approach than one hit by a single storm.
Most of the repair calls we handle trace back to a handful of repeat offenders. Wind uplift tears shingles loose at the tab, especially on roofs installed with too few nails or the wrong nail placement. Hail bruises the shingle mat, which you often can't see from the ground but shows up as soft spots when you press on the surface. Tree limbs scrape granules off during storms, and flashing around chimneys, vents, and skylights pulls away as houses settle and materials expand and contract with temperature swings. Clogged gutters back water up under the shingle edge, and that's a slow leak that rots decking long before anyone notices a ceiling stain.
A roof repair only lasts if you fix the cause of the damage, not just the spot where water got through.
You don't need to be on the roof to spot most problems. Walk your property line and look up with binoculars first. Granules collecting in your gutters or at downspout outlets mean shingles are wearing thin. Dark streaks or curling shingle edges signal age-related breakdown. Inside the attic, check for daylight through the roof deck, water stains on rafters, or a musty smell that points to trapped moisture. These indoors clues often tell you more than a quick visual scan from a ladder, and they help you decide whether you're dealing with a single damaged shingle or a broader problem that needs professional eyes.
Roof work causes more injuries than almost any other home maintenance task, and most of those injuries happen because someone skipped a basic precaution. Before you touch a ladder, run through this checklist:

Once you're set up, move slowly and test your footing before shifting weight, particularly on roofs with algae streaking or moss growth, which get slippery even when dry. If at any point the pitch feels too steep, the decking feels soft underfoot, or you're not confident in your harness setup, stop and call a licensed roofer instead. No repair is worth a fall, and a professional crew can usually finish the same job in a fraction of the time it takes a first-timer working carefully.
Before you buy a single shingle or squeeze a tube of sealant, you need a clear picture of what's actually wrong. A thorough inspection tells you whether you're looking at a 20-minute patch job or a problem that's already spread into the decking. Start from the ground with binoculars, then move to the attic, and only get on the roof once you know roughly what you're looking for and where.
Walk the perimeter of your house first. Look for shingles that are curling, cracked, or missing outright, and check your gutters for granule buildup, which signals shingle wear even if nothing looks obviously broken from a distance. Then head into the attic with a flashlight during daylight hours. Look for beams of light poking through the roof deck, dark water stains on rafters or sheathing, and any soft or sagging spots in the wood. A musty smell in the attic almost always means moisture is trapped somewhere, even if you haven't found the leak point yet.
The attic tells you more about roof damage than the shingles do, because that's where water actually ends up.
Once you've narrowed down a general area, get up on the roof following the safety steps from the last section. Press gently on shingles with your palm, not your knuckles, feeling for soft spots that indicate hail-bruised mat underneath. Check every flashing point, meaning chimneys, vents, skylights, and where the roof meets a wall, since these are the most common leak sources on any Central Texas roof. Look closely at nail heads too. Popped or exposed nails let water track straight into the decking, and they're an easy fix if you catch them early.
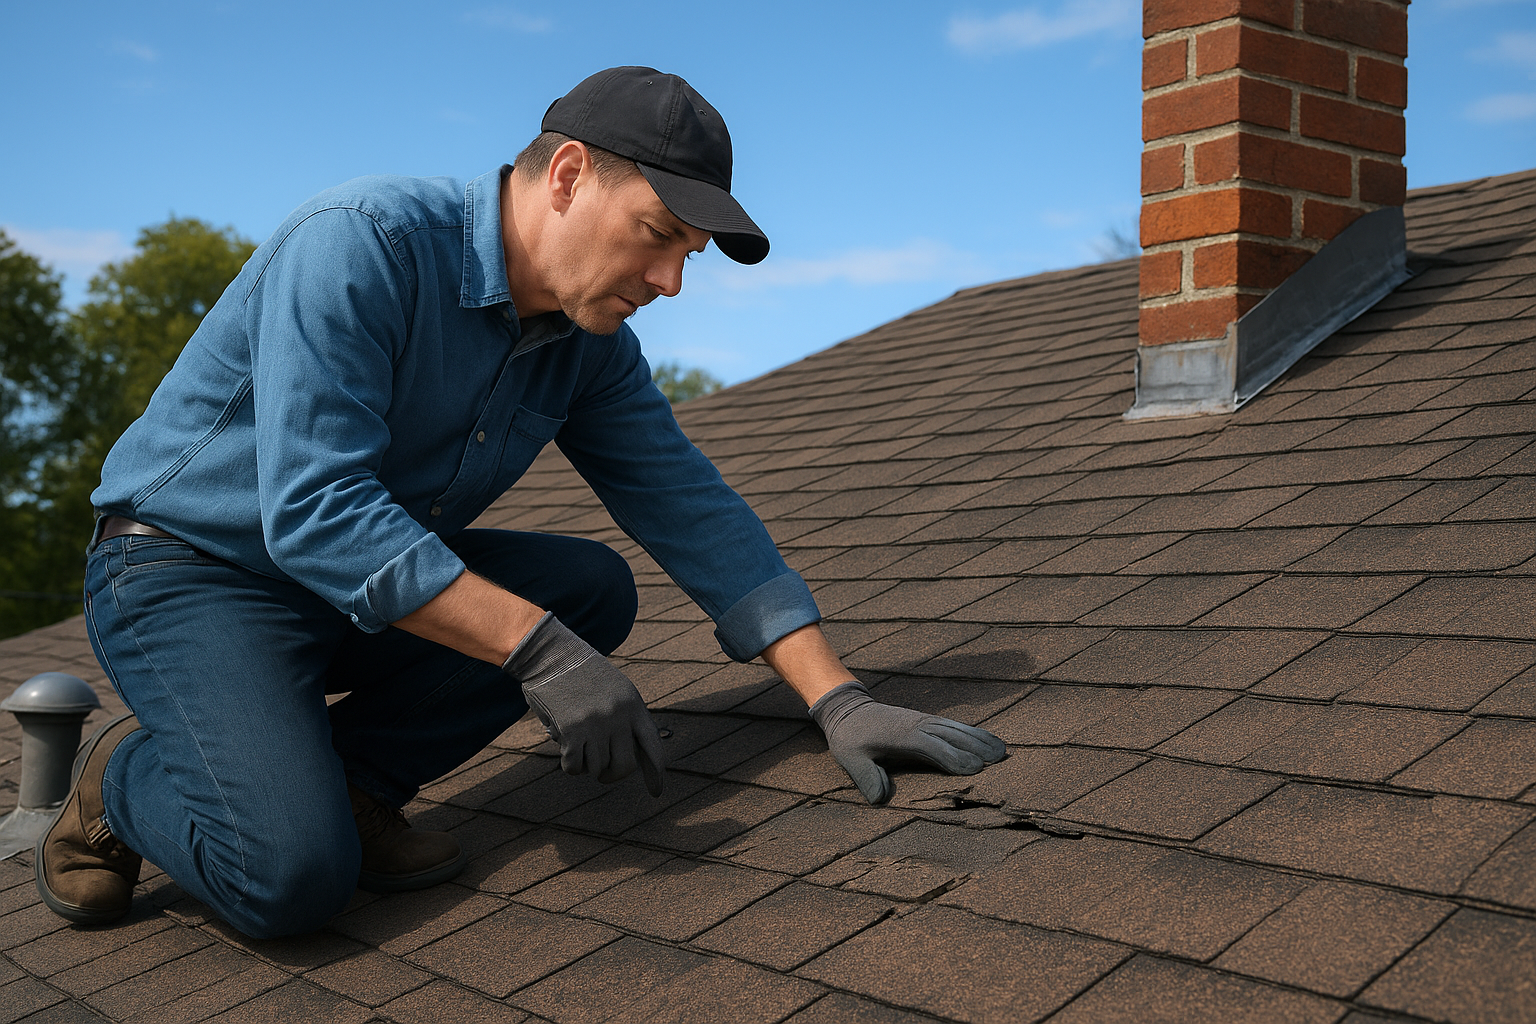
Use this checklist as you move across the roof section by section:
Document everything you find with photos, both wide shots showing the area and close-ups of the specific damage. This matters for two reasons. First, it helps you plan your materials list accurately instead of guessing. Second, if you decide partway through that the damage is bigger than expected, or if you end up filing an insurance claim, having timestamped photos from before you started any repair work protects you and gives an adjuster something concrete to review.
Having the right gear on hand before you climb up saves you two or three trips down the ladder, and it keeps you from working with the wrong fastener or adhesive under time pressure. Match your shopping list to the specific damage you documented in Step 1, since a shingle repair calls for different supplies than a flashing fix or a sealant job. Buying a little extra material, especially matching shingles, is cheaper than a second run to the hardware store mid-repair.
Buy for the damage you actually found, not a generic repair kit that leaves you improvising halfway through the job.
Most repairs draw from the same core toolkit, regardless of whether you're patching a shingle or resealing a vent boot. Pull these together before you head up:
Once your tools are set, gather materials that match the shingle type, color, and profile already on your roof. Mismatched shingles stand out and can affect how water sheds off the surface, so bring a piece of your existing shingle to the store if you're unsure of the exact match. The table below covers what most homeowners need for common Central Texas repairs.
| Damage type | Materials needed |
|---|---|
| Missing or cracked shingles | Matching shingles, roofing nails (1.25"), roofing cement |
| Lifted or rusted flashing | Step or continuous flashing, roofing nails, butyl flashing tape, sealant |
| Small cracks or holes | Roofing sealant or roof cement, a scrap of flashing for larger holes |
| Exposed nail heads | Roofing cement or sealant, replacement nails if heads are stripped |
| Valley debris and granule loss | Stiff broom, garden hose, granule-matched shingle if patching |
Gather everything into a bucket you can hook onto the ladder or hoist up with rope, rather than making multiple trips with your hands full. A cluttered work surface on a sloped roof is how tools end up sliding off the edge, so keep your materials organized and within easy reach before you start cutting into any damaged section.
Swapping out a damaged shingle looks intimidating the first time, but the process breaks down into a handful of predictable moves once you understand how shingles overlap. Every shingle course sits on top of the one below it and gets pinned down by nails from the course above, so you're working with layers, not a single flat piece you can just pry off. Getting the sequence right keeps you from tearing shingles you didn't mean to touch.
Start by lifting the shingle tabs directly above the damaged one, since those tabs hide the nails holding your target shingle in place. Slide your flat pry bar under the tab and gently work it upward, breaking the seal without cracking the shingle itself, which gets brittle and stiff in cooler weather. Once the tab is lifted, you'll see two rows of nails, the ones securing the damaged shingle and the ones from the course above. Slip the pry bar under each nail head and pop it loose, then slide the damaged shingle free. Check the felt paper or decking underneath while it's exposed. If it's soft, discolored, or torn, that's a bigger repair than a simple swap, and you should stop here and call a roofer before covering the problem back up.
A shingle repair is only as good as the layer underneath it, so always check the decking before you nail down a replacement.
Slide the new shingle into the gap so it lines up with the course on either side, matching the exposed reveal so it doesn't look like a patch from the ground. Nail it using four nails placed about one inch above the adhesive strip, spaced evenly across the shingle width. Drive each nail flush with the surface, not sunk deep and not sitting proud, since either mistake leaves a path for water. Here's the order that works best:
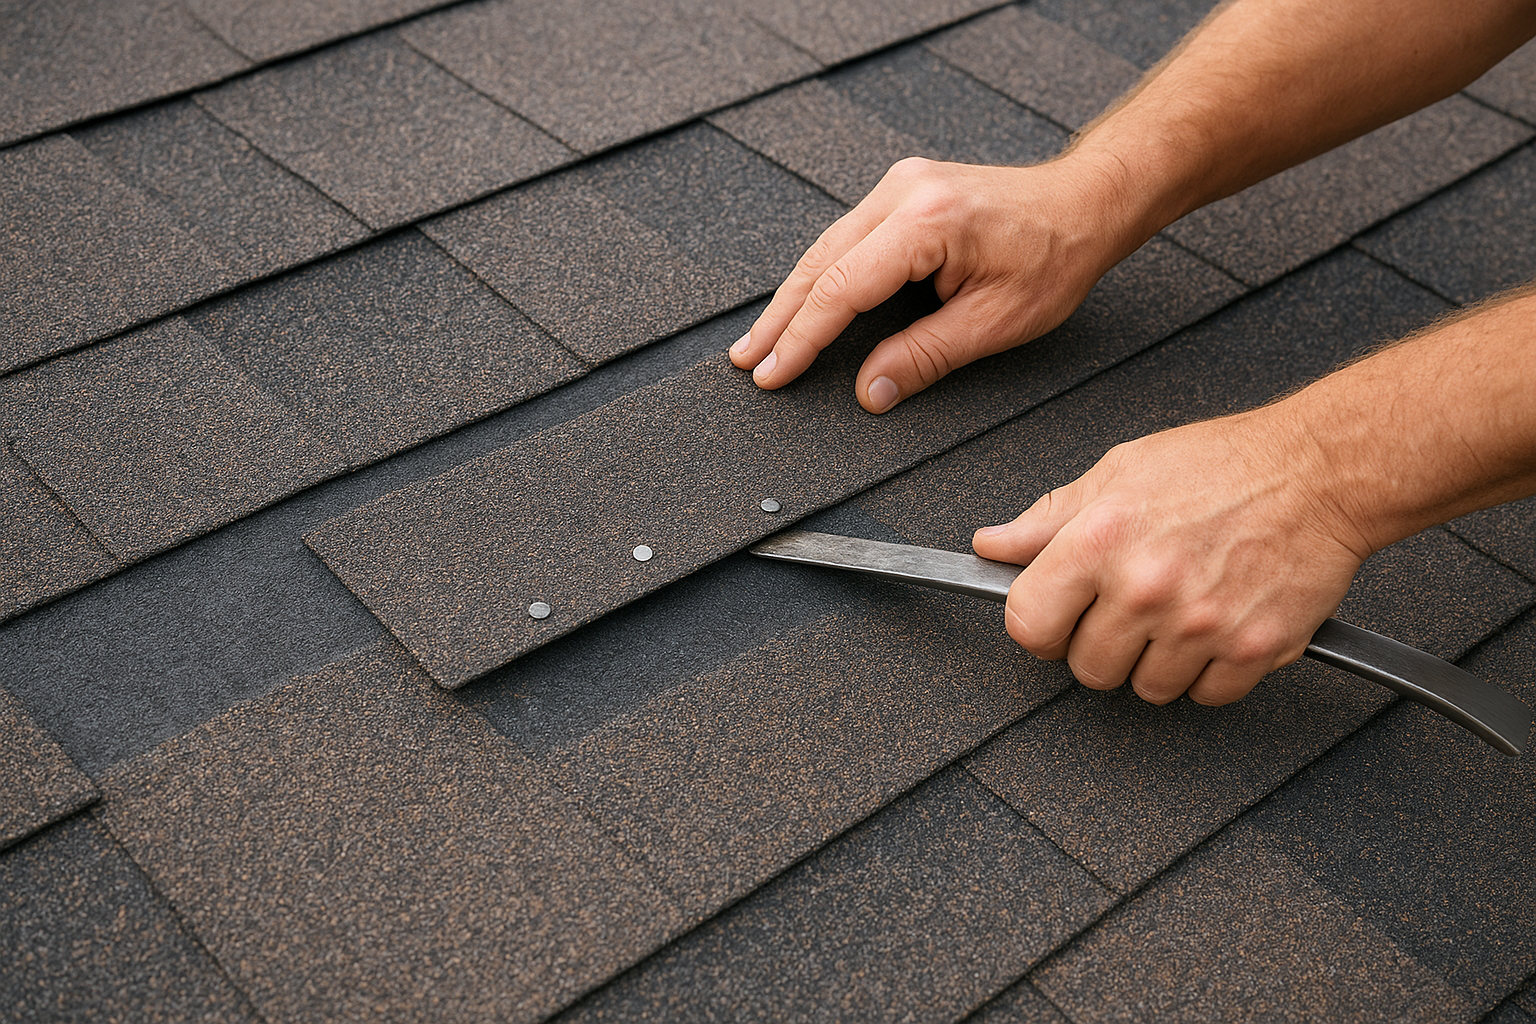
Press the tabs above back down firmly so the adhesive strip can bond in the sun over the next few days. If you're replacing several shingles in a row, work from the bottom course upward and keep your chalk line straight, since a crooked course is obvious from the street even after the repair holds up structurally. Save any shingles you remove that aren't damaged. They come in handy later if you need a matching patch somewhere else on the roof.
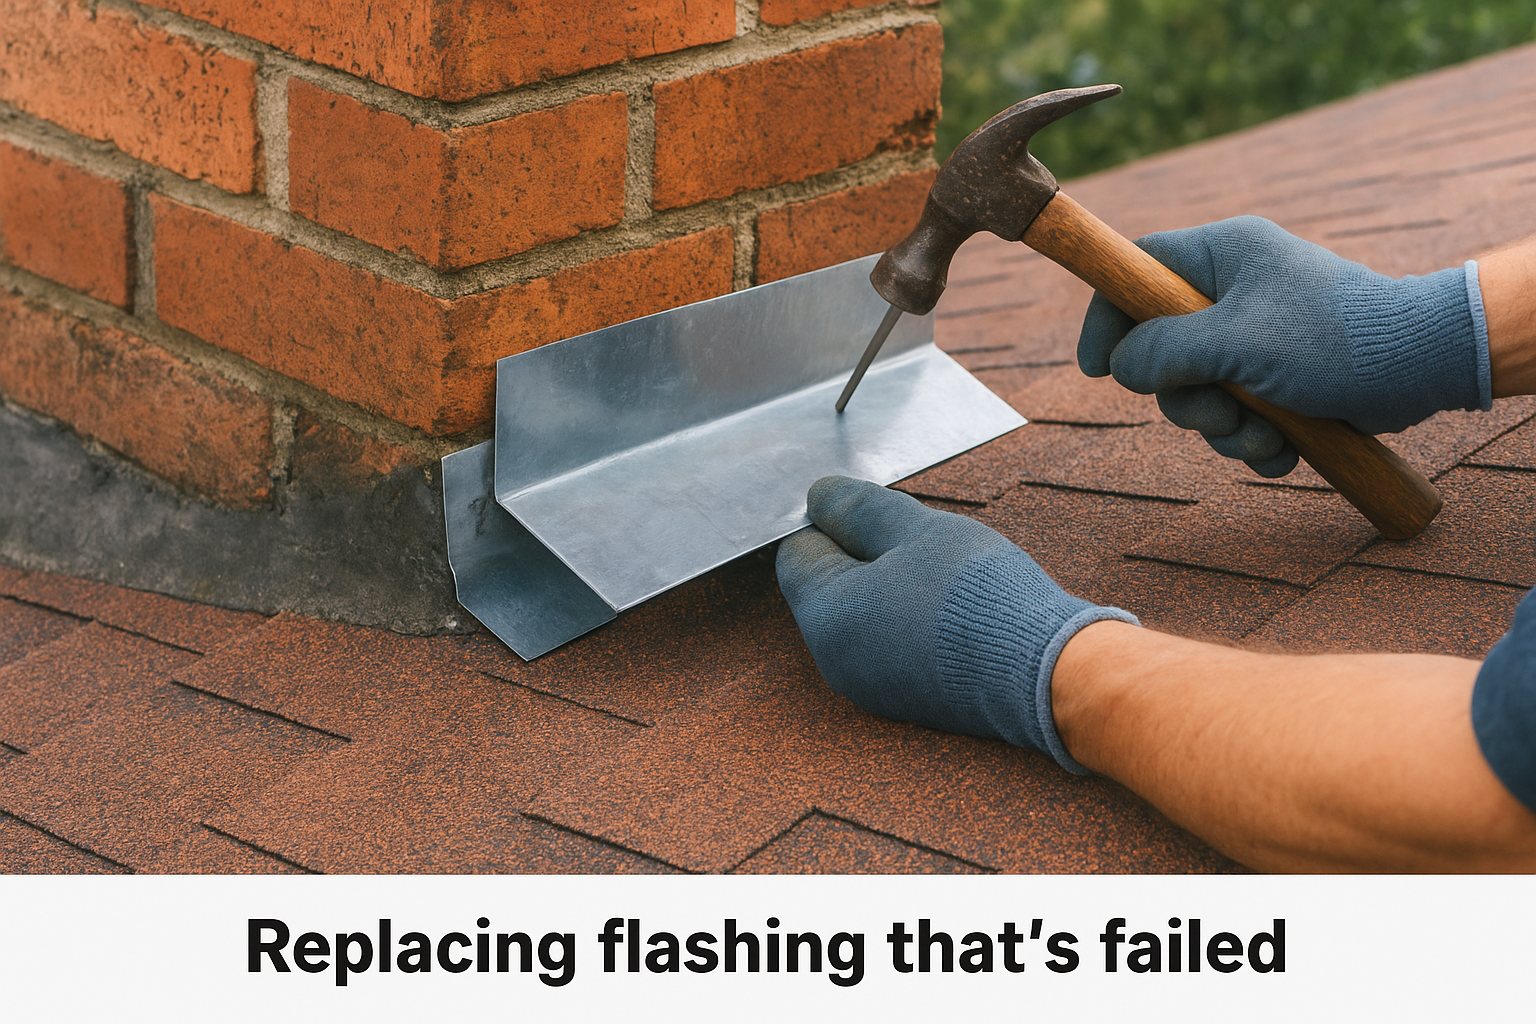
Flashing does the real work of keeping water out at every joint and penetration on your roof, so when it fails, leaks show up fast and often far from the actual gap. Chimneys, plumbing vents, skylights, and wall intersections all rely on metal flashing bent and layered to shed water downhill, and once that metal rusts through or pulls loose from settling, water finds its way straight into the decking. If you spotted lifted or rusted flashing during your inspection, this is where you fix it before moving on to smaller sealant work.
Small gaps or minor lifting at the edge of a flashing piece usually call for a repair rather than a full swap. Press on the metal first. If it flexes but holds its shape and isn't rusted through, you can reseal it. If you find rust holes, cracked seams, or flashing that's bent out of its original profile, replace that section instead of patching it, since a patch on failed metal just delays the same leak.
Flashing failures cause more hidden leaks than missing shingles ever do, so treat every rusted seam as a priority repair.
For flashing you're keeping, clean the surface first with a wire brush to strip away rust, old sealant, and debris so the new sealant actually bonds. Then follow this sequence:
When the metal itself is compromised, remove it entirely rather than layering new material over old rust. Pull the nails holding it in place, working carefully around shingles you want to keep intact, then slide the new flashing into the same position, tucking it under the shingle course above and over the course below. Nail it along the top edge only, never through the face where water runs, and seal every nail head as you go. Step flashing around chimneys and walls needs individual pieces woven between each shingle course, so don't try to shortcut this with one long strip. This is also the point in a repair where a lot of DIYers underestimate the fitting work involved. If the flashing shape is complex, like a chimney with multiple angles, or you're not confident bending and fitting metal precisely, this is a good moment to call in a professional rather than risk a rushed fit that leaks again within a season.
Sealant work looks like the easy part of a roof repair, but it's also where sloppy application undoes everything you just did with the shingles and flashing. A thin, uneven bead of roofing cement dries out and cracks within a season, while a thick glob traps water instead of shedding it. Getting this step right means matching the product to the surface and applying it in the right amount, not just squeezing a tube until the gap disappears from view.
Not every crack calls for the same product. Roofing cement, the thick, trowel-grade material, works best on larger gaps and around flashing edges where you need something with body to fill uneven surfaces. Tube sealant, applied with a caulking gun, suits smaller cracks, nail heads, and seams where precision matters more than volume. Check the label for compatibility with your shingle type, since some sealants soften asphalt shingles if left in direct contact too long. A polyurethane or butyl-based sealant generally holds up better under Central Texas heat than cheaper acrylic caulks, which shrink and crack within a year or two of sun exposure.
A sealant repair fails when it's applied too thin, not when the wrong product gets picked, so lay it on generously and smooth it flat.
Start by cleaning the area with a wire brush or rag to remove dirt, granules, and any old, failed sealant. Sealant won't bond to a dirty or wet surface, so give it a few minutes to dry if you just hosed off debris. Apply the sealant in a steady bead, then smooth it with a putty knife or a gloved finger so it feathers out at the edges instead of sitting in a raised ridge that catches debris and holds water.
Nail heads are small, but they're a common leak point because they sit right at the surface where water runs. Work through them with this sequence:
Don't skip nail heads that seem minor. A quarter-inch gap around a popped nail is enough to soak decking over a rainy season, and it's one of the cheapest, fastest fixes in the whole repair.
A repair isn't finished the moment the sealant dries. Loose nails, shingle scraps, and granules scattered across your roof and yard create hazards and can clog gutters if you leave them behind. Sweeping the work area and checking your gutters takes ten minutes, but skipping it means finding a stray nail in your lawnmower or a granule-clogged downspout weeks later. Cleanup habits matter just as much as repair technique when you're trying to repair the roof correctly the first time.
Work your way down from the ridge, collecting anything loose as you go rather than letting it slide off the edge unsupervised. Bag up old shingle pieces, bent nails, and sealant tube caps for disposal, and don't leave any tools sitting on the slope where they can slip during the next storm. Once the roof surface is clear, check your gutters and downspouts for anything that fell in during the repair.
Here's the part most first-time DIYers skip, and it's the reason so many repairs get called back within a month. Grab a garden hose and run water directly over the repaired area for several minutes, starting at the lowest point and working upward the way rain actually flows. Have someone in the attic underneath with a flashlight watching for any sign of water coming through, and give it a few minutes since small leaks take time to show.
A repair that hasn't been tested with water isn't finished, it's just assembled.
If the attic stays dry through a full soak, you've got a solid repair. If you catch even a small drip, go back and recheck your sealant coverage and flashing overlap before you consider the job done. Testing now, while you've still got your tools and materials on hand, saves you from discovering a failure during the next real storm when water's already running through your ceiling. Once the repair passes the hose test, take a few photos of the finished work for your records, especially if this repair is tied to storm damage you might end up documenting for an insurance claim later.
Fixing the damage in front of you doesn't stop the next problem from starting somewhere else on the roof. Regular maintenance catches small issues while they're still cheap and easy to handle, instead of letting them turn into another afternoon on a ladder six months from now. Central Texas roofs age faster than most because of the heat and hail combination, so a maintenance routine matters more here than in milder climates.
Set a schedule and stick to it rather than waiting for a leak to remind you. Spring and fall are the two best windows, since spring catches winter wear before summer heat bakes it in, and fall clears out debris before winter storms arrive. Grab your binoculars, walk the perimeter, and check the attic each time, the same routine you used in Step 1. Consistency catches a lifted shingle or a rusting nail head before it becomes a water stain on your ceiling.
A roof that gets checked twice a year rarely surprises you with a leak.
Clogged gutters back water up under your shingle edge, and that slow soak rots decking long before you see a stain indoors. Clean gutters and valleys at least twice a year, more often if oak or pecan trees hang over your roofline. Trim back any branches that touch or overhang the roof surface, since scraping limbs strip granules and drop debris straight into your valleys every time the wind picks up.
Between your scheduled checks, keep an eye out for a few warning signs that mean something needs attention sooner:
Catching any of these early usually means a small sealant fix instead of a full shingle or flashing replacement.
Keep a simple log of every repair and inspection, including dates and photos. This record helps you spot patterns, like a flashing joint that keeps loosening every summer, and it gives you documentation if you ever need it for an insurance claim or a future buyer's inspection. A folder with dated photos costs you nothing and saves real time later.
Maintenance won't stop every storm from causing damage, but it keeps your roof performing the way it's supposed to between repairs. A well-maintained roof also ages more predictably, which makes it easier to plan for a full replacement on your own timeline instead of being forced into one after a surprise leak.
Knowing your limits matters more than knowing your tools when you decide to repair the roof yourself. Some jobs genuinely fit within a capable homeowner's skill set, and others turn into expensive rework once a licensed contractor has to undo a well-meaning patch. The honest answer depends on the scope of the damage, your comfort on a ladder, and whether insurance is involved.
Small, isolated repairs are usually safe territory for a homeowner with the right tools and patience. A handful of missing shingles, a cracked sealant bead around a vent, or a couple of popped nail heads fall into this category, especially on a single-story home with a gentle slope. Low-risk repairs like these cost you a few hours and under $100 in materials, and the consequences of a minor mistake are limited since you're not disturbing structural elements or large sections of the roof system.
Larger or more complex problems shift the math quickly. Multiple leaks, soft or rotted decking, complicated flashing around chimneys with several angles, or any roof steeper than 6:12 pitch push the risk and skill requirement past what most DIYers should attempt. Rotted decking especially demands professional attention, since replacing sheathing means opening up a bigger section of roof than most homeowners are equipped to close back up correctly. Insurance claims add another layer, since adjusters and documentation matter more when a licensed contractor handles the assessment and repair together.
If the damage involves structural wood, steep pitch, or an insurance claim, hire a professional instead of testing your limits on the roof.
| Factor | DIY Repair | Professional Repair |
|---|---|---|
| Cost | $50-$300 in materials | $300-$1,500+ depending on scope |
| Time | Several hours to a full weekend | Usually completed in a day |
| Warranty | None, unless materials carry one | Workmanship and manufacturer warranties |
| Insurance documentation | Homeowner-gathered photos | Adjuster-ready professional documentation |
| Best suited for | Small, isolated shingle or sealant fixes | Flashing systems, decking damage, storm claims |
Weighing these factors before you climb up saves you from discovering the hard way that a repair was outside your skill level. Professionals also carry liability insurance and workers' comp, protecting you if someone gets hurt on your property during the job, something a DIY repair never covers. Documentation matters too. According to the Insurance Information Institute, well-documented claims with professional assessments tend to move faster through the adjuster process than homeowner-submitted photos alone. If you're at all unsure which category your damage falls into, a free inspection from a licensed roofer costs you nothing and gives you a clear answer before you spend a Saturday on the ladder.
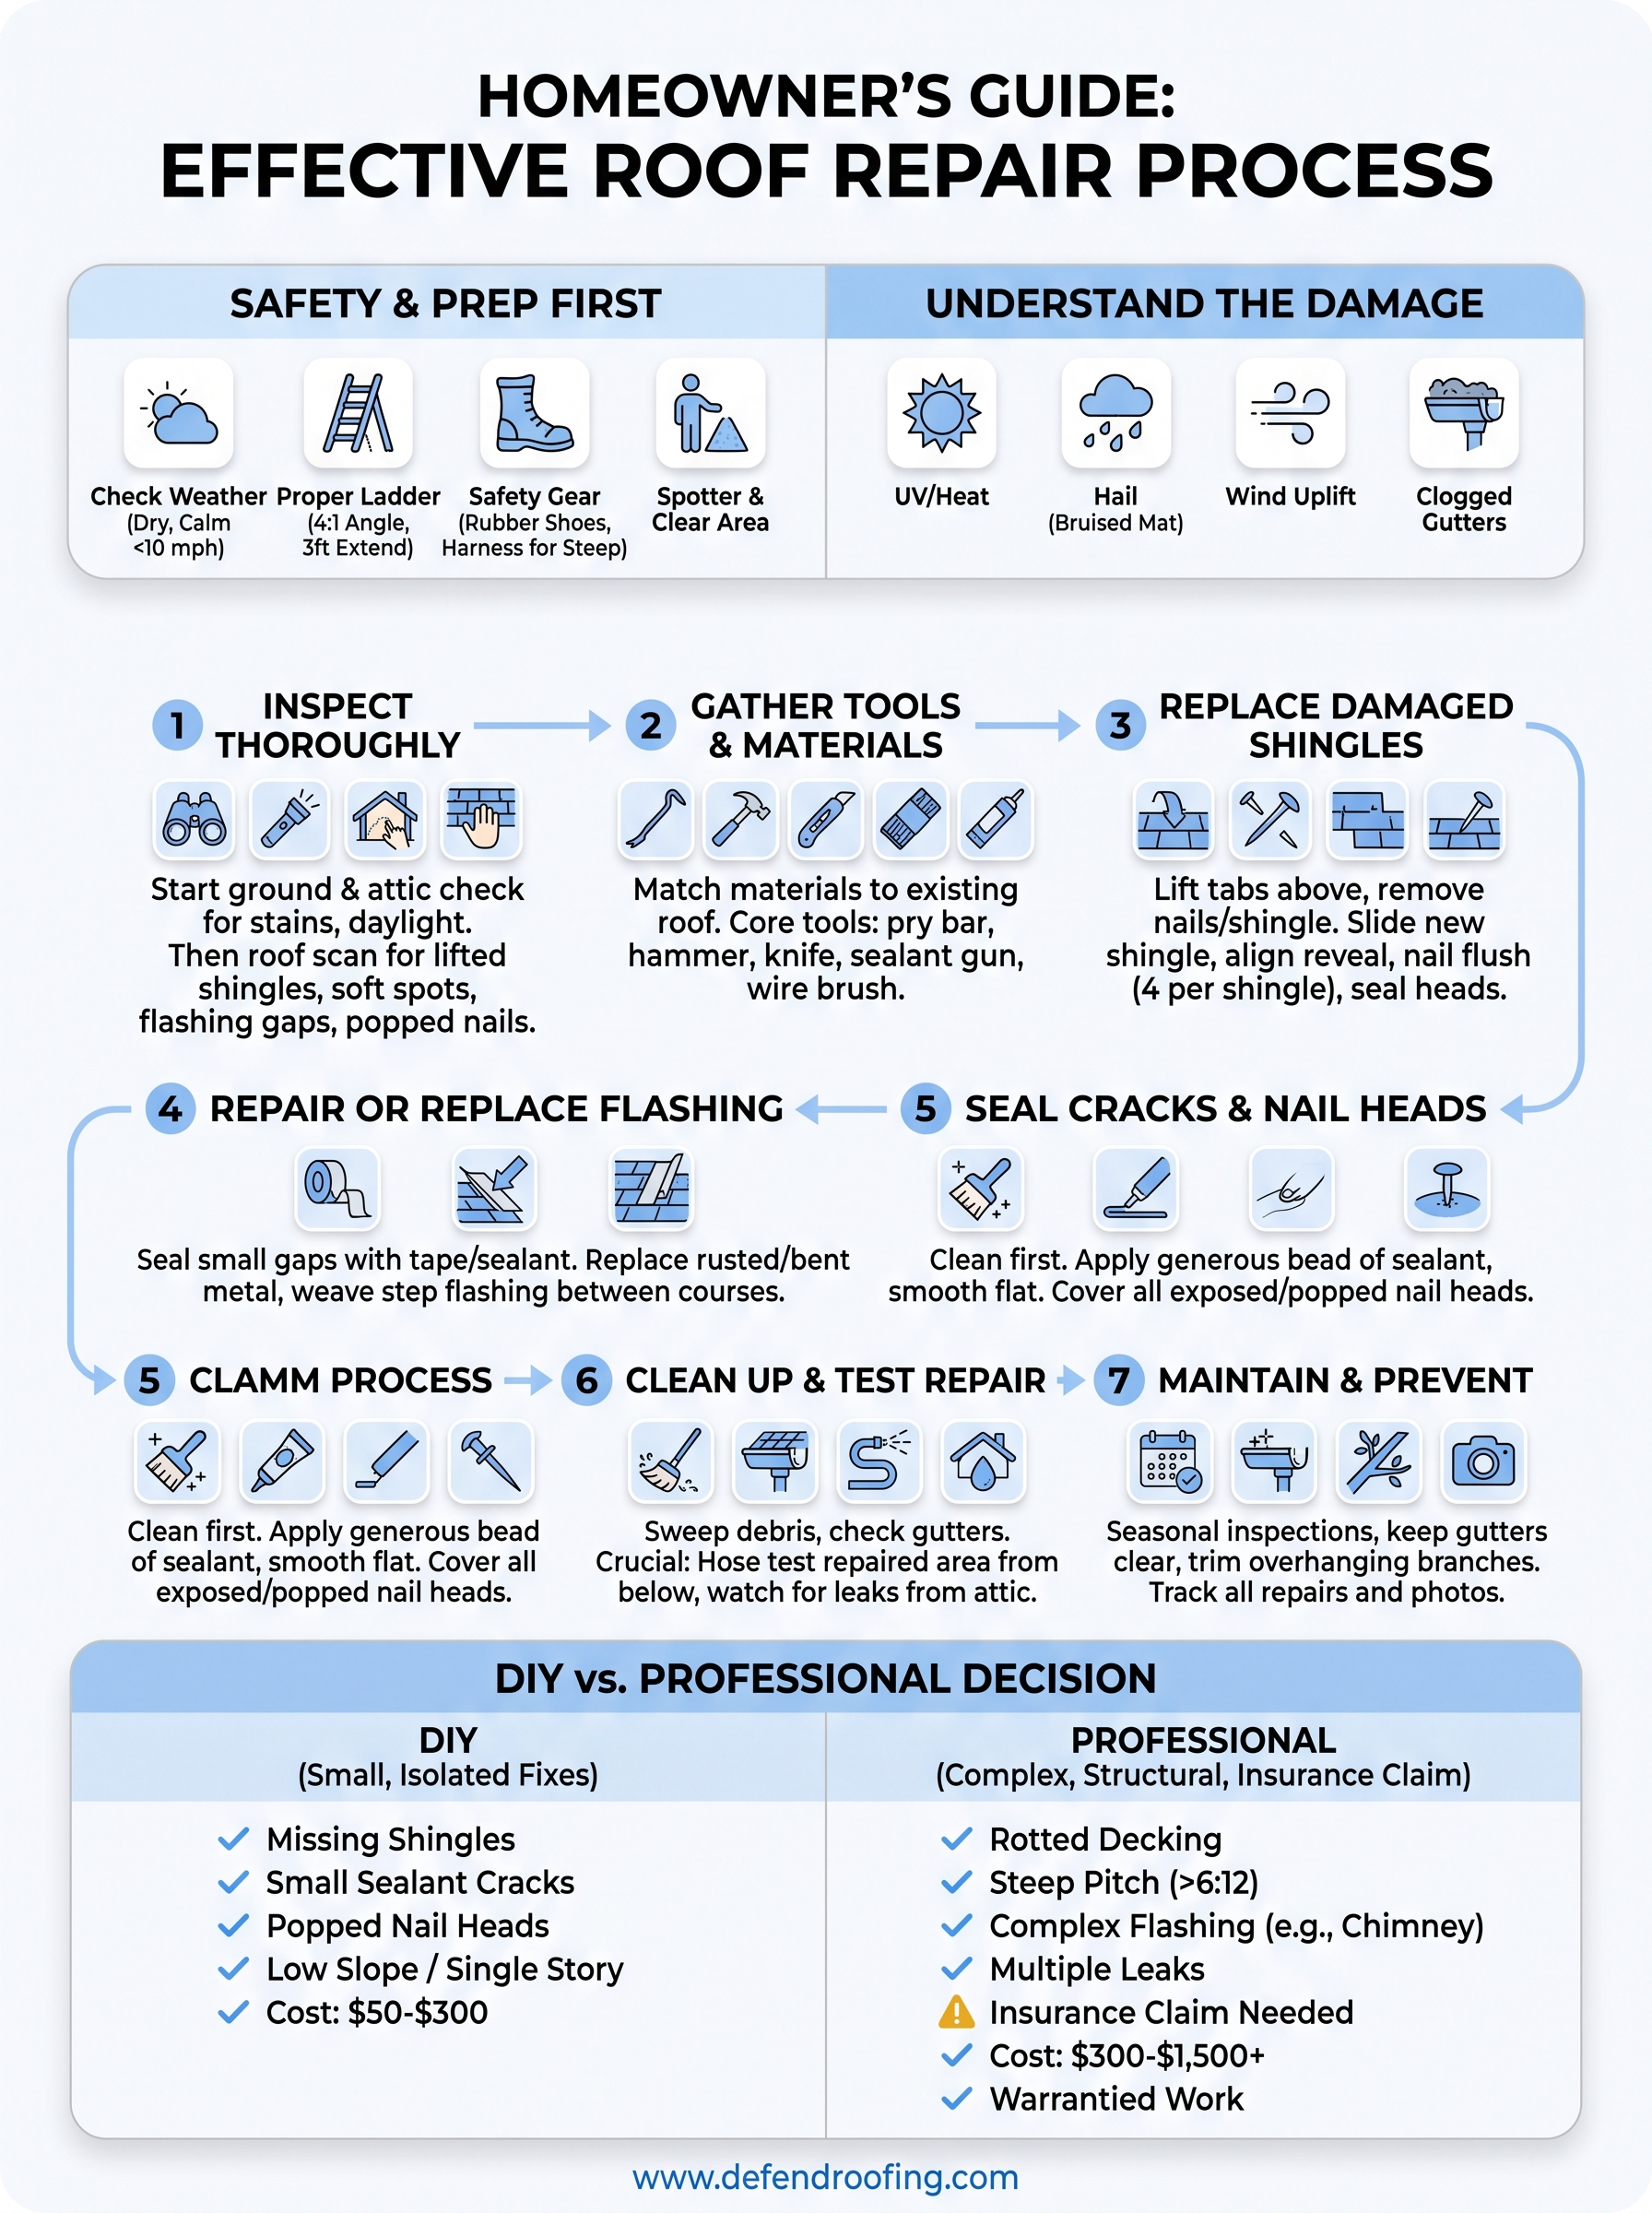
Repairing a roof yourself comes down to three things: honest inspection, matching materials to the actual damage, and testing your work before you call it finished. Follow the steps in this guide and a minor repair should hold up through the next Central Texas storm season without a callback. Skip the inspection or rush the sealant, and you'll likely be back on the ladder within a year.
But some damage isn't a DIY job, and pretending otherwise costs more than a service call ever would. Rotted decking, complex flashing, steep pitches, and anything tied to an insurance claim deserve a professional set of eyes before you commit a weekend to the wrong fix.
If you're not sure which category your roof falls into, don't guess. Get in touch with Defend Roofing for a free assessment and an honest answer before you climb up.