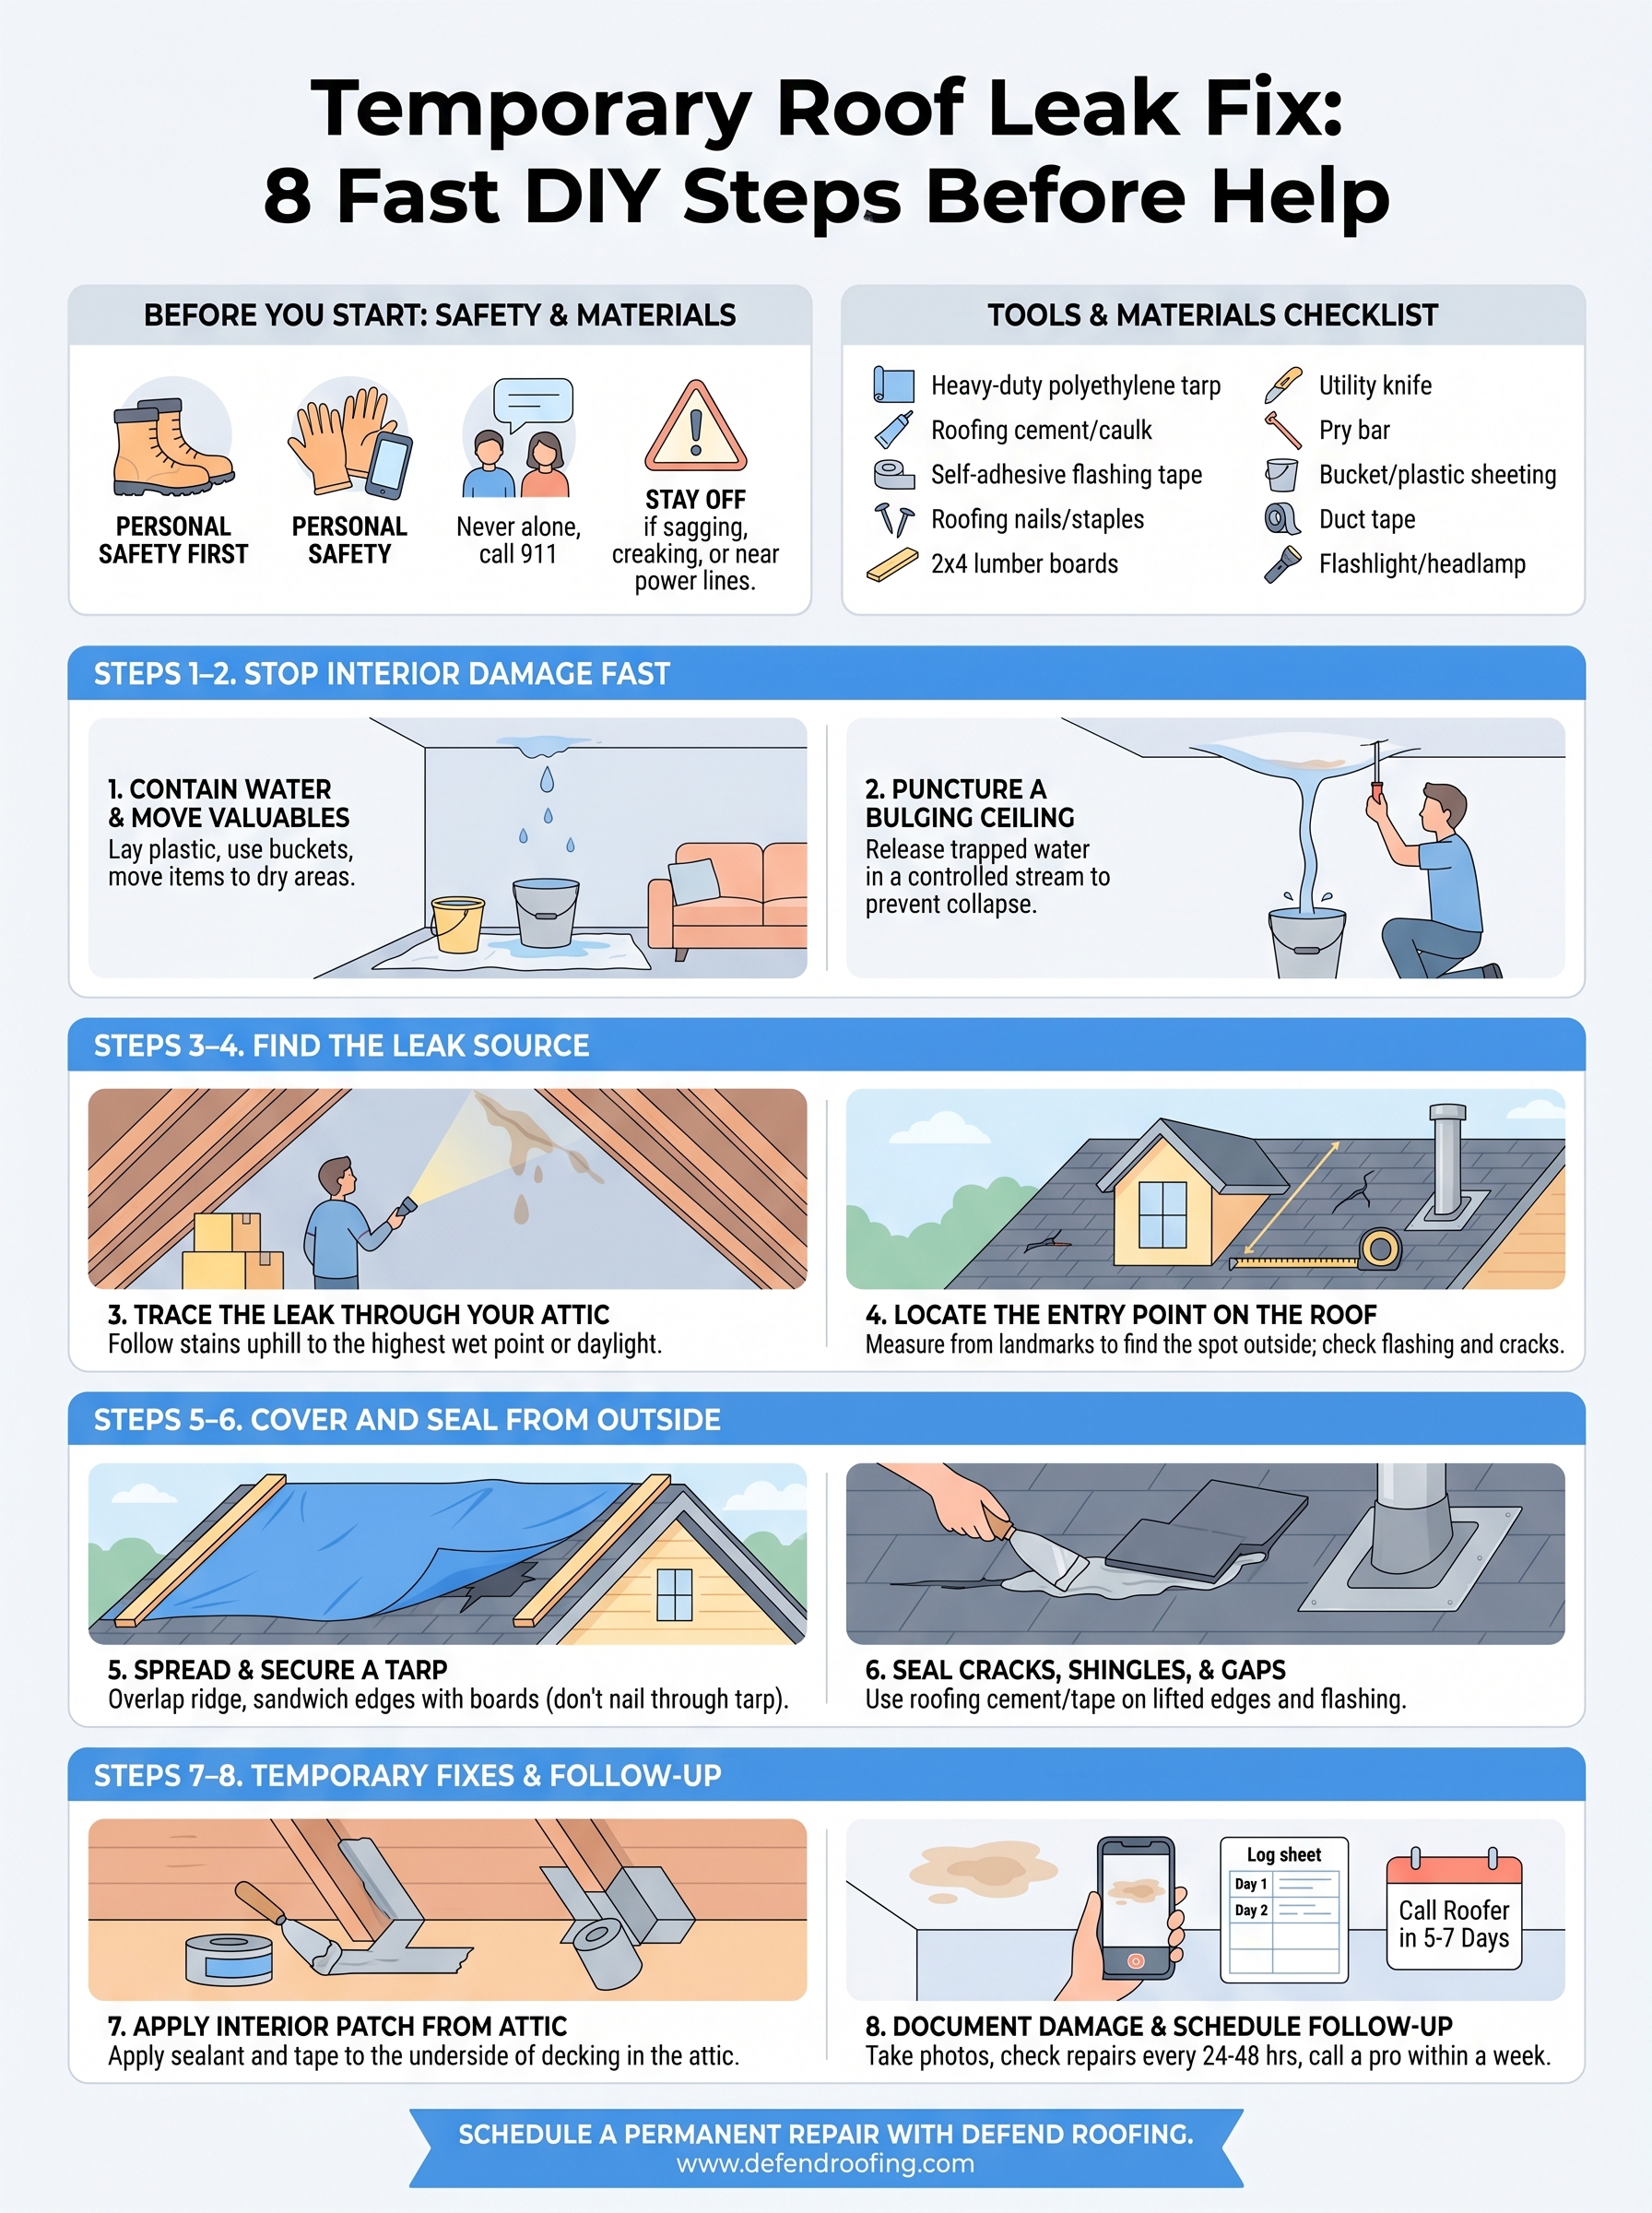
Stop water damage with these 8 DIY steps. Learn to safely tarp, drain ceilings, and apply a temporary roof leak fix until professional help arrives.
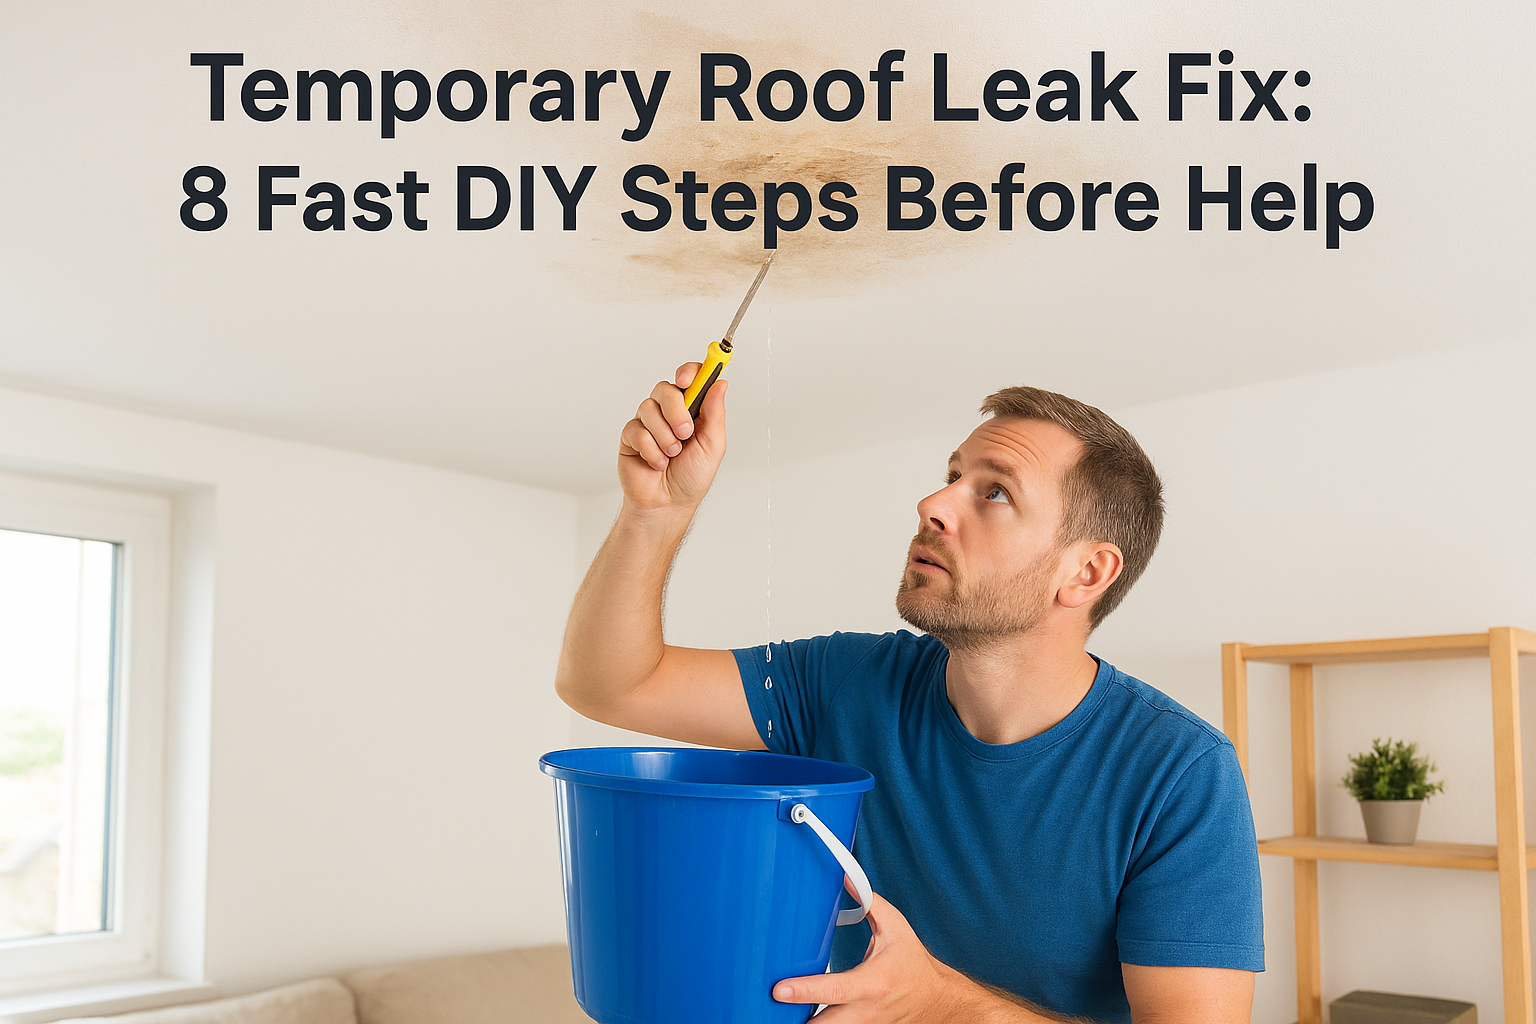
Water dripping through your ceiling at 2 a.m. doesn't wait for business hours. Whether it's a Central Texas hailstorm or a slow leak that finally broke through, you need a temporary roof leak fix right now, something to stop the water damage while you arrange for a professional repair.
That's exactly what this guide covers. We'll walk you through 8 practical steps you can take immediately to contain the leak, protect your belongings, and minimize damage to your home. These are the same interim measures we talk homeowners through at Defend Roofing when they call us in a panic, straightforward actions using materials you likely already have or can grab from a hardware store.
A temporary fix buys you time, but it doesn't replace a proper repair. We'll show you what works in the short term, explain why each step matters, and help you understand when it's time to call in a professional to make the fix permanent.
A temporary roof leak fix only works if you're still standing when it's done. Before you grab a ladder or tear open a tarp, take five minutes to assess the situation. Rushing onto a wet or damaged roof without the right gear is how a small leak turns into an emergency room visit. The steps in this guide are built for real conditions, not ideal ones, so we'll cover what to wear, what to grab, and when to skip the roof entirely based on what you're dealing with.
Wet surfaces and steep roof pitches are the two biggest hazards you face during any roof emergency. Rain, moss, and debris make shingles slippery even when they look solid underfoot. Before you step anywhere near a roofline, put on rubber-soled shoes or work boots, not sneakers or sandals. Wear gloves to protect your hands from sharp metal flashing and cracked shingles, and keep your phone in your pocket so you can call for help if something goes wrong.
Never go on the roof alone. Have another adult on the ground who knows where you are and can call 911 if needed.
Check the weather before you climb. High winds above 20 mph, active lightning, or heavy rain are hard stops. Wait them out. Temporary interior fixes described later in this guide can hold things together until conditions are safe enough to work outside.
Gathering your supplies before you start saves you from making multiple trips up and down a ladder mid-job. Below is everything you need for a complete temporary repair kit:
| Item | Purpose |
|---|---|
| Heavy-duty polyethylene tarp (6 mil or thicker) | Covers the damaged area to block rain |
| Roofing cement or roofing caulk | Seals cracks, lifted shingles, and flashing gaps |
| Self-adhesive flashing tape | Patches tears, holes, and open seams |
| Roofing nails or staple gun | Secures tarp and loose material in place |
| 2x4 lumber boards | Weighs down tarp edges to resist wind lift |
| Utility knife | Cuts tarp and flashing tape cleanly |
| Pry bar | Lifts shingles so you can apply sealant underneath |
| Bucket or plastic sheeting | Catches interior drips to protect floors and walls |
| Duct tape | Short-term interior patches on vapor barriers |
| Flashlight or headlamp | Attic visibility when tracing the leak source |
Most of these items are available at any hardware store. Roofing cement comes in small tubes or cans and works on asphalt shingles, metal flashing, and most common roof materials. If you can only buy one thing today, get the tarp and a tube of roofing cement. Those two items cover the majority of temporary exterior repairs.
Some situations make roof access too dangerous to attempt, no matter how bad the leak looks. If the roof is visibly sagging, if you hear structural creaking when you walk through the attic, or if the damaged area sits near a power line, stay inside. In those cases, interior containment is your only safe move until a licensed contractor can assess the structure.
Your attic can tell you a lot without you ever stepping onto the roof. Water stains, soaked insulation, and active dripping in the attic space point directly toward the leak source and help you decide where to focus your temporary repairs from inside the home. Starting there keeps you safe and still moves you forward.
Before you touch the roof, protect the inside of your home first. Water that gets through your roof doesn't just drip straight down. It travels along rafters, soaks insulation, and spreads across ceilings before it ever reaches the floor. Your first two steps in any temporary roof leak fix focus entirely on limiting that spread and protecting your belongings while you work toward an exterior solution.
The moment you spot a leak, grab every bucket, pot, or bin you own and place them under the drip points. Water on a hardwood floor or soaked into carpet causes damage that goes far beyond the roof repair bill, so containment is worth doing fast. Lay down plastic sheeting or old towels around the buckets to catch splash and runoff.
Move furniture, electronics, and anything irreplaceable out of the affected room entirely. Wet drywall and soaked insulation can harbor mold within 24 to 48 hours, so don't assume a small drip is harmless. Once your valuables are clear and your containers are in place, you've bought yourself working room.
A ceiling that sags or bubbles outward is holding a pocket of trapped water. Left alone, that pocket will tear through the drywall suddenly, dropping a large volume of water and debris at once. That kind of collapse causes far more damage than a controlled drain.
Take a screwdriver or a thin nail and puncture the lowest point of the bulge to release the water in a controlled stream into a bucket below. This sounds counterintuitive, but a small, directed hole prevents a much larger, unpredictable failure. Wear eye protection when you do this, and position your bucket directly underneath before you make the puncture.
One controlled hole beats a ceiling collapse every time. Direct the water, don't let the ceiling decide where it goes.
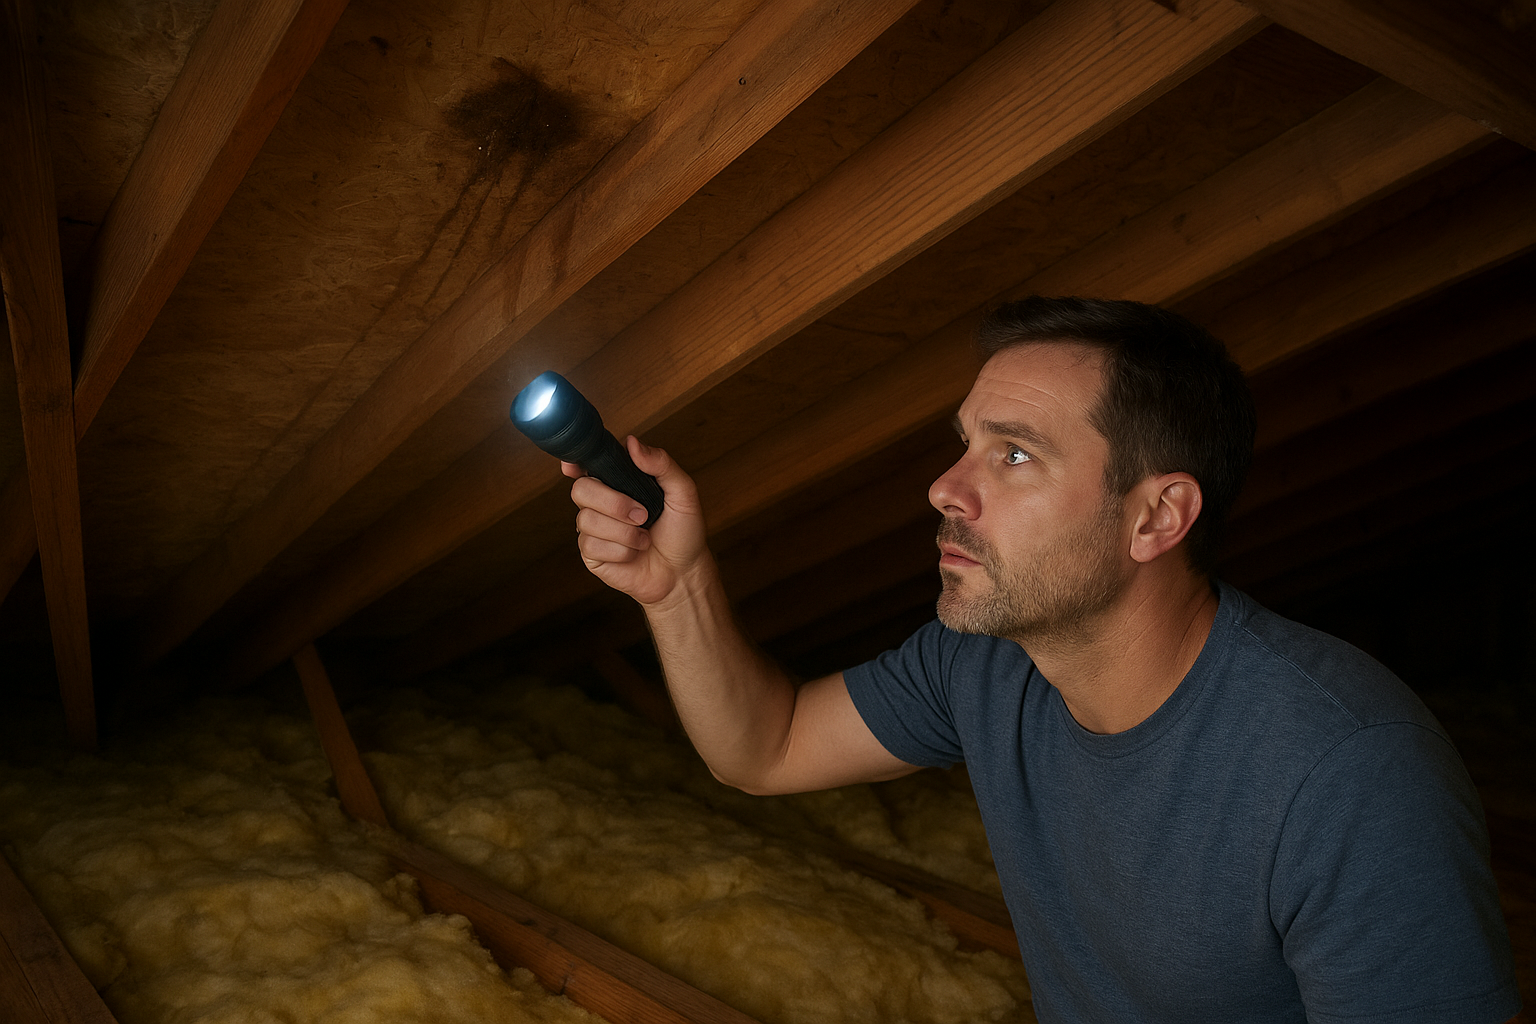
Finding the actual source of a leak is the step most homeowners skip, and it's why many temporary roof leak fix attempts fail within the next rainstorm. Water rarely enters and falls straight down. It travels along roof decking, rafters, and insulation before it shows up on your ceiling, sometimes several feet away from where it got in. Steps 3 and 4 walk you through tracing that path from inside your attic out to the roof surface.
Grab your flashlight and get into the attic as soon as it's safe. Look for water stains, wet insulation, and dark streaks on the rafters or decking, which mark the path the water took. The stains often run downhill along a beam before dripping, so follow them uphill toward the peak of the roof to find where water first made contact with a surface.
Mark the entry point with a piece of tape or chalk so you can reference it when you move outside. If someone is available to help, have them watch from the attic while you gently spray a garden hose on the roof in sections starting low and moving upward. This isolates the leak zone in minutes without guesswork.
Once you have a reference point from the attic, move outside and measure from a fixed landmark like the ridge line or a dormer to find the same spot on the roof surface. The actual entry point is almost always at a flashing seam, a cracked shingle, or a failed pipe boot rather than in the middle of a flat shingle field.
Where water appears on your ceiling and where it enters the roof are rarely the same spot. Always trace uphill.
Look for lifted shingle edges, cracked caulk around flashing, and any area where two roof planes meet. Those intersections collect debris and are the most common failure points on Central Texas roofs after a hailstorm or heavy wind event.
Steps 5 and 6 are where your temporary roof leak fix moves from damage control to active protection. Once you've located the entry point on the roof surface, you need to cover the damaged area and seal any visible gaps before the next rain event hits. These two steps work together: the tarp blocks bulk water while the sealant handles the smaller vulnerabilities underneath.
A tarp is your most reliable short-term barrier against rain. Lay the tarp so it extends at least 4 feet beyond the damaged area on all sides, and run it up and over the ridge if possible so water can't pool at the upper edge and work its way underneath. A tarp that stops short of the ridge will let water back in right at the seam.
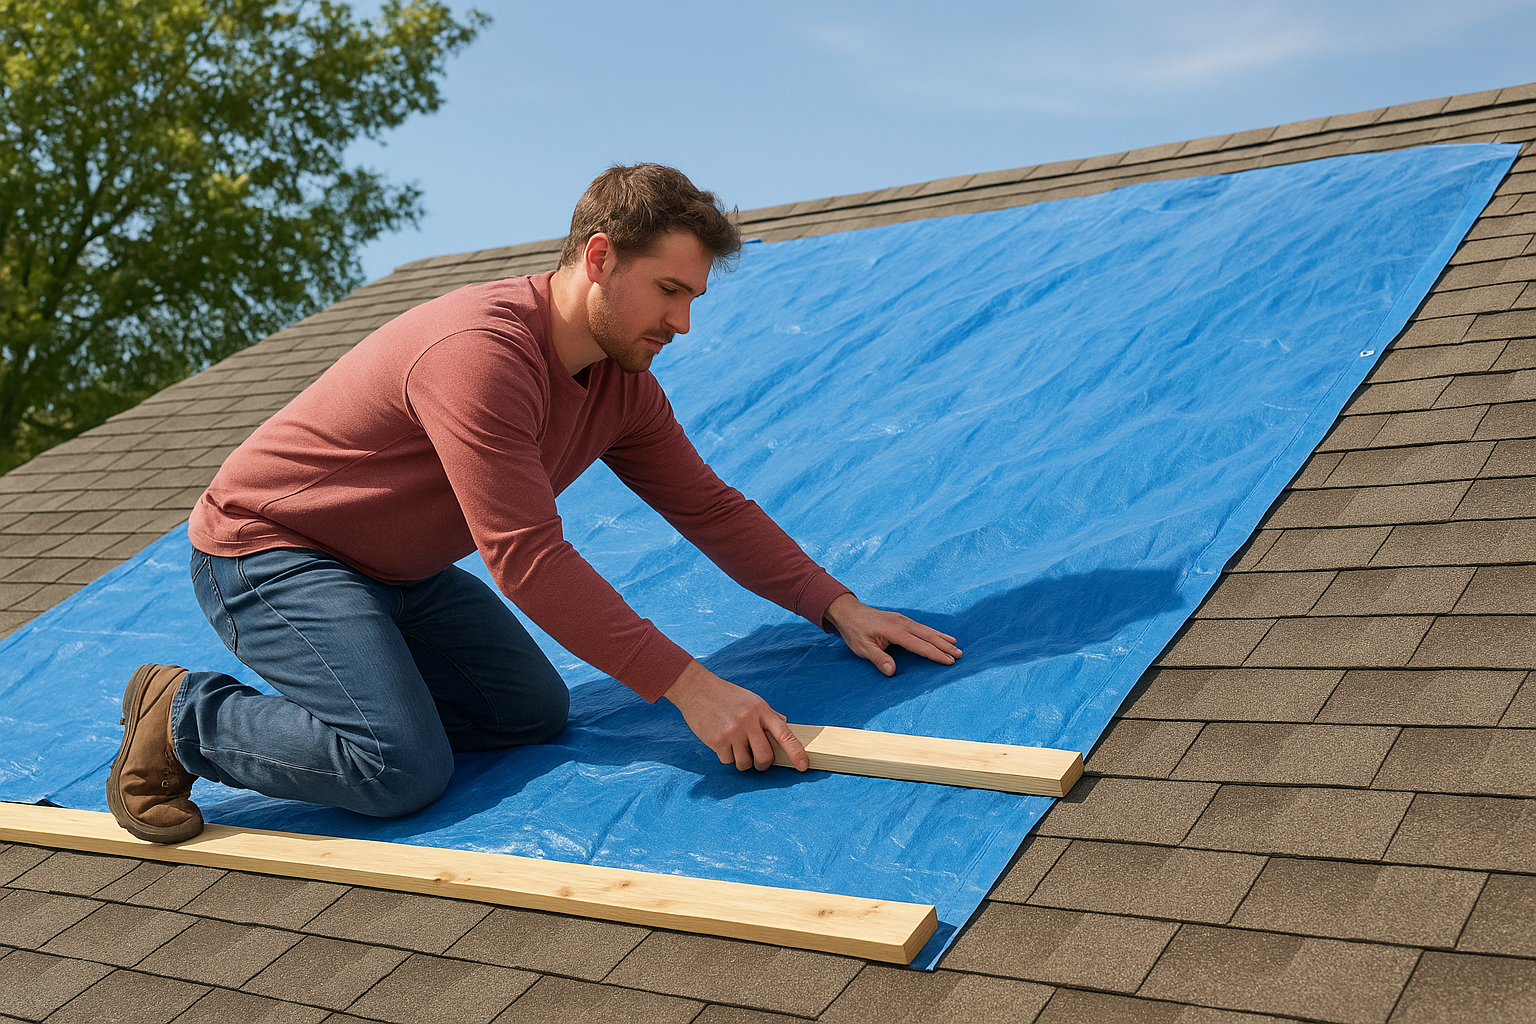
Secure the tarp before the next storm, not during it. Even a few hours of protection matter.
Use 2x4 boards to sandwich the tarp edges rather than driving nails directly through the tarp material, which tears under wind load. Lay one board along the bottom edge of the tarp and screw or nail another board on top, clamping the tarp between them. Repeat this on both sides. This sandwich method holds the tarp in place through high winds without punching new holes in your roofing material.
While the tarp handles large areas, roofing cement and self-adhesive flashing tape take care of smaller breaches that a tarp alone won't cover. Focus on cracked shingle edges, open caulk lines around flashing, and gaps where a pipe boot meets the roof surface. These are the spots that let water in even when the surrounding shingles look intact.
Apply roofing cement under any lifted shingle edges using a putty knife or caulk gun, press the shingle flat, and run a bead of caulk along the seam. For flashing gaps, cut a strip of self-adhesive flashing tape slightly wider than the gap, press it firmly into place, and smooth out any air bubbles with your hand. These fixes won't last indefinitely, but they hold up well for several weeks in normal weather conditions.
Sometimes weather conditions or roof structure make exterior access unsafe or impossible. When that happens, you still have options. Steps 7 and 8 shift focus back indoors, covering how to apply an interior patch from the attic and how to follow up in the days after your temporary roof leak fix to make sure nothing gets worse before a professional arrives.
Your attic gives you direct access to the underside of the roof decking, which is your best interior repair point. Locate the entry spot you marked in Step 3, clean away any wet insulation around it, and let the surface dry as much as possible with a towel or rag. A dry surface helps your materials bond and hold longer.
An attic patch won't stop water like a tarp does, but it slows infiltration and protects your ceiling while you wait for a permanent fix.
Apply roofing cement directly to the underside of the decking at and around the entry point using a putty knife. Spread it at least 2 inches beyond the visible wet area in all directions. For a more secure patch, cut a piece of self-adhesive flashing tape and press it firmly over the cemented area. Smooth it flat with your hand to eliminate air pockets that let moisture creep underneath.
After your temporary repairs are in place, take photos of every damaged area before you clean anything up. Photograph the ceiling stains, the attic entry point, any lifted or cracked shingles you found, and your tarp installation. This documentation matters when you file an insurance claim or describe the scope of damage to a roofing contractor.
Check your repairs every 24 to 48 hours, especially before and after any rain. Look for new drip points, shifting in the tarp, or water working around your attic patch. A simple inspection log keeps you informed:
| Date | Conditions | Interior drips | Tarp status | Action taken |
|---|---|---|---|---|
| Day 1 | Post-storm | 2 buckets | Secure | Initial fix applied |
| Day 3 | Rain overnight | None | Shifted at corner | Re-clamped left edge |
| Day 5 | Clear | None | Holding | Scheduled contractor |
Set a firm deadline to call a licensed roofer within 5 to 7 days of applying your temporary fix. Temporary materials are not rated for extended exposure, and delays increase the risk of mold, structural rot, and a larger repair bill.
Your temporary roof leak fix has stopped the immediate water intrusion, but every material you applied has a shelf life. Tarps degrade under UV exposure within weeks, roofing cement cracks as temperatures shift, and attic patches lose adhesion over time. The clock starts the moment you finish your temporary repairs, so locking in a permanent fix quickly is the only way to protect your home long-term.
Contact a licensed roofing contractor within five to seven days of completing your temporary repairs. Share the photos you took in Step 8, describe what you found in the attic, and point the contractor to the specific failure points you identified. The more detail you provide, the faster and more accurate your repair estimate will be. If your damage resulted from a storm, ask about insurance claim support, since many repairs qualify for coverage.
Schedule a roof assessment with Defend Roofing and get a clear, documented repair plan before your temporary fix gives out.