Learn DIY steps and costs for repair of flat roof issues in Central Texas, plus warning signs that mean it's time to call a pro.

A flat roof leak never waits for a convenient time. It shows up as a water stain on your ceiling after a storm, or a soft spot near a drain that gets worse every time it rains. If you're searching for the repair of flat roof problems on your own home, you want real answers: what materials work, how much you'll spend, and whether this is actually a job you can handle yourself.
This guide walks you through the honest version of that answer. You'll get step-by-step fixes for flat roof leaks for common issues like membrane splits, ponding water, and flashing failures, along with the materials and tools that actually hold up in Central Texas heat. We'll also break down realistic repair costs, so you're not guessing whether a quote is fair.
More importantly, we'll tell you when a patch job isn't enough and calling a professional saves you money in the long run. We've assessed hundreds of Austin-area roofs, and we know the difference between a fix that lasts and one that fails again next season.
Flat roofs fail differently than pitched ones, and that's the root of most confusion around how to fix flat roof leaks and what it costs. Water doesn't run off quickly; it sits, pools, and finds the smallest gap in the membrane. In Central Texas, that gap usually shows up at a seam, a flashing edge, or a spot where ponding water has sat for days after a summer storm. UV exposure from our brutal sun also dries out and cracks TPO, EPDM, and modified bitumen membranes faster than in cooler climates, shortening the lifespan you can expect from each membrane material, which is why a roof that looked fine in spring can develop pinhole leaks by August.
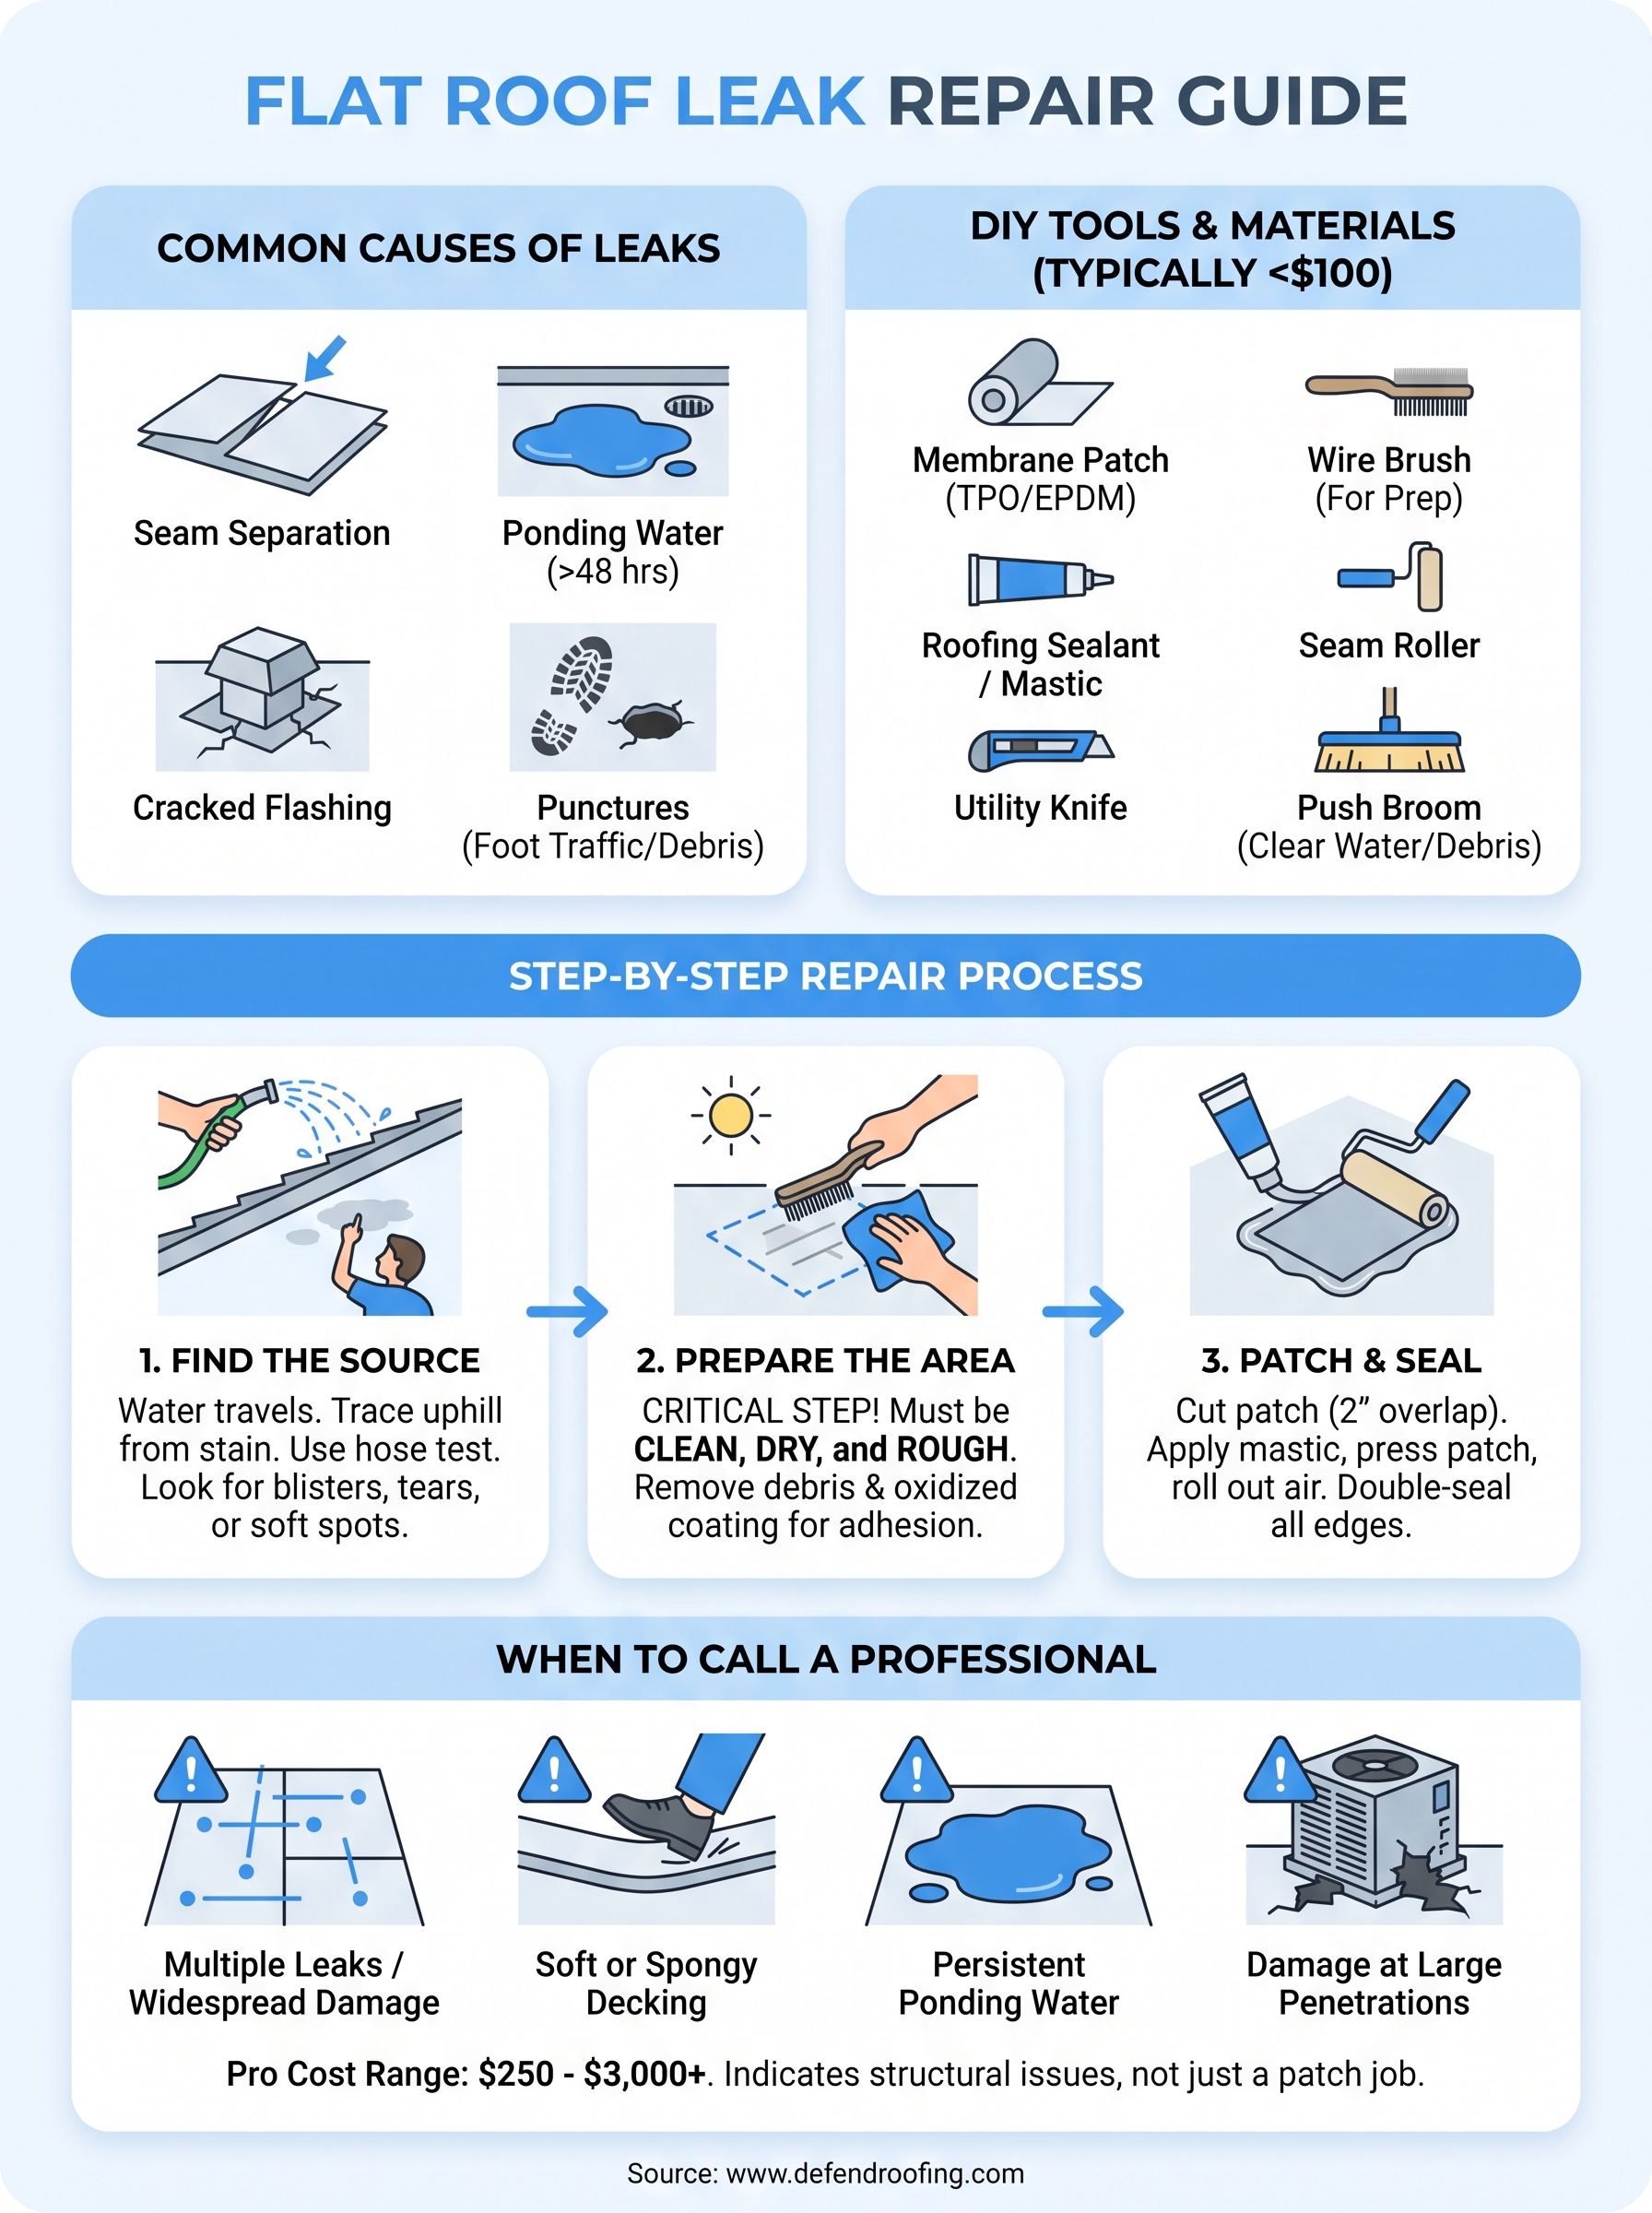
Before you touch a repair, know why roofs start leaking in the first place so you understand what you're actually dealing with. The most frequent culprits we see on Austin-area roofs are:
A leak in a flat roof is almost never where the ceiling stain appears; it's uphill from there, following the path of least resistance.
Having the right supplies on hand before you start saves you a second trip to the hardware store mid-repair. Here's what a typical patch job requires:
| Item | Purpose | Typical Cost |
|---|---|---|
| Membrane patch (matching your roof type: TPO, EPDM, or modified bitumen) | Covers punctures and splits | $15-$40 per patch kit |
| Roofing sealant or mastic | Seals seams and small cracks | $8-$20 per tube |
| Utility knife | Cuts patches and clears debris | Under $10 |
| Wire brush | Cleans the damaged surface | Under $10 |
| Seam roller | Presses patches flat for adhesion | $10-$25 |
| Caulking gun | Applies sealant evenly | $10-$15 |
| Push broom | Clears ponding water and debris | $15-$25 |
Most homeowners can gather everything above for under $100. That's a reasonable investment if the damage is small and isolated, but keep receipts and photos of what you find. If the problem turns out to be bigger than expected, that documentation helps a professional, or your insurance adjuster, understand what's already been done.
Tracing water back to its actual entry point takes more patience than most homeowners expect. Water travels along the underside of the membrane and roof deck before it drips through, so the stain on your ceiling might be five or ten feet from where the leak started. Start your search uphill from the stain and work toward the roof's high points, checking every seam, penetration, and drain along the way.
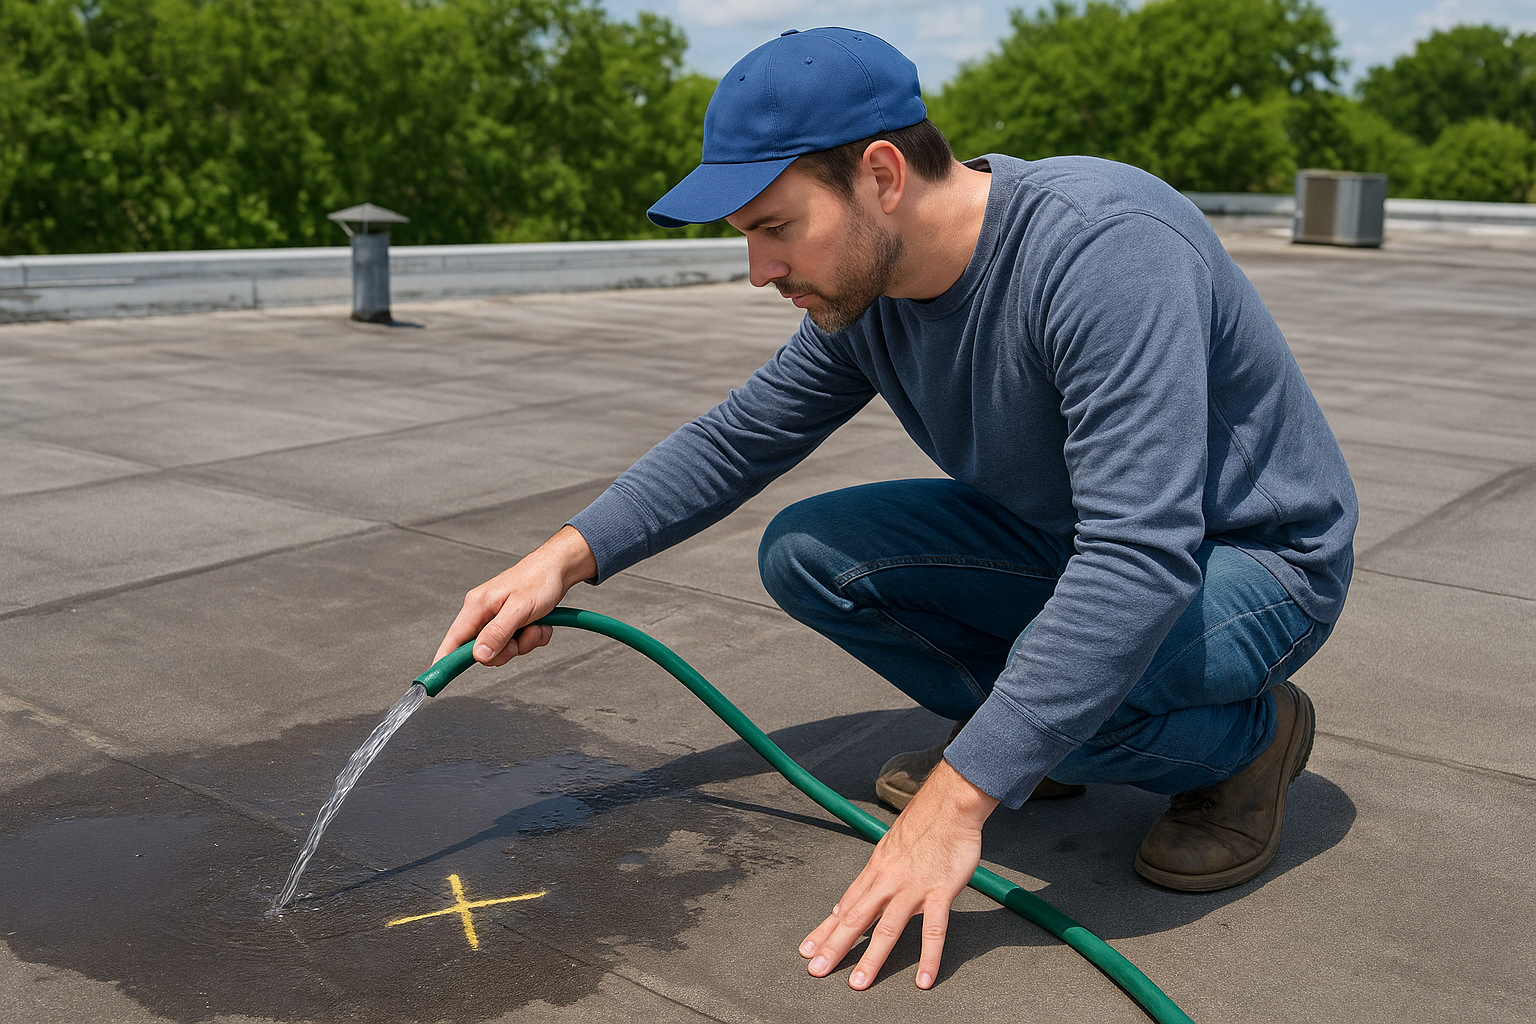
Grab a garden hose and a helper if you can't find an obvious crack. Run water over one section of the roof at a time while your helper watches the ceiling below, and wait a few minutes between sections since flat roof leaks are slow to show themselves. This kind of methodical flat roof leak detection beats guessing every time.
Fix the wrong spot and you'll be back on the roof within a month; find the actual source and one patch is all you need.
Walk the roof surface and look for these telltale signs:
Mark every suspect area with chalk or tape before you climb down. On a hot Austin afternoon, membranes soften and small cracks can be nearly invisible until the surface cools. Photograph each mark for reference before you start cutting into anything.
Skipping prep work is the fastest way to waste a patch kit. Surface preparation determines adhesion, and adhesion is the whole game with any flat roof membrane repair. Before you open a single tube of sealant, the area needs to be bone dry, free of loose debris, and stripped down to sound material.
Sweep the damaged section with your push broom, then let it sit in direct sun for at least an hour if the roof was wet from rain or morning dew. Trapped moisture under a patch causes it to bubble and fail within weeks, so don't rush this step even if you're eager to close up the leak. Wipe down the area with a clean rag to remove dust, gravel, or oxidized coating residue that would otherwise keep the patch from bonding.
Use your utility knife to trim away any cracked, blistered, or delaminated membrane around the leak. Cut back to solid, flat material with a margin of at least two inches beyond the visible damage in every direction.
A patch only holds as well as the surface underneath it, so clean and dry beats fast every time.
Scuff the area with your wire brush to remove any glossy top coating. Most membrane repair for flat roofs fails not because the patch material is wrong, but because it was applied over a slick, unroughened surface that never let the adhesive grip. A properly prepped patch area should look dull and slightly textured, not shiny, before you move to sealing it.
Now that the surface is clean and roughed up, you're ready to actually repair the flat roof membrane. The method changes slightly depending on the size of the damage, but the goal stays the same: create a watertight bond that flexes with the roof instead of cracking against it.
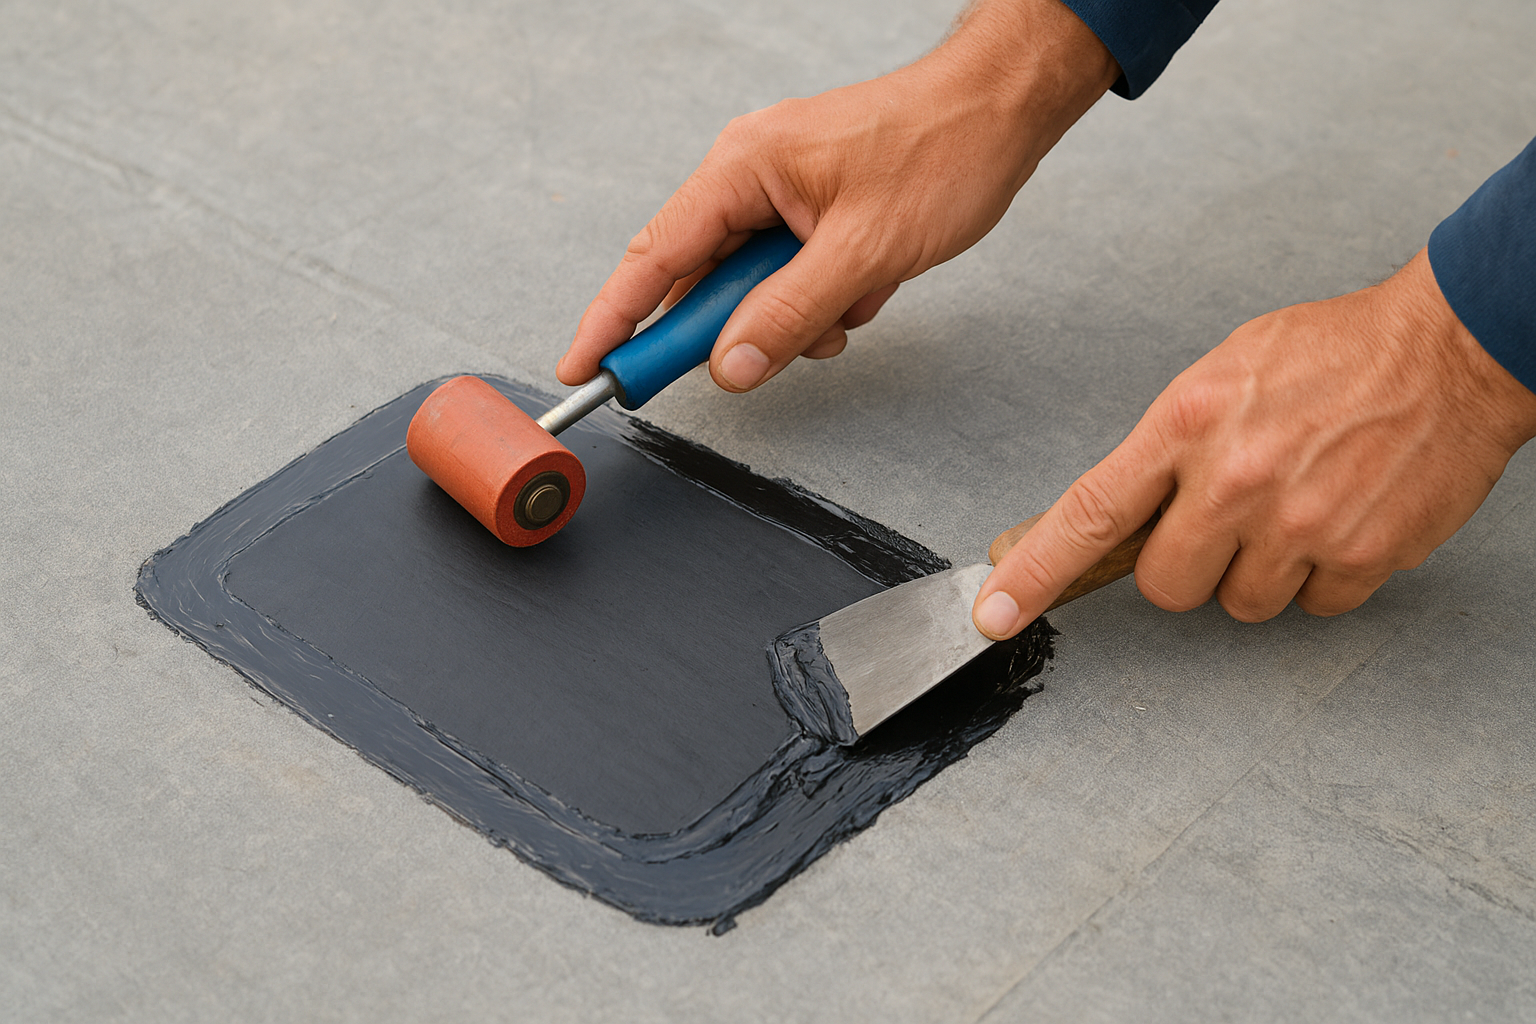
Cut your patch material so it overlaps the damaged area by at least two inches on every side, then round the corners to keep them from peeling up later. Spread roofing sealant or mastic evenly across the prepped surface with a putty knife, press the patch into place, and work outward from the center with your seam roller to push out air pockets.
Run a second bead of sealant around the entire perimeter of the patch once it's rolled flat. This double-seal step is what separates a flat roof leak repair that lasts three years from one that fails by next spring.
A patch that isn't sealed on all four edges is just an invitation for water to sneak back in.
For smaller cracks or worn seams without a full puncture, you can skip the patch and simply reseal the membrane directly with a liberal coat of mastic, feathered out two to three inches beyond the crack in every direction. Let any repair cure fully, usually 24 to 48 hours, before walking on it or expecting rain to test it, and keep in mind that roof repair timelines range from hours to weeks depending on the damage.
Budgeting for a flat roof repair cost depends on how much of the membrane is compromised and whether the damage is isolated or spread across multiple seams. A small DIY patch might run you under $100 in materials, but professional repairs cost more because they include labor, proper equipment, and often a warranty on the work.
Here's a general range homeowners in the Austin area can expect, though every roof and damage type is different:
| Repair Type | Typical Professional Cost |
|---|---|
| Small patch (single puncture or seam) | $250-$450 |
| Ponding water correction (adding drainage) | $500-$1,500 |
| Flashing replacement | $300-$700 |
| Full membrane resealing (partial roof) | $800-$2,500 |
| Large-scale membrane replacement | $3,000+ |
Quit reaching for the mastic and call a pro if you notice any of these: multiple leak points across the roof, soft or spongy decking underneath the membrane, ponding water that returns within days of a repair, or damage near a large penetration like an HVAC curb. These usually point to a structural issue or widespread membrane failure, not a spot repair, and at that point it's worth pricing out flat roof replacement cost per square foot.
If you've patched the same area twice and it's still leaking, the problem isn't the patch, it's what's underneath it.
Once a repair involves more than one section of roof, or you're unsure whether the deck itself has water damage, it's worth getting a professional assessment. Documented, photo-based inspections catch problems a surface patch can't fix, and they protect you if you ever need to file an insurance claim.
A solid DIY patch can buy you years if you find the real source of the leak and prep the surface properly. But flat roof repair has limits. Once ponding water keeps coming back, or the deck underneath feels soft, no amount of mastic fixes a problem that's structural. Knowing that difference is what separates a homeowner who saves money from one who pays for the same repair twice.
Treat your roof the way you'd treat any other part of your home that takes a beating from Central Texas weather: check it after every major storm, keep drains clear, and don't ignore a small blister because it hasn't leaked yet. If you're staring at damage that's bigger than a weekend patch job, or you just want a second opinion before you climb up there again, call, text, or get an instant online quote for a documented flat roof assessment and a straight answer, no upselling involved.




