See what roof inspection reports must include, get a copy-ready template, and use the findings for insurance claims and repair-or-replace decisions.
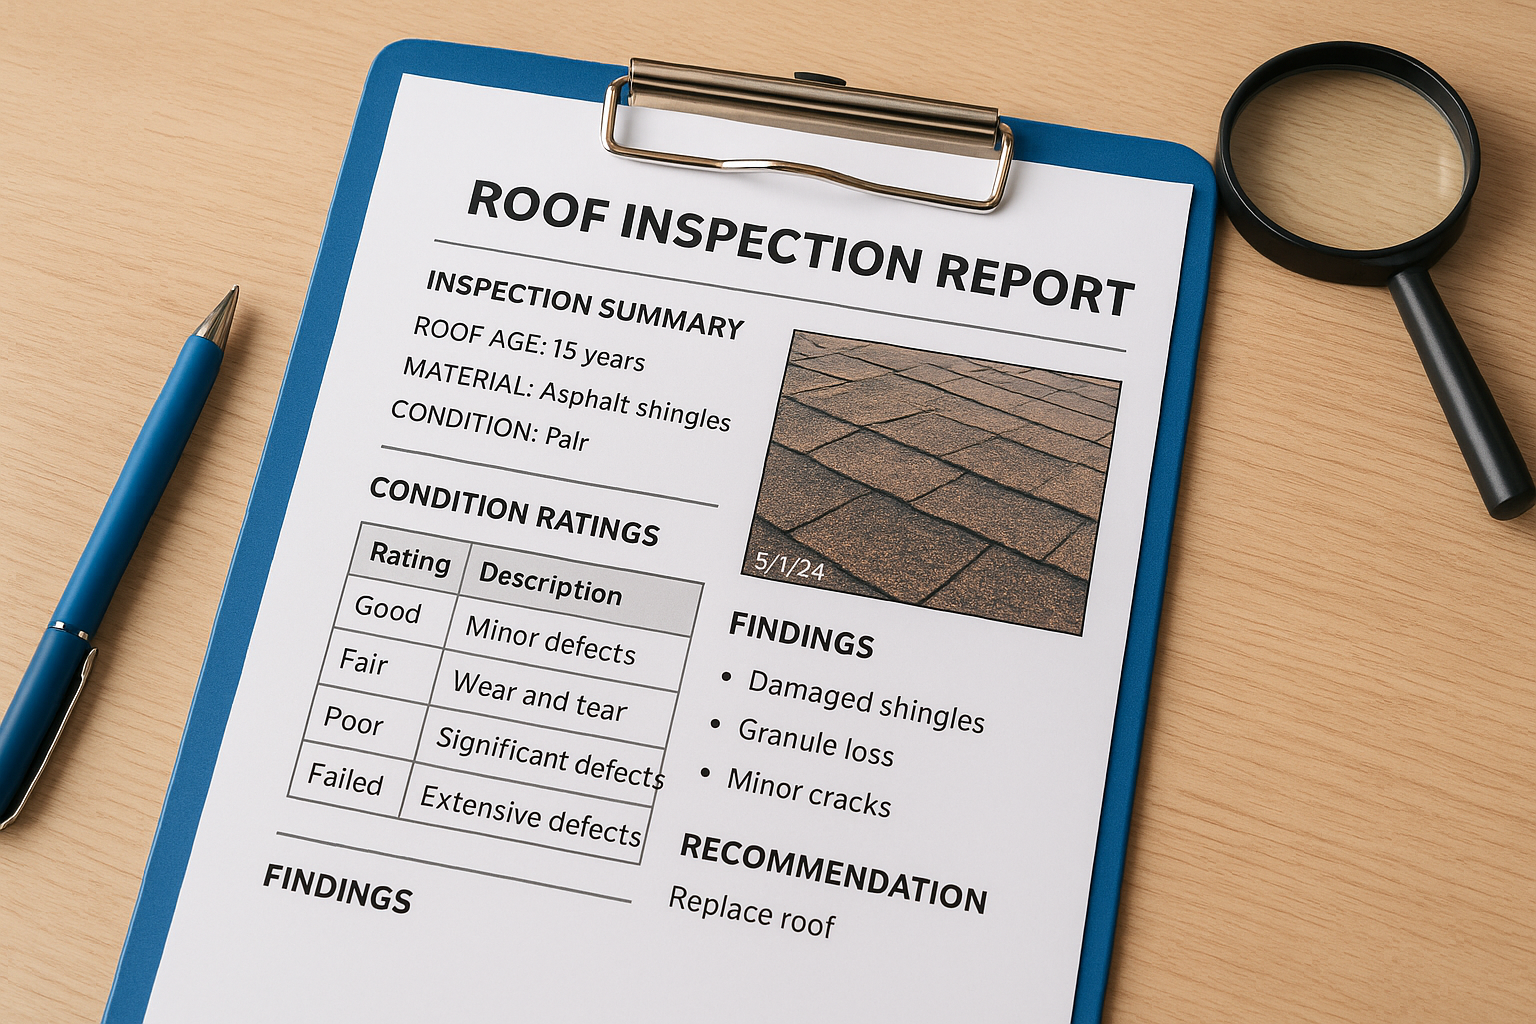
A roof inspection is only as useful as the paperwork that comes out of it. If all you get is a verbal "it looks fine" or a one-line invoice, you can't compare bids, push back on a bad estimate, or back up an insurance claim. Roof inspection reports fix that by putting what the inspector saw in writing, with evidence.
Here is the short answer. A solid report identifies the roof's age, materials, and condition, documents every problem with dated photos, notes where each issue sits on the roof, and ends with a clear repair-or-replace recommendation. Below, you'll find a roof inspection report template you can copy and use for a home or a small commercial roof.
We're Defend Roofing, a family-owned Austin-area contractor. Every job we take starts with a 100+ photo Precision Roof Assessment, so we know what a report needs to hold up with homeowners and adjusters. This article walks through each section, what to look for, and how to spot a report that's padded or vague.
Your roof is usually the most expensive exterior component on your home, and it ages where you can't see it. In Central Texas it takes hail, heat, UV, and high wind year after year. A written report is the only practical way to know what is happening up there without climbing a ladder yourself, and it gives you something to act on.
Anyone can say a roof "has a few years left." A report makes the inspector prove it. Dated photos, measurements, and locations show exactly where the granule loss, cracked flashing, or lifted shingles are, so you can see the problem for yourself instead of taking someone's word for it.
That matters because roofing is a trade where trust is hard to verify. Two contractors can look at the same roof and quote $9,000 and $18,000. Without a report, you can't tell which one is right. With one, you can check each line of an estimate against a documented finding and ask why the scope differs.
A roof inspection report is the difference between being told your roof is bad and being shown why.
Reports earn their keep at specific points in a roof's life, and each one has money attached. Here are the situations where we see homeowners get the most value from the paperwork:
Timing also counts. Many homeowner policies set a deadline for filing storm claims, often one year from the date of loss, so check your policy and get the inspection done while the evidence is fresh. Hail bruising and wind creases can look different after months of weathering, and a late report has a harder time proving when the damage happened.
Skipping the paperwork costs you in quiet ways. A failing pipe boot or a lifted flashing seam might cost a few hundred dollars to fix in spring. Left unnoticed, it becomes rotted decking and stained drywall that run into the thousands. A report that flags the small problem early is cheap insurance against the big one.
The other risk is the missing paper trail. We regularly meet homeowners with an underpaid or denied claim and no photos from before or after the storm. Without records, you're arguing from memory against an insurer or contractor who has their own file. A good report fixes that before the argument starts.
Good roof inspection reports share the same skeleton, whether the roof covers a 2,400-square-foot Austin home or a small strip-mall building. Once you know the seven core parts, you can tell a thorough report from a one-page checklist with a signature.
Each part of the report answers a question you would otherwise have to ask the inspector. Use this table to check any report you receive.
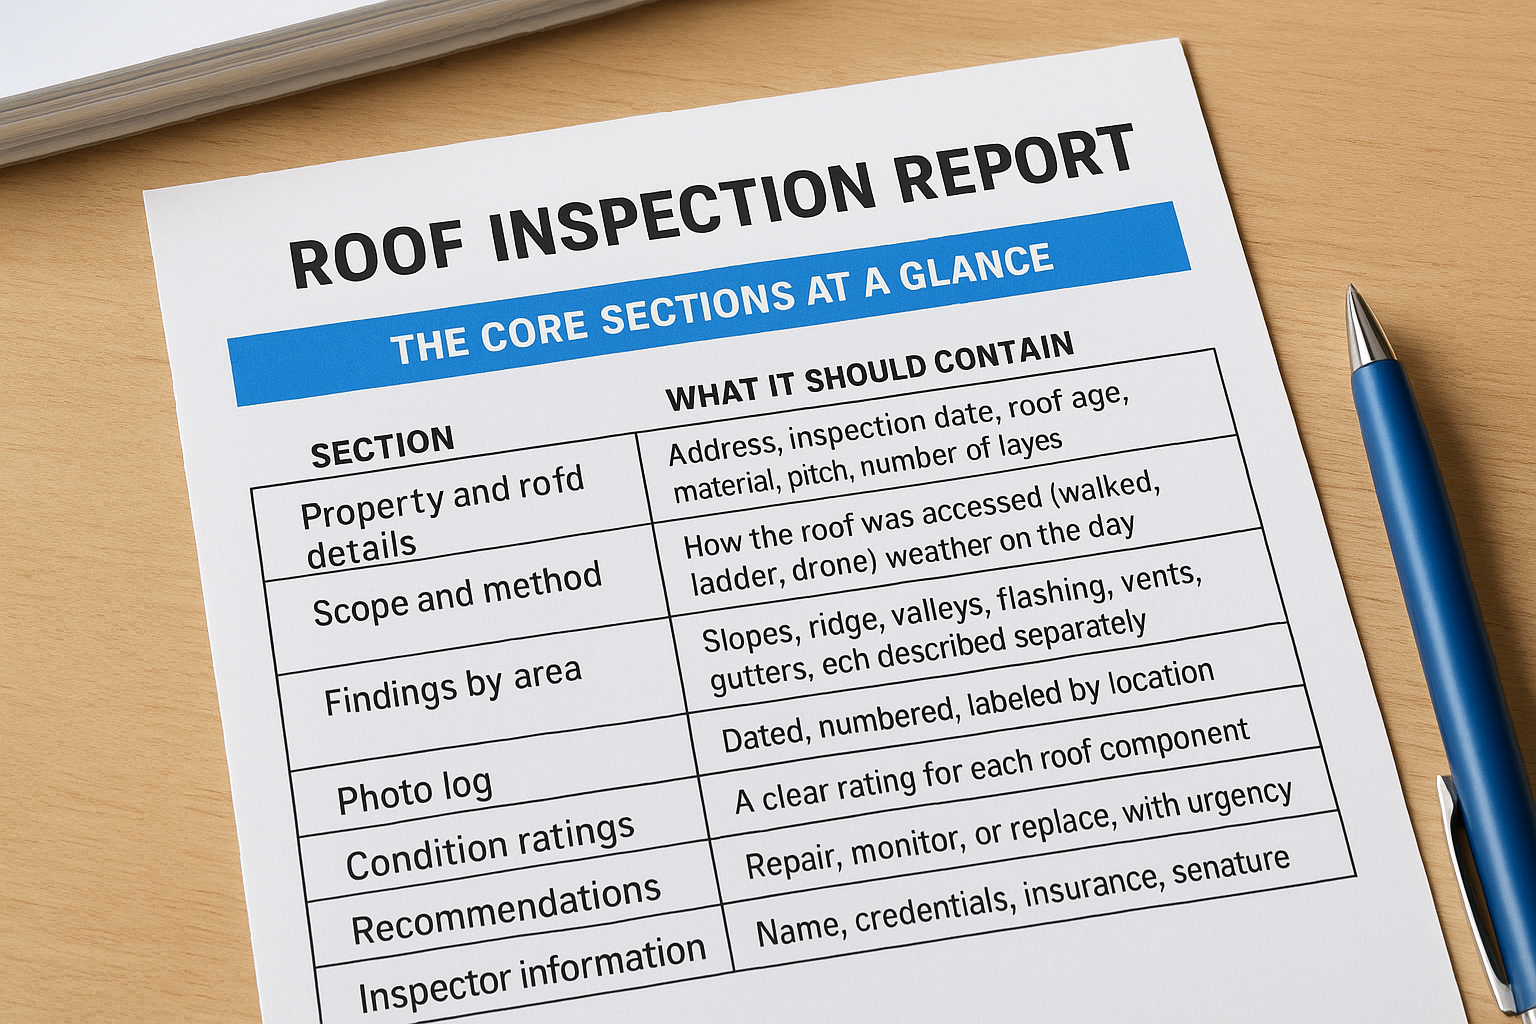
| Section | What it should contain |
|---|---|
| Property and roof details | Address, inspection date, roof age, material, pitch, number of layers |
| Scope and method | How the roof was accessed (walked, ladder, drone) and weather on the day |
| Findings by area | Slopes, ridge, valleys, flashing, vents, gutters, each described separately |
| Photo log | Dated, numbered, labeled by location |
| Condition ratings | A clear rating for each roof component |
| Recommendations | Repair, monitor, or replace, with urgency |
| Inspector information | Name, credentials, insurance, signature |
Findings are the heart of the report. Each one should name the roof slope or area, describe the defect, and point to a numbered photo. "Damaged shingles on north slope" is weak. "Eleven creased shingles, north slope, four feet below ridge, photos 14 to 17" is something you can verify.
A finding without a location and a photo is just an opinion.
Photo volume matters too. Our assessments run past 100 images because a roof has dozens of details, including every slope, every penetration, and every flashing run. Look for wide shots for context and close-ups for detail. Also check whether the inspector examined the attic or the underside of the decking, since leaks often show up there before they stain a ceiling.
Recommendations come last, and they should be specific. A useful report says whether each issue calls for repair, monitoring, or replacement, how urgent it is, and what the fix involves. Pricing often arrives as a separate estimate, but the scope in the report should match it line for line.
Honest reports also state their limits. If the pitch was too steep to walk, or the attic was inaccessible, the inspector should say so. A report that lists what was not verified tells you where the blind spots are, and that kind of candor is usually a sign the rest of the document can be trusted.
The easiest way to produce roof inspection reports that hold up is to build them in the order you inspect. Capture evidence first, organize it second, and draw conclusions last. That sequence keeps opinions from sneaking in before the facts.
Follow this sequence on every roof, and you will rarely miss a detail. It works the same for a single-family home or a small commercial building, and it keeps your photo numbering consistent from start to finish.
Write the report the same day. Details fade fast, and photo numbers get mixed up when you wait a week. Same-day writing also gives the report a clean date that ties your observations to the inspection itself.
Write the report the same day, while every location and photo number is still fresh.
Use one formula for every finding: location, defect, extent, photo reference, and consequence. For example: "North slope, 12 feet from the left rake. Seven lifted shingles with broken seal strips. Photos 22 to 25. Wind-driven rain can reach the underlayment." Skip adjectives like "terrible" or "severe." Numbers and photos persuade better.
Safety comes before thoroughness. Steep or wet roofs are dangerous, and falls are a leading cause of injury in this trade. If you are a homeowner, inspect from the ground with binoculars or a roof inspection drone, and hire a licensed roofer for anything that requires walking the surface. A report that says "viewed from the ground" is honest, and that honesty beats a rushed climb.
This roof inspection report template mirrors the seven sections covered above, so nothing on the checklist gets skipped. It works for a house or a small commercial roof. Paste it into any word processor, fill it in, and export it as a PDF so the final version can't be edited by accident.
Copy the block below as is. Every field maps to something an adjuster or second contractor will want to verify, so resist the urge to delete the boring ones.
ROOF INSPECTION REPORT

1. PROPERTY AND ROOF DETAILS
Address:
Inspection date / weather:
Roof material / age / pitch / layers:

2. SCOPE AND METHOD
Access: [ ] Walked  [ ] Ladder  [ ] Drone  [ ] Ground only
Attic inspected: [ ] Yes  [ ] No

3. FINDINGS BY AREA (one block per defect)
Area (slope, ridge, valley, flashing, vent, gutter):
Defect:
Extent (count, size, location):
Photo #:
Consequence if ignored:

4. PHOTO LOG
Photo # | Location | Description | Date

5. CONDITION RATINGS
Shingles / surface: Good / Fair / Poor
Flashing:
Penetrations:
Decking (attic view):
Gutters and drainage:

6. RECOMMENDATIONS
Item | Action (repair / monitor / replace) | Urgency

7. LIMITATIONS
Not reached or not verified:

Inspector name / license / insurance:
Signature / date:
Repeat section 3 once for every defect. A roof with 20 findings gets 20 blocks, and that is fine. One block per defect keeps each photo tied to one location, which makes the report easy to check.
Give every defect its own block, and never merge two problems into one line.
Before you share the report, add a rating scale with a one-line definition for each level. Use the same words for every component. The next section shows how to define those levels so "Fair" and "Poor" mean something to whoever reads the report.
Commercial roofs need a few extra rows. For a flat or low-slope roof, add the membrane type, seam condition, drain status, and any ponding water, since standing water after 48 hours points to a drainage problem.
Ratings are the quickest part of roof inspection reports to scan, and the easiest to misread. One inspector's "Fair" is another's "Poor." Before you trust any grade, find the definitions printed in the report. If there are none, ask the inspector to add them in writing.
Use this four-level scale as a baseline. It is the same one we recommend for the template above.
| Rating | Meaning | Typical action |
|---|---|---|
| Good | Performing as designed, normal wear only | Routine yearly check |
| Fair | Visible wear or minor defects, still sheds water | Repair or monitor |
| Poor | Active damage or advanced wear, high leak risk | Repair now, plan for replacement |
| Failed | Leaking or structurally compromised | Immediate repair or replacement |
Ratings should apply to each component, not just the roof as a whole. A roof can have Good shingles and Poor flashing. That split points to a targeted repair instead of a full replacement, and a single overall grade would hide it.
Urgency is a separate scale, and it is the one that drives your calendar and your budget:
Condition and urgency answer different questions. Condition describes the roof today. Urgency describes what happens if you wait. Fair flashing above a bedroom with attic staining is Immediate, while Poor shingles on a low slope with no moisture below might only be Soon.
Condition tells you how the roof looks today, and urgency tells you what waiting will cost.
Watch for patterns. A report that rates every component "Poor" reads like a sales pitch, and a report that rates everything "Fair" may be avoiding a hard conversation. Every rating should trace back to a numbered photo and a measured finding. If a Poor grade cites no evidence, ask the inspector to show the photo before you sign anything or schedule work.
Jargon is where many homeowners lose the thread. A finding can be accurate and still tell you nothing if you can't tell what it means for your house. Below are six lines pulled from typical roof inspection reports, written the way inspectors write them, with the plain-language version beside each.
| Finding as written | What it means | Likely urgency |
|---|---|---|
| Failed pipe boot, photo 31 | The rubber collar around a plumbing vent has cracked. Water can run straight down the pipe. | Immediate |
| Granule loss, south slope, about 30% | The shingles' protective gravel-like surface is wearing off, so they age faster. | Soon |
| Exposed fasteners at ridge cap | Nail heads are showing and can back out, letting water in. | Soon |
| Step flashing corroded at chimney | The metal strips where the roof meets the brick are rusting through. | Soon to Immediate |
| Ponding at drain, 48+ hours | Water on a flat roof isn't draining, which strains the membrane. | Soon |
| Hail bruising, 9 hits per test square | Impacts have fractured the shingle mat under the granules. | Depends on count |
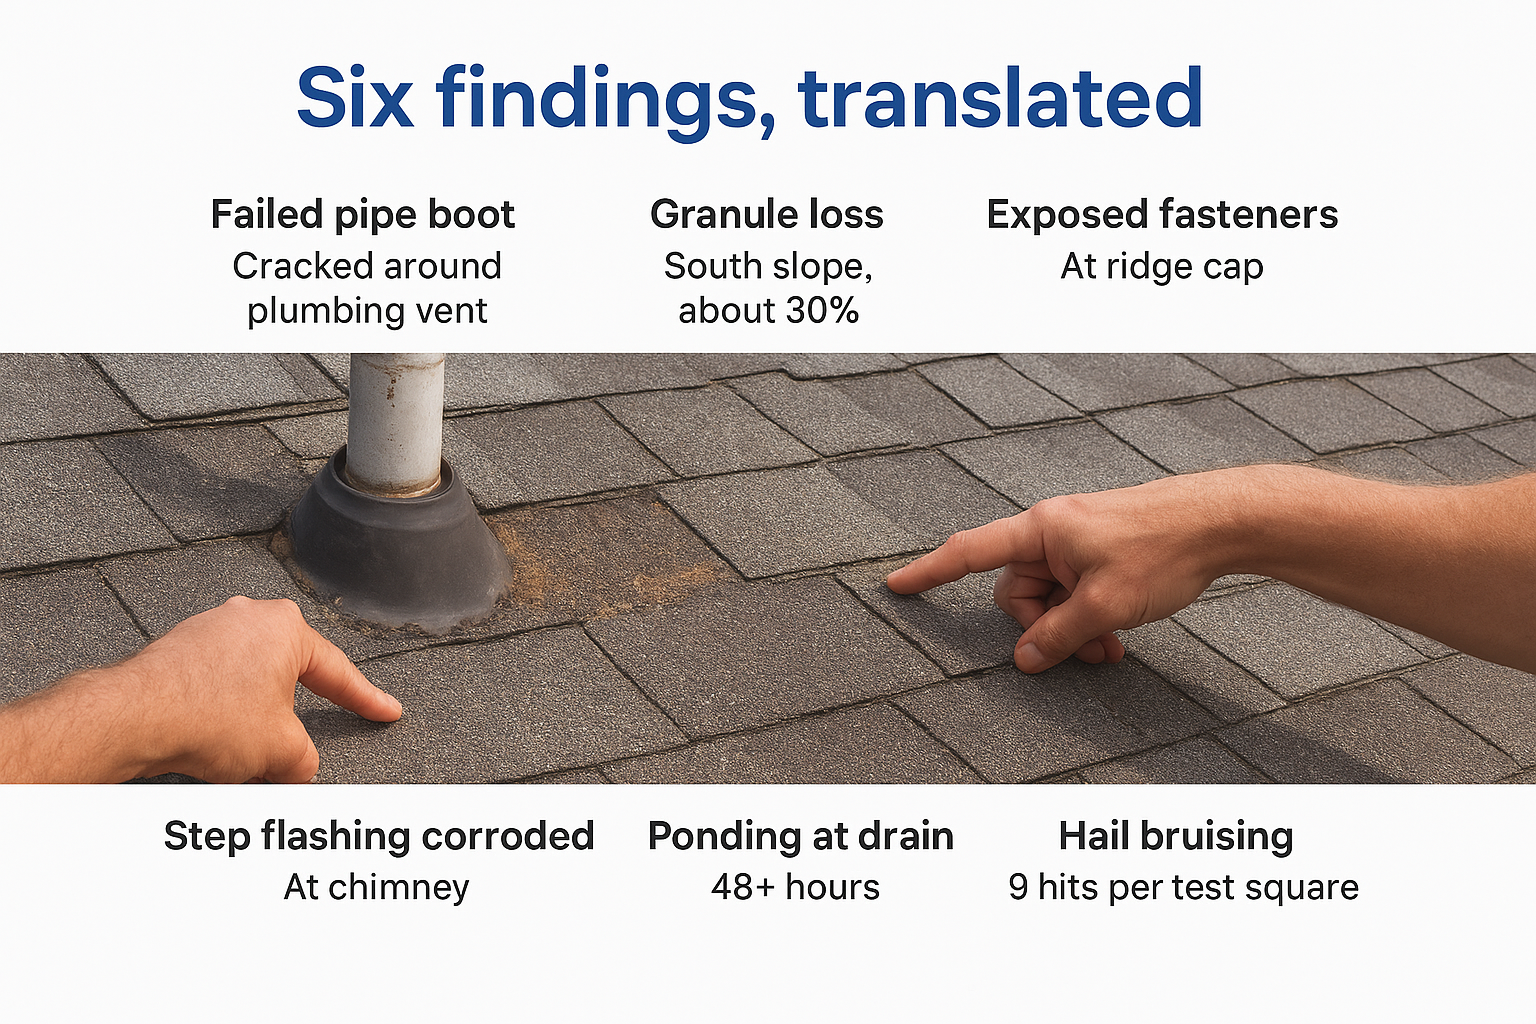
Notice the pattern. The small-sounding items, like a cracked pipe boot, are often the most urgent, because they leak today. The dramatic-sounding ones, like granule loss, are usually slow burners that affect how many years remain, not whether water is coming in now.
Hail findings deserve extra attention because money rides on them. A "test square" is a 10-by-10-foot patch where the inspector counts impacts, and some carriers use a count of roughly eight to ten per square as a replacement threshold. Your carrier's number may differ, so the report needs a count per slope and photos of each hit for an adjuster to evaluate.
If you can't restate a finding in one plain sentence, ask the inspector to rewrite it.
Use the same test on every line of a filled-in roof inspection report template. Ask three questions:
A finding that answers all three is worth acting on. One that answers none is just filler.
An adjuster decides your claim from evidence, and roof inspection reports are the evidence you control. A specific, dated, photo-backed report lets the adjuster verify damage quickly instead of debating it. It also documents the date of discovery and the likely cause of loss, which carriers weigh as heavily as the damage itself.
Adjusters sort every finding into storm damage, age-related wear, or deferred maintenance. Usually only the first is covered. Your report should separate hail and wind damage from normal wear, and explain how you can identify hail damage. Creased shingles in a wind-shaped pattern or fresh bruising on one slope point to a storm. Even granule loss across every slope points to age.
Before you send a report to anyone, confirm it includes these items:
Collateral damage helps more than most homeowners expect. Dented soft metals are hard to dispute, and they support the case for hail on the shingles too.
Work in this order so the paperwork supports you at each stage:
Keep expectations realistic. A report does not guarantee payment, because the carrier makes the final call. What it does is make your case easy to verify, and that shortens arguments.
A claim is won with documentation, so bring evidence the adjuster can check photo by photo.
Disagreements are common. The adjuster may count fewer hits, blame age, or approve a repair where your report calls for replacement. Ask for the reasoning in writing, then respond using your photo numbers and slope-by-slope counts, not general complaints.
If the gap stays open, request a reinspection and bring the roofer who wrote the report. Having the author on the roof is often the quickest way to resolve a dispute. Your policy may also include an appraisal clause as a formal next step. We coordinate with adjusters on claims for exactly this reason, because a clear report keeps the conversation about the roof and not about opinions.
This is where roof inspection reports earn their keep. The decision gets easier when you stop asking how the roof looks and start asking how much of it is failing. Your ratings, photo log, and roof age already hold most of the answer.
Start with the spread of the damage. Repair makes sense when problems are local and the rest of the roof is sound. Replacement makes sense when problems are widespread, structural, or tied to age. Use this table to compare your report against both patterns.

| What the report shows | Points toward |
|---|---|
| Damage on one or two slopes, other components rated Good or Fair | Repair |
| Failed pipe boots or flashing, decking dry | Repair |
| Asphalt shingles under about 15 years old | Repair |
| Poor or Failed ratings on most components | Replace |
| Granule loss on every slope, roof 20+ years old | Replace |
| Hail hits at your carrier's threshold on several slopes | Replace |
| Wet or rotted decking in more than one area | Replace |
| Two layers already on the roof | Replace |
One row rarely settles it. Two or three rows in the same column usually do.
Then compare costs. A common rule of thumb says to replace when repairs would reach 30% to 50% of a new roof's price, or when you would pay for another round of repairs within two years. Ask for a repair quote and a replacement quote on the same documented scope, so you compare like with like.
Repair the roof when the report shows a local problem, and replace it when the report shows the whole system wearing out.
Selling soon changes the math. A buyer's inspector will read your report, so a roof with a few years left and clean repairs on file can protect your price better than a rushed replacement. If you plan to stay, a roof near the end of its life is usually cheaper to replace once than to patch every spring.
Insurance can shift the answer too. When insurance covers the storm damage, replacement may cost you little beyond the deductible, so check the claim before you pay for repairs out of pocket. Keep the report with your estimates and warranty records, because it shows exactly what was wrong and what you paid to fix.
Most weak reports fail in predictable ways. The inspector often did the work, but the paperwork does not show it. Here are the mistakes we see most often in roof inspection reports, and how to catch them before an adjuster or a second contractor does.
Photos cause the most trouble. A report with too few images, or images with no labels, leaves every finding open to dispute. Dates matter just as much, because undated photos can't tie damage to a storm. The table lists the usual gaps and the fix for each.
| Mistake | Why it hurts | Fix |
|---|---|---|
| Unlabeled photos | Nobody can tell which slope is shown | Number every photo and label its location |
| Missing roof age or layers | The adjuster can't separate wear from storm damage | Record age, material, and layer count up front |
| One overall grade | A failing component gets hidden | Rate each component separately |
| No limitations section | It looks like everything was checked | List what you could not reach or verify |
Vague language is the second big problem. Phrases like "needs work" or "general wear" give nobody anything to verify. Replace them with counts, sizes, and locations. Exaggeration does equal damage. A report that calls everything severe loses credibility, and an adjuster will discount the real findings along with the inflated ones.
A report that can't be checked line by line can't be trusted, whatever it concludes.
Another trap is blending the inspection with a sales pitch. If one document recommends a full replacement and quotes a price without showing evidence, it reads as a bid, not a report. Keep findings and pricing separate so you can judge the facts first. We also see reports written weeks after the visit, with photo numbers that no longer match the text. Write the report the same day to avoid that.
Before you accept any report, read it once as a skeptic. Pick three findings and try to locate the photo for each. If it takes more than a minute, send it back for fixes, because a report you can't navigate won't persuade an insurer either.
Prices for roof inspection reports range from free to well over $1,000, and the spread comes from who writes the report and how deep it goes. Knowing the typical price ranges keeps you from overpaying for a basic report, or trusting a free one that has no substance.
The figures below are ballpark numbers for U.S. residential and small commercial roofs. Your market, roof size, and inspector will move them, so get two quotes before you commit.
| Report type | Typical cost | Notes |
|---|---|---|
| Homeowner ground-level report using a template | Free | Limited view, less weight with insurers |
| Roofer inspection with written report | $150 to $400 | Often free before a storm claim or bid |
| Drone-assisted inspection | $200 to $500 | Useful for steep or fragile roofs |
| Roof portion of a home sale inspection | $100 to $300 | Usually a short checklist |
| Engineer-stamped or large commercial report | $500 to $2,000+ | Needed for disputes and legal use |
Treat the first row as a real option. If you fill in the template above and inspect from the ground, your cost is zero, though the report will carry less weight than one from a licensed roofer.
Several factors push a roof inspection quote up or down:
Free inspections are common. Many roofers inspect at no charge after a storm or while bidding a replacement, because the report leads to work. That arrangement is fine as long as you receive the written report, with numbered photos and condition ratings, not a verbal summary.
A free inspection is only worth having if you walk away with the written report and the photos.
Pay for an independent inspection when the stakes justify it. A dispute with your carrier, a home sale, or a bid gap like the $9,000 versus $18,000 example earlier calls for an inspector with no stake in the repair. A few hundred dollars is small next to a roof that costs five figures. Whichever route you choose, hold the report to the checklist from the earlier sections, and walk away from any price that buys you less.
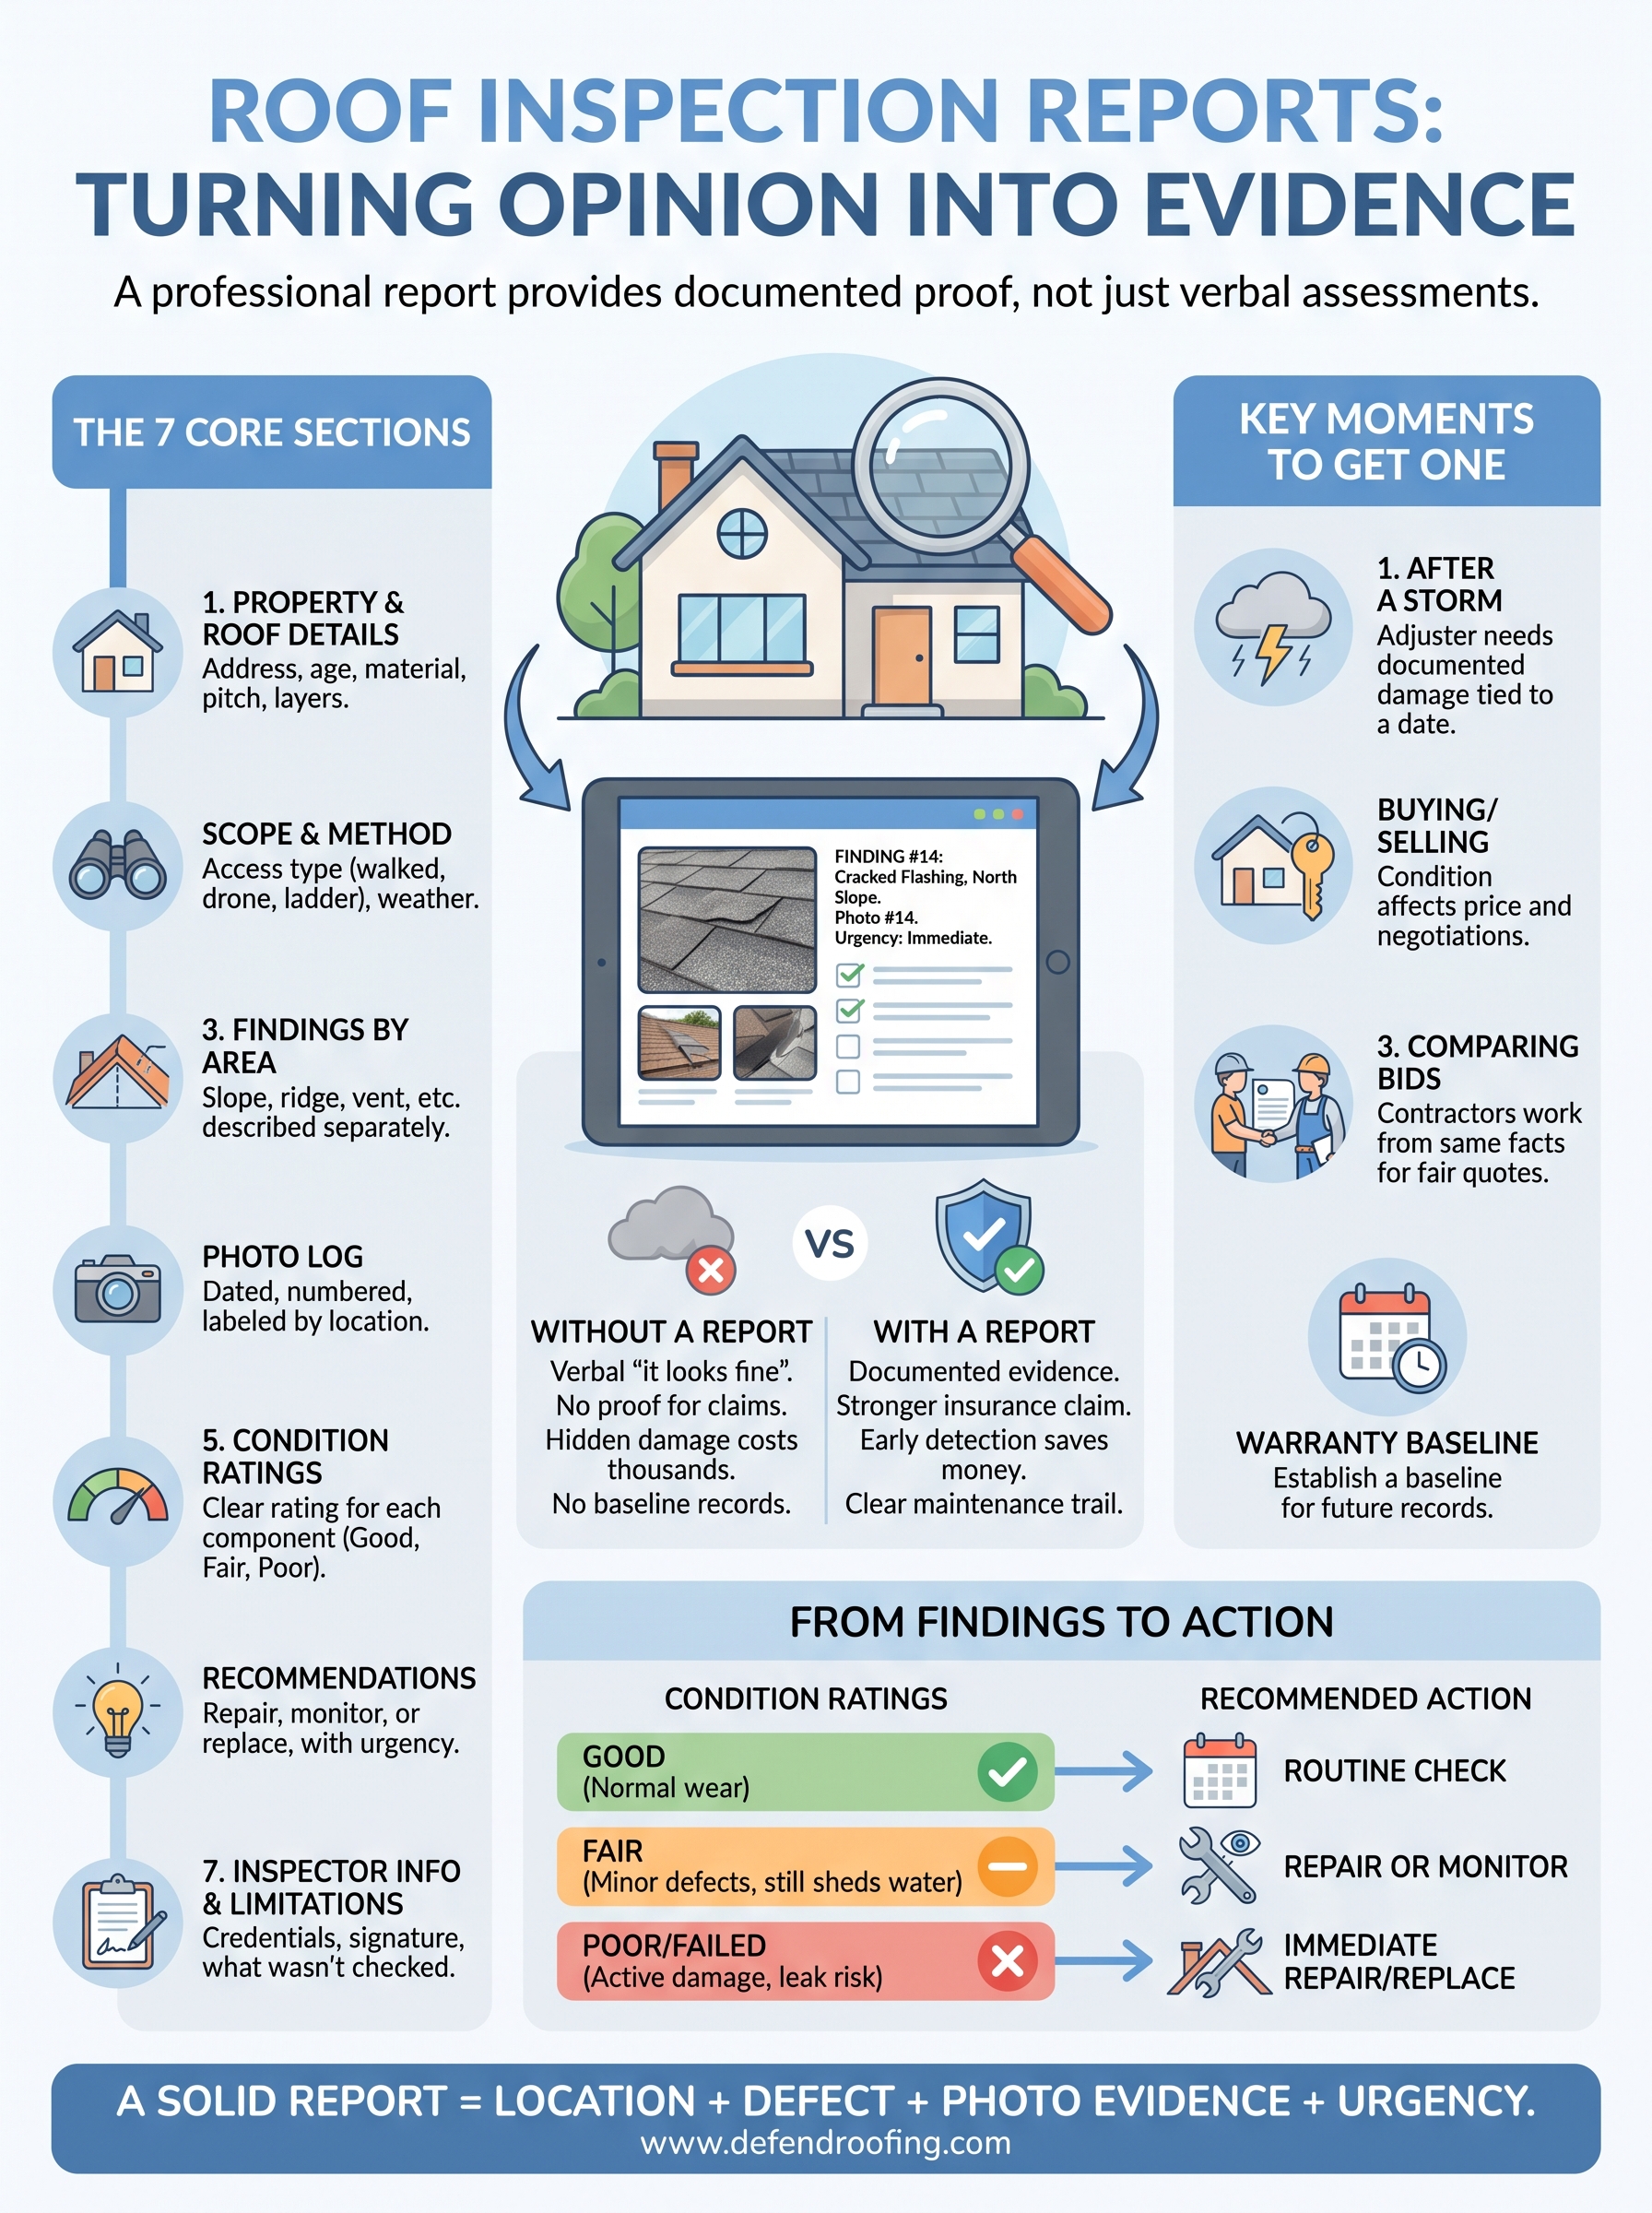
Roof inspection reports come down to one idea: evidence beats opinion. A good report names the roof's age and materials, ties every finding to a numbered, dated photo, rates each component, and ends with a clear recommendation. Whether you use the template above or hire a pro, hold the report to that checklist.
Once you have it, use it. Bring it to the adjuster after a storm, set it beside every bid, and file it with your warranty records. It shows you when a repair is enough and when replacement is the smarter spend, and it keeps small problems from turning into expensive ones.
If you want a documented report from a roofer who won't push work you don't need, get an instant quote from Defend Roofing. We'll back every finding with 100+ photos and give you an honest repair-or-replace answer.