Learn how a roof leak inspection works, what it costs, when insurance helps, what you can check yourself, and how to hire a local Austin-area roofer.

A roof leak inspection is a methodical check of your roof, attic, and ceilings that traces water to the exact spot where it gets in and measures the damage it has already done. A professional usually finishes it in a couple of hours on a typical house. It can cost nothing when a roofer bundles it with a repair estimate, or roughly $150 to $400 for a paid, independent report. The result you want is a written repair plan, not just a guess about where the drip comes from.
This article covers what a roof leak inspection is worth, how an inspector works step by step, and what it costs. It also explains how insurance fits in, what you can safely check yourself, and how to find a trustworthy roofer in the Austin area. Everything here is written for Central Texas homeowners, where hail, heat, and sudden downpours put roofs under real pressure.
Defend Roofing is a family-owned contractor run by Chris and Greyson Buster, serving homeowners in Austin, Cedar Park, Leander, Jonestown, and nearby neighborhoods. Every assessment we do includes 100+ photos, so we explain inspections from the way we actually run them.
A roof leak inspection matters because the stain on your ceiling is rarely where the leak is, and the damage keeps spreading the whole time you wait. Inspecting early turns a likely replacement into a small repair.
Water that gets through your roof follows gravity and whatever surface it touches first. It runs along the underlayment, rafters, and decking before it soaks through a ceiling, so the stain can sit several feet from the real entry point. Patching the spot above the stain is the most common wrong fix we see.
An inspection works backward from the evidence. The inspector starts at the stain, moves uphill through the attic, and finds the true entry point, whether that is a cracked vent boot, lifted flashing, or a few missing shingles.
The stain shows where the water ended up, not where it got in.
Every rainfall pushes more water into the same path. Insulation soaks up water and stops insulating. Roof decking softens and eventually rots. Mold can begin growing within 24 to 48 hours of a surface getting wet, according to the U.S. Environmental Protection Agency.
The cost gap is large. Resealing flashing or replacing a pipe boot is a small repair. Replacing rotted decking, drywall, and insulation turns the same leak into a major job. Early inspection keeps you on the cheap side of that gap.
Strong sun, long summers, and fast-moving thunderstorms wear down shingles and sealants. Hail is the bigger surprise. A hailstorm can bruise shingles and knock off protective granules without causing a drip that day. The leak shows up months later, usually in the next heavy rain.
That is why a roof inspection for leaks makes sense after any hail or high-wind event, even when the ceilings look fine. If you later file an insurance claim, an inspection dated close to the storm also helps your case.
A professional roof leak inspection follows a set order: questions, interior, attic, exterior, targeted testing, then a written report with photos. Each step narrows the search until the entry point is confirmed, not assumed.
Here is the sequence a thorough inspector follows:
Reading this list, you can see why a quick look from the driveway is not an inspection. The interior and attic steps are what separate a diagnosis from a guess.
Most leaks begin at a transition, a spot where one material meets another, not in the middle of a shingle field. This table shows the usual suspects and what gets checked at each.
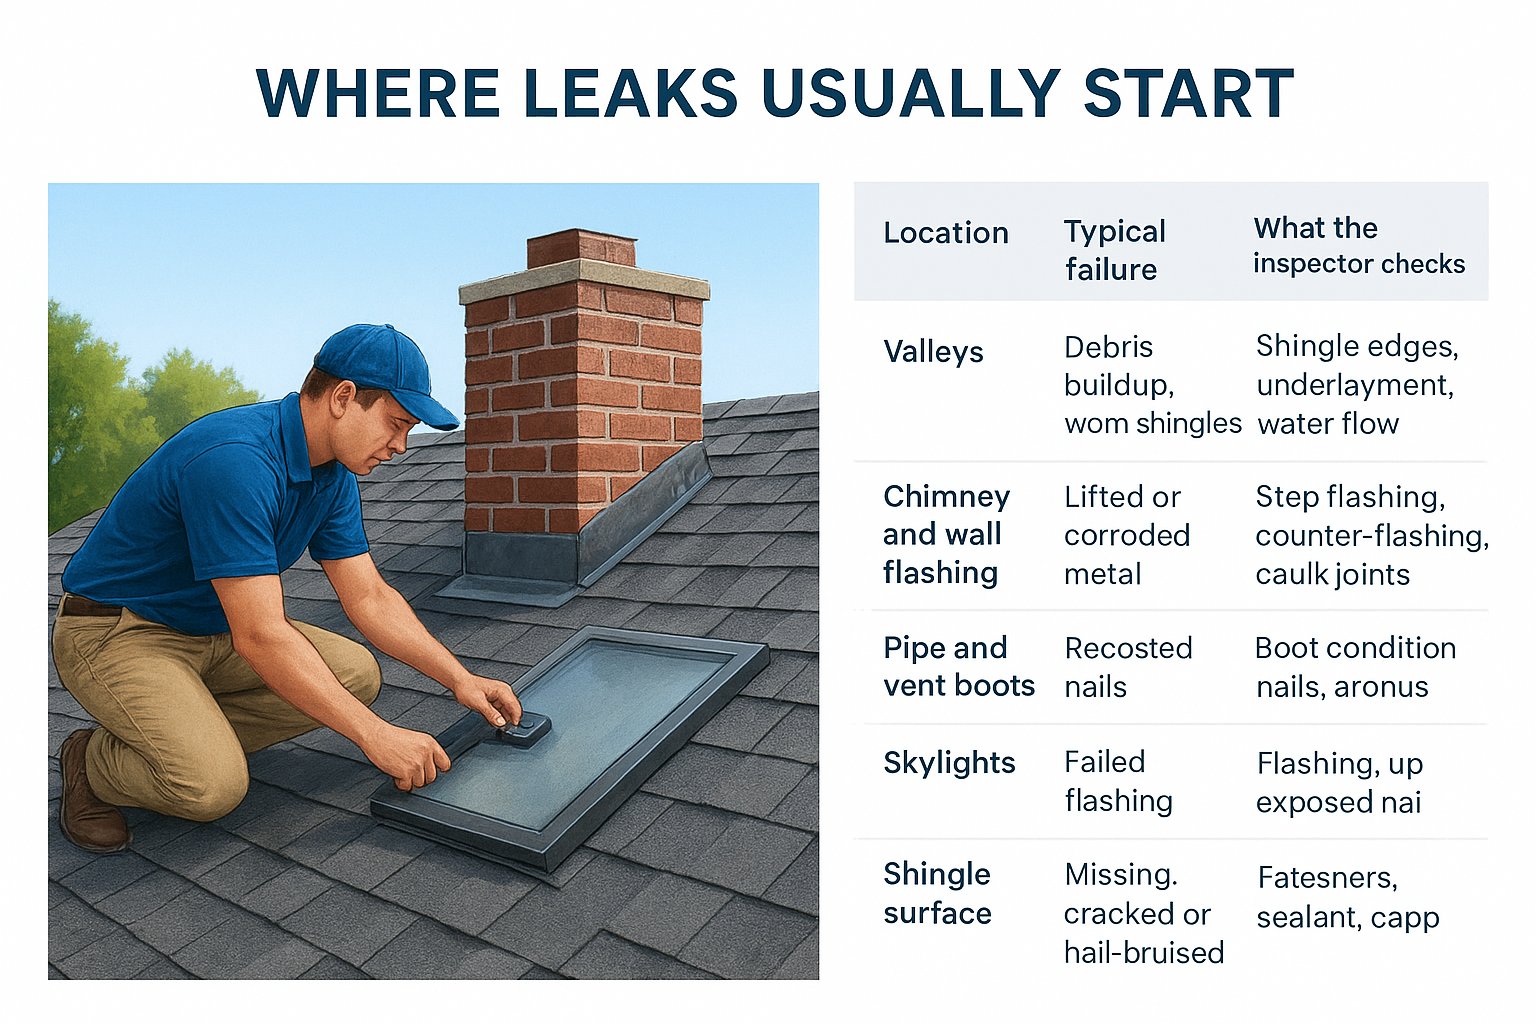
| Location | Typical failure | What the inspector checks |
|---|---|---|
| Valleys | Debris buildup, worn shingles | Shingle edges, underlayment, water flow |
| Chimney and wall flashing | Lifted or corroded metal, dried sealant | Step flashing, counter-flashing, caulk joints |
| Pipe and vent boots | Cracked rubber collars | Boot condition, nails, surrounding shingles |
| Skylights | Failed flashing or seals | Flashing kit, curb, interior staining |
| Shingle surface | Missing, cracked, or hail-bruised shingles | Granule loss, exposed nails, fractures |
| Ridge and hip caps | Wind-lifted caps | Fasteners, sealant, cap alignment |
| Eaves and gutters | Backed-up water, rotted fascia | Drip edge, gutter slope, fascia boards |
Many leaks need only trained eyes. For stubborn ones, inspectors use a moisture meter to confirm wet material and an infrared camera, which shows temperature differences from trapped moisture, especially on flat or low-slope sections. A controlled water test recreates the leak by wetting one roof section at a time while someone watches inside.
The documentation matters as much as the diagnosis. Our Precision Roof Assessment includes 100+ photos of the roof and interior, so you can see what we see. That record also gives you something to compare against other quotes and, if needed, something to hand an insurance adjuster.
A good inspection ends with photos and a written cause, not a verbal "probably the flashing."
A paid, independent roof leak inspection typically runs about $150 to $400 nationally, while many roofing contractors include the inspection with a repair estimate at no separate charge. Always ask which one you are getting before anyone climbs a ladder.
The figures below are national ballparks. Local quotes in Central Texas will vary with the factors in the next section.
| Inspection type | What you get | Typical cost |
|---|---|---|
| Basic visual | Ground or ladder assessment, brief findings | About $150 to $250 |
| Detailed inspection | Roof walk, attic check, photos, written report | About $250 to $400 |
| Contractor inspection with estimate | Inspection tied to a repair or replacement quote | Often no separate fee |
| Specialty testing | Infrared scan or controlled water test | Quoted separately |
Several things push a roof leak inspection toward the high or low end. Roof size and pitch matter, since a steep, multi-level roof takes longer and needs more safety gear. Material matters too, because tile and metal are harder to inspect than asphalt shingles. Add in how many stories the home has, whether specialty testing is needed, and how detailed a report you want.
Location affects price through labor rates, so treat any national number as a starting point. Ask for the total in writing before the visit.
The inspection fee is small next to the repair, and the repair price depends entirely on the cause. Replacing a cracked pipe boot is a minor job. Replacing rotted decking and a section of shingles is a bigger one. Nobody can quote a fair repair price without finding the cause first, so be wary of any number given over the phone.
A free inspection is fine if the roofer documents everything and does not pressure you. Ask for the photos and a written, scope-based estimate that names the cause. If the roofer refuses, or jumps straight to "you need a new roof" without showing evidence, get a second opinion.
Pay for evidence, whether the inspection is free or not: photos, a named cause, and a written scope.
Homeowners insurance generally covers a roof leak when a sudden, covered event such as hail or wind damaged the roof, and generally does not cover leaks caused by age, wear, or lack of maintenance. Your specific policy decides, so read it or call your agent.
Coverage hinges on the cause of the leak, not the leak itself. That is why the inspection report matters so much.
| Usually covered | Usually not covered |
|---|---|
| Hail damage that bruised or cracked shingles | Wear and tear from normal aging |
| Wind damage that lifted or removed roofing | Long-term, gradual seepage |
| A fallen tree limb that punctured the roof | Damage from poor maintenance or neglect |
| Interior water damage that follows a covered opening | Faulty original installation |
Many Texas policies also carry a separate wind and hail deductible, often a percentage of your dwelling coverage instead of a flat dollar amount. Compare that deductible to the likely repair cost before filing. If the repair is smaller than the deductible, a claim may not make sense, and claims can affect your future premiums.
Good documentation protects you whether or not you file. Follow these steps:
A contractor can meet the adjuster on the roof and point out the documented damage. The insurer still makes the coverage decision, and an honest roofer will tell you upfront when a leak looks like age-related wear and will not be covered. We would rather tell you that than waste your time on a claim.
Insurance pays for damage from a covered event, so your report must show the event, not just the leak.
You can do a useful first-pass roof leak inspection from your attic and from the ground, but leave walking the roof to a professional. A DIY look can narrow the problem and give you better information when you call a roofer.
The attic is the best place to find a leak safely. Take a flashlight and go during daylight, or during rain if the attic is safe to enter. Look at the underside of the decking for dark stains or wet wood, and at the insulation for dampness or compression. Also watch for rusted nail tips, daylight coming through, and a musty smell.
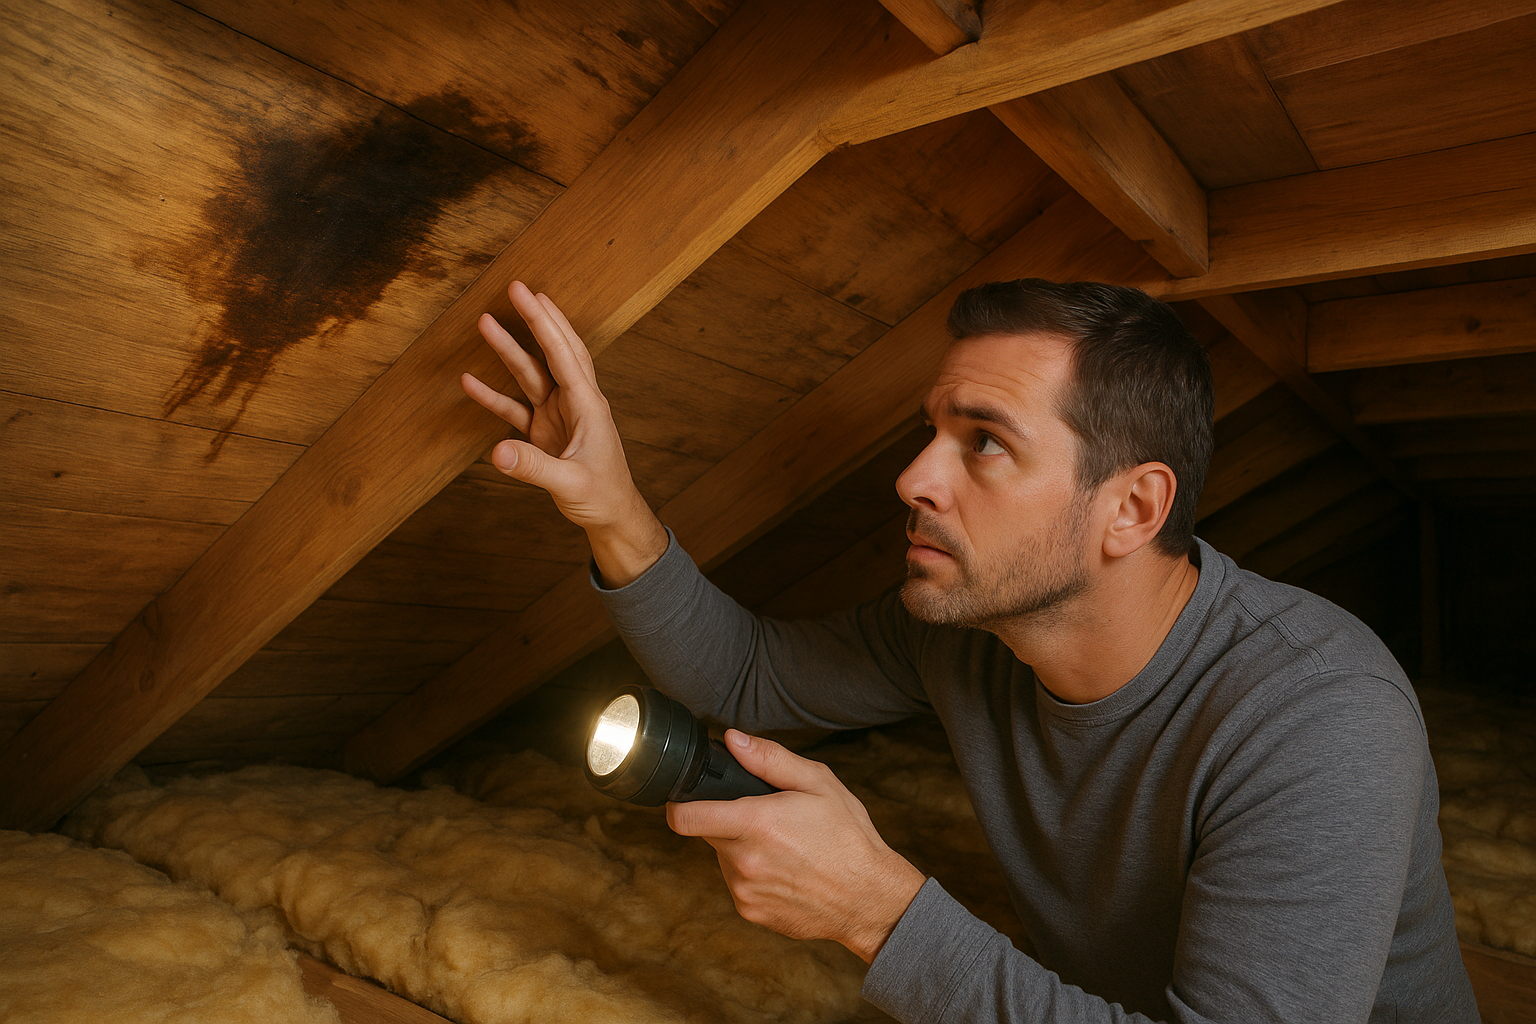
Trace any stain uphill, because the entry point is usually higher than the wet spot. Mark the area with a pencil or chalk and take photos. Stay on the joists and keep clear of electrical wiring.
Use binoculars from the yard. Look for missing, cracked, or lifted shingles and exposed nails. Also check pipe boots for cracked rubber, flashing around chimneys and walls for gaps, and valleys for debris. Granules collecting in your gutters can signal an aging or hail-damaged roof.
Match what you see outside with the attic marks. If a cracked boot sits directly uphill from a stain, you have a strong lead.
A hose test can confirm a suspect area, but only with a helper inside. Start low on the roof, below the suspected spot, and soak one small section at a time for several minutes before moving up. Never spray upward under shingles, which can force water in and create a leak. Stay on the ground or a stable ladder, not on the roof surface.
For temporary protection, set a bucket under the drip and move belongings away. A secured tarp can cover a damaged area until repair, but only if you can place it safely. Sealants can slow a small leak, yet they rarely fix failed flashing or damaged decking.
If you cannot reach it safely from the ground or a firm ladder, you should not be up there.
Falls are a leading cause of roofing injuries. Never climb a wet, steep, or storm-damaged roof.
To find a good roofer in the Austin area, ask neighbors for referrals, then verify insurance, local presence, a written scope, and photo documentation before anyone works on your roof. Do this before the next storm, because demand spikes right after hail.
Start with people nearby. Neighbors who recently had roof work can tell you how the crew behaved and whether the job matched the quote. Check Google Business Profile reviews, a local address, and how long the company has operated in the area. Your insurance agent may also know contractors who handle claims well.
Choose someone who regularly serves your area. At Defend Roofing, we work with homeowners in Cedar Park, Leander, Jonestown, Avery Ranch, Steiner Ranch, and across the Austin area, so we know the local weather patterns and building styles.
Texas does not issue a state roofing license, so the checking is up to you. Use this list:
Hail storms bring out door-knockers and out-of-area crews. Be cautious of high-pressure sales, demands for large upfront payment, vague scopes, and a roofer who will not share photos. A contractor who offers to waive or absorb your insurance deductible is breaking Texas law, so walk away.
Prefer a roofer who tells you when a small repair is enough. If every roof they see needs full replacement, treat that as a warning sign, not a service.
A trustworthy roofer shows you the evidence and lets you decide.

A roof leak inspection finds the true entry point, measures the damage, and gives you a documented plan. Expect to pay anywhere from nothing to about $400 for the inspection, and ask for photos and a written cause either way. Insurance helps only when a covered event caused the leak, so document early. Your own attic check can narrow the search, but the roof surface is a job for a professional.
Do not wait for the next storm to find out how bad the leak is. Small leaks stay small only when someone traces them. If you want the cause found and explained with clear photos, text or call Defend Roofing for an instant online quote and we will take it from there.




