Learn how to repair hail damage roof issues step-by-step, from inspection to insurance claims, plus real cost ranges for Central Texas homeowners.
A hailstorm rolls through Central Texas, and now you're standing in your driveway squinting at your roof, wondering if those dents and missing granules mean real trouble. If you need to repair hail damage roof problems the right way, you can't just eyeball it from the ground. Hail bruises shingles, cracks seals, and opens the door to leaks that show up months later, long after the storm is forgotten.
This guide walks you through exactly what hail damage roof repair looks like from start to finish: how professionals spot damage insurance adjusters often miss, what the repair process actually involves, and what you should expect to pay depending on the extent of the damage. We'll also cover when a repair makes sense versus when you're better off replacing sections of your roof entirely.
We've spent three generations fixing Austin-area roofs after hailstorms, so we know the difference between cosmetic marks and damage that will cost you thousands if ignored. Below, you'll get straight answers on roof repair for hail damage, typical cost ranges, and how to document everything properly before you ever file an insurance claim.
Hail moves fast, but the smart moves after it hits your roof take a little patience. Once the storm passes and the sky clears, your first job isn't grabbing a ladder. It's making sure your family and property are safe, then working through a short checklist before you touch anything on the roof itself. Homeowners who rush this stage often miss damage that only shows up as a slow leak six months later, or they climb up on wet, unstable shingles and get hurt in the process.
Before anything else, walk your property and look for downed power lines, broken tree limbs, or debris in your yard and driveway. Standing water near your foundation or garage can signal a compromised roofline sending water somewhere it shouldn't go. If you spot exposed wiring or gas smells, call the utility company before you do anything else. Only after the immediate hazards are cleared should you move on to looking at the roof itself, and even then, keep your feet on the ground.
Grab a pair of binoculars and walk the perimeter of your house looking for obvious warning signs. You're not trying to diagnose the roof yourself here, just gathering enough information to know if you need to act quickly.
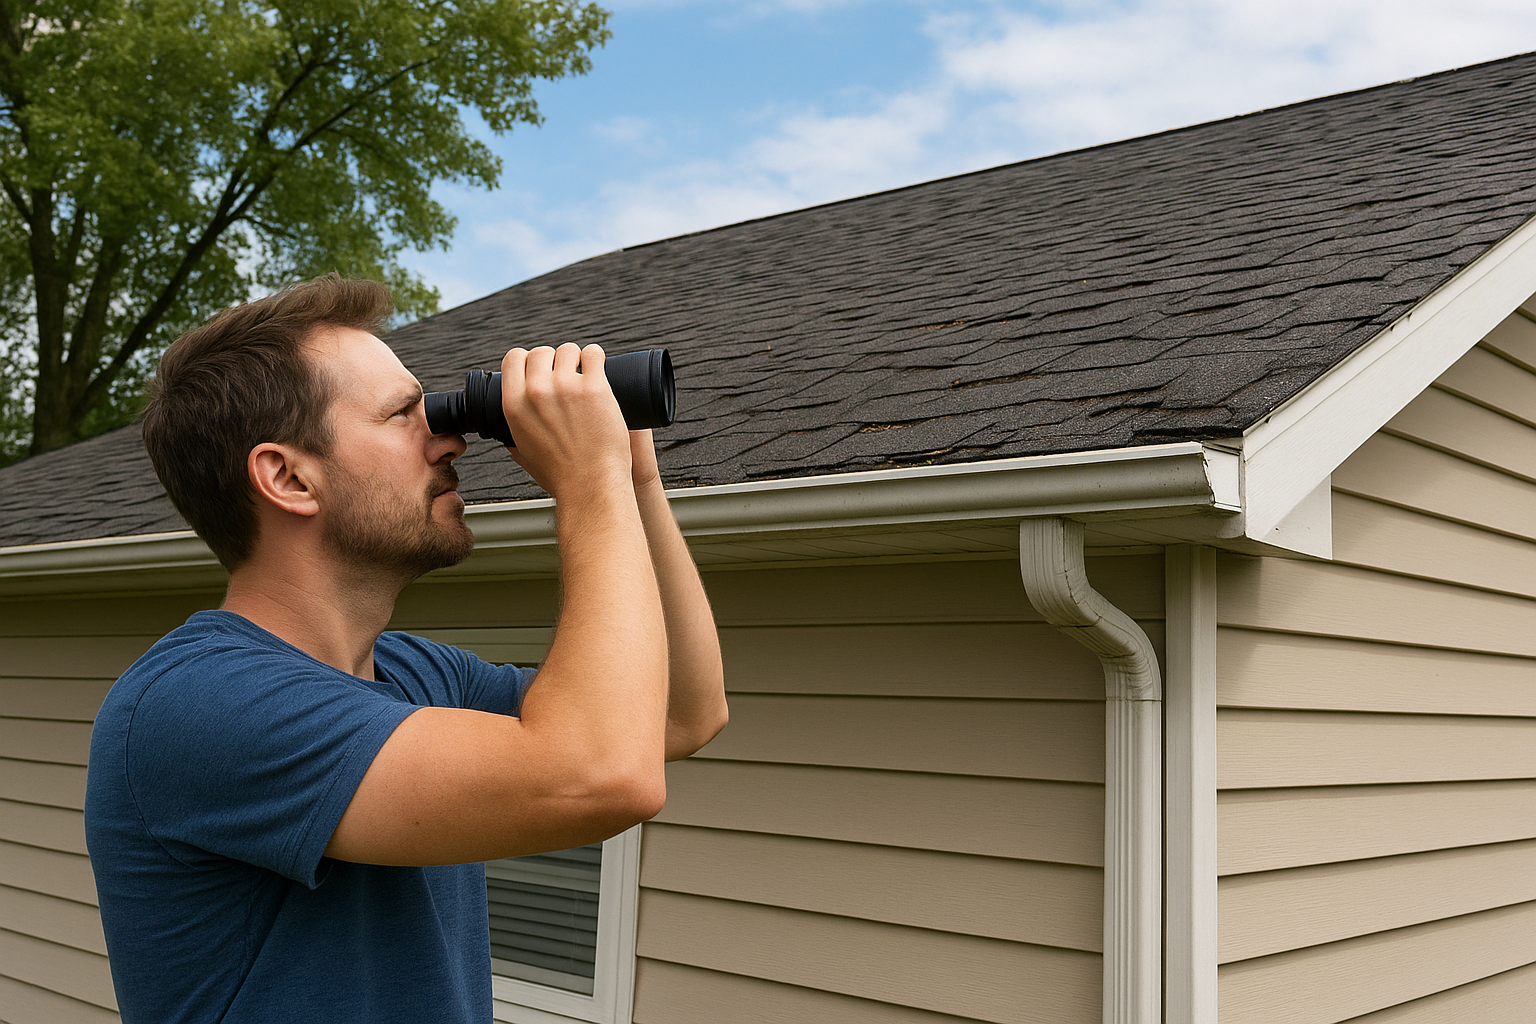
Any one of these signs points to real hail damage worth investigating further, even if the roof looks fine from the street, and it helps to know how to spot hail damage on your shingles before you call anyone.
Never climb onto a hail-damaged roof yourself, the granule loss and cracked mat make shingles far more slippery and fragile than they look.
After you've done a safe ground check, resist the urge to get up there yourself. Hail damage is often subtle: bruised shingles that look fine but have lost their waterproofing integrity underneath. Spotting that kind of damage takes training and, frankly, a lot of hail-damaged roofs under your belt, which is why a post-hailstorm roof inspection is worth leaving to a pro. That's exactly why we built our Precision Roof Assessment around 100+ photos of every roof we inspect, so you get documented proof of what's really going on up there instead of a guess.
Contacting a licensed roofer within a few days of the storm also protects your timeline for filing an insurance claim, since most policies have windows for reporting damage. Getting ahead of that clock now saves you headaches later, when you're deciding whether to repair or replace and negotiating with an adjuster who wasn't standing next to you during the storm.
Once you've called a professional, the real work starts: a full inspection that goes far beyond a glance from the ladder. Thorough documentation at this stage decides whether you open a roof insurance claim the right way and get approved without a fight, or end up in a months-long back-and-forth with an adjuster who's never seen your roof up close.
A licensed roofer checks every surface exposed to the storm, not just the shingles you can see from the driveway. That means the roof field, flashing, vents, gutters, and often the siding and window screens too, since hail rarely damages one component alone.
A roof inspection that skips flashing and vents misses the spots where hail damage turns into a leak fastest.
Insurance adjusters see hundreds of roofs after a hailstorm, and they move fast. Photo evidence is what separates a claim that gets approved from one that gets lowballed or denied outright, so it pays to know the photo documentation adjusters accept. This is why we run a Precision Roof Assessment on every job, capturing 100+ photos that show hail hits with a reference marker for scale, roof pitch, and directionality, the same details an adjuster looks for when confirming storm damage versus normal wear.
Getting this documentation right the first time also protects you if the adjuster's initial estimate comes back low. You'll have your own dated, timestamped photo record to compare against theirs, which puts you in a much stronger position during the appraisal process if it comes to that.
Skip this step, or let it get rushed, and you're negotiating blind. Take the time here, or hire someone who will, and everything downstream, from your claim to your repair scope, goes smoother.
Once the inspection is done, you're left with a choice that affects your wallet and your roof's lifespan for years to come. Choosing between repairing and replacing a hail-damaged roof isn't a coin flip. It comes down to how widespread the damage is, how old your roof already was before the storm, and whether the shingle mat itself is compromised beyond a patch job.

Isolated hail hits on a roof that's less than ten years old usually point toward repair. If the damage is confined to a slope or two, and the decking underneath is still sound, a skilled crew can replace the affected shingles and flashing without touching the rest of the roof. This keeps costs down and gets you back to a watertight roof fast, often within a day.
Widespread bruising across multiple slopes, granule loss over large sections, or a roof that was already nearing the end of its warranty period are all signs it's time for a new roof in Texas, and replacement becomes the smarter long-term move. Patching an old roof that's already lost most of its granule protection just delays a bigger bill, and most manufacturers won't warranty new shingles installed next to failing ones anyway.
A roof that's more than 15 years old with heavy hail damage almost never makes financial sense to patch, replacement protects you longer for close to the same insurance payout.
| Factor | Favors Repair | Favors Replacement |
|---|---|---|
| Roof age | Under 10 years | Over 15 years |
| Damage spread | 1-2 slopes | 3+ slopes or whole roof |
| Granule loss | Minor, localized | Widespread, exposed mat |
| Decking condition | Solid, no soft spots | Soft spots or rot present |
| Prior repairs | None or minimal | Multiple patch jobs already |
Getting this decision right matters more than most homeowners realize, because it shapes everything that follows. It determines the scope your insurance claim needs to cover, the materials your contractor orders, and how long the whole job takes. We walk every Central Texas homeowner through this decision honestly, based on what the 100+ photos actually show, not on what pads a bigger invoice.
With your documentation in hand, it's time to open the claim and start getting your insurer to pay for the work. Call your insurance company's claims line directly rather than relying on an app or email form, since a direct phone call starts your file moving faster and gives you a claim number and adjuster contact on the spot. Tell them the date of the storm, the visible damage you found, and that a licensed roofer has already inspected the property. This is also the moment to ask about your filing deadline, since some Texas policies require notice within a year of the storm date, and missing that window can void an otherwise valid claim.
An adjuster will schedule a visit to walk the roof themselves, and this is where having your contractor present pays off. Adjusters see dozens of roofs a week and sometimes miss subtle bruising that a roofer trained in hail damage roof repair catches immediately. Ask your contractor to meet the adjuster on-site so both parties are looking at the same damage together, comparing notes against the photo report instead of arguing over a phone call later.
An adjuster's first estimate is a starting point, not a final number, and your own documentation is what moves it closer to the real repair cost.
Sometimes the first offer comes in short, especially on older roofs where the adjuster assumes wear and tear instead of storm damage, since roof age changes how coverage gets applied. Submitting your dated photo report alongside a written repair estimate from your contractor usually resolves the gap without escalating to a formal appraisal. If it doesn't, most policies include an appraisal clause you can invoke, and we walk Central Texas homeowners through that process as part of our insurance claim support.
Once your claim is settled, or you've decided to move forward on your own dime, the next step is getting a crew on your calendar quickly. Scheduling promptly matters more after a hailstorm than most homeowners expect, since a backlog of storm claims across Central Texas means good crews book up fast. Confirm your contractor has your approved scope of work in hand, whether that's from your insurance settlement or a private estimate, so materials get ordered the same week instead of sitting in a queue.
Most isolated hail repairs wrap up in a single day, sometimes two if flashing or decking needs replacing alongside shingles, though roof repair timelines can stretch from hours to weeks on bigger jobs. A typical crew removes damaged shingles down to the deck on the affected slope, checks for soft spots, replaces underlayment where needed, and installs matching shingles with new nail patterns to meet code. Gutters, vents, and pipe boots get addressed in the same visit if they showed damage in your original assessment.
A repair job that skips a final walkthrough with photos leaves you with no proof the work matches what your insurance company paid for.
Pricing depends on how many slopes need work and whether decking replacement is involved, and 2026 roof repair costs by damage type give you a wider benchmark.
| Repair Scope | Typical Cost Range |
|---|---|
| Single slope, shingles only | $800-$2,000 |
| Multiple slopes with flashing/vents | $2,000-$5,000 |
| Decking replacement plus shingles | $5,000-$9,000+ |
These figures shift with roof pitch, material grade, and access, but they give you a realistic starting point when comparing quotes.
Before your crew leaves, walk the roof with them or ask for a closeout photo set matching your original assessment. This final documentation protects your workmanship warranty and gives you a paper trail if a slow leak shows up months later. We handle every job this way for Central Texas homeowners, closing the loop with the same photo standard we started with.
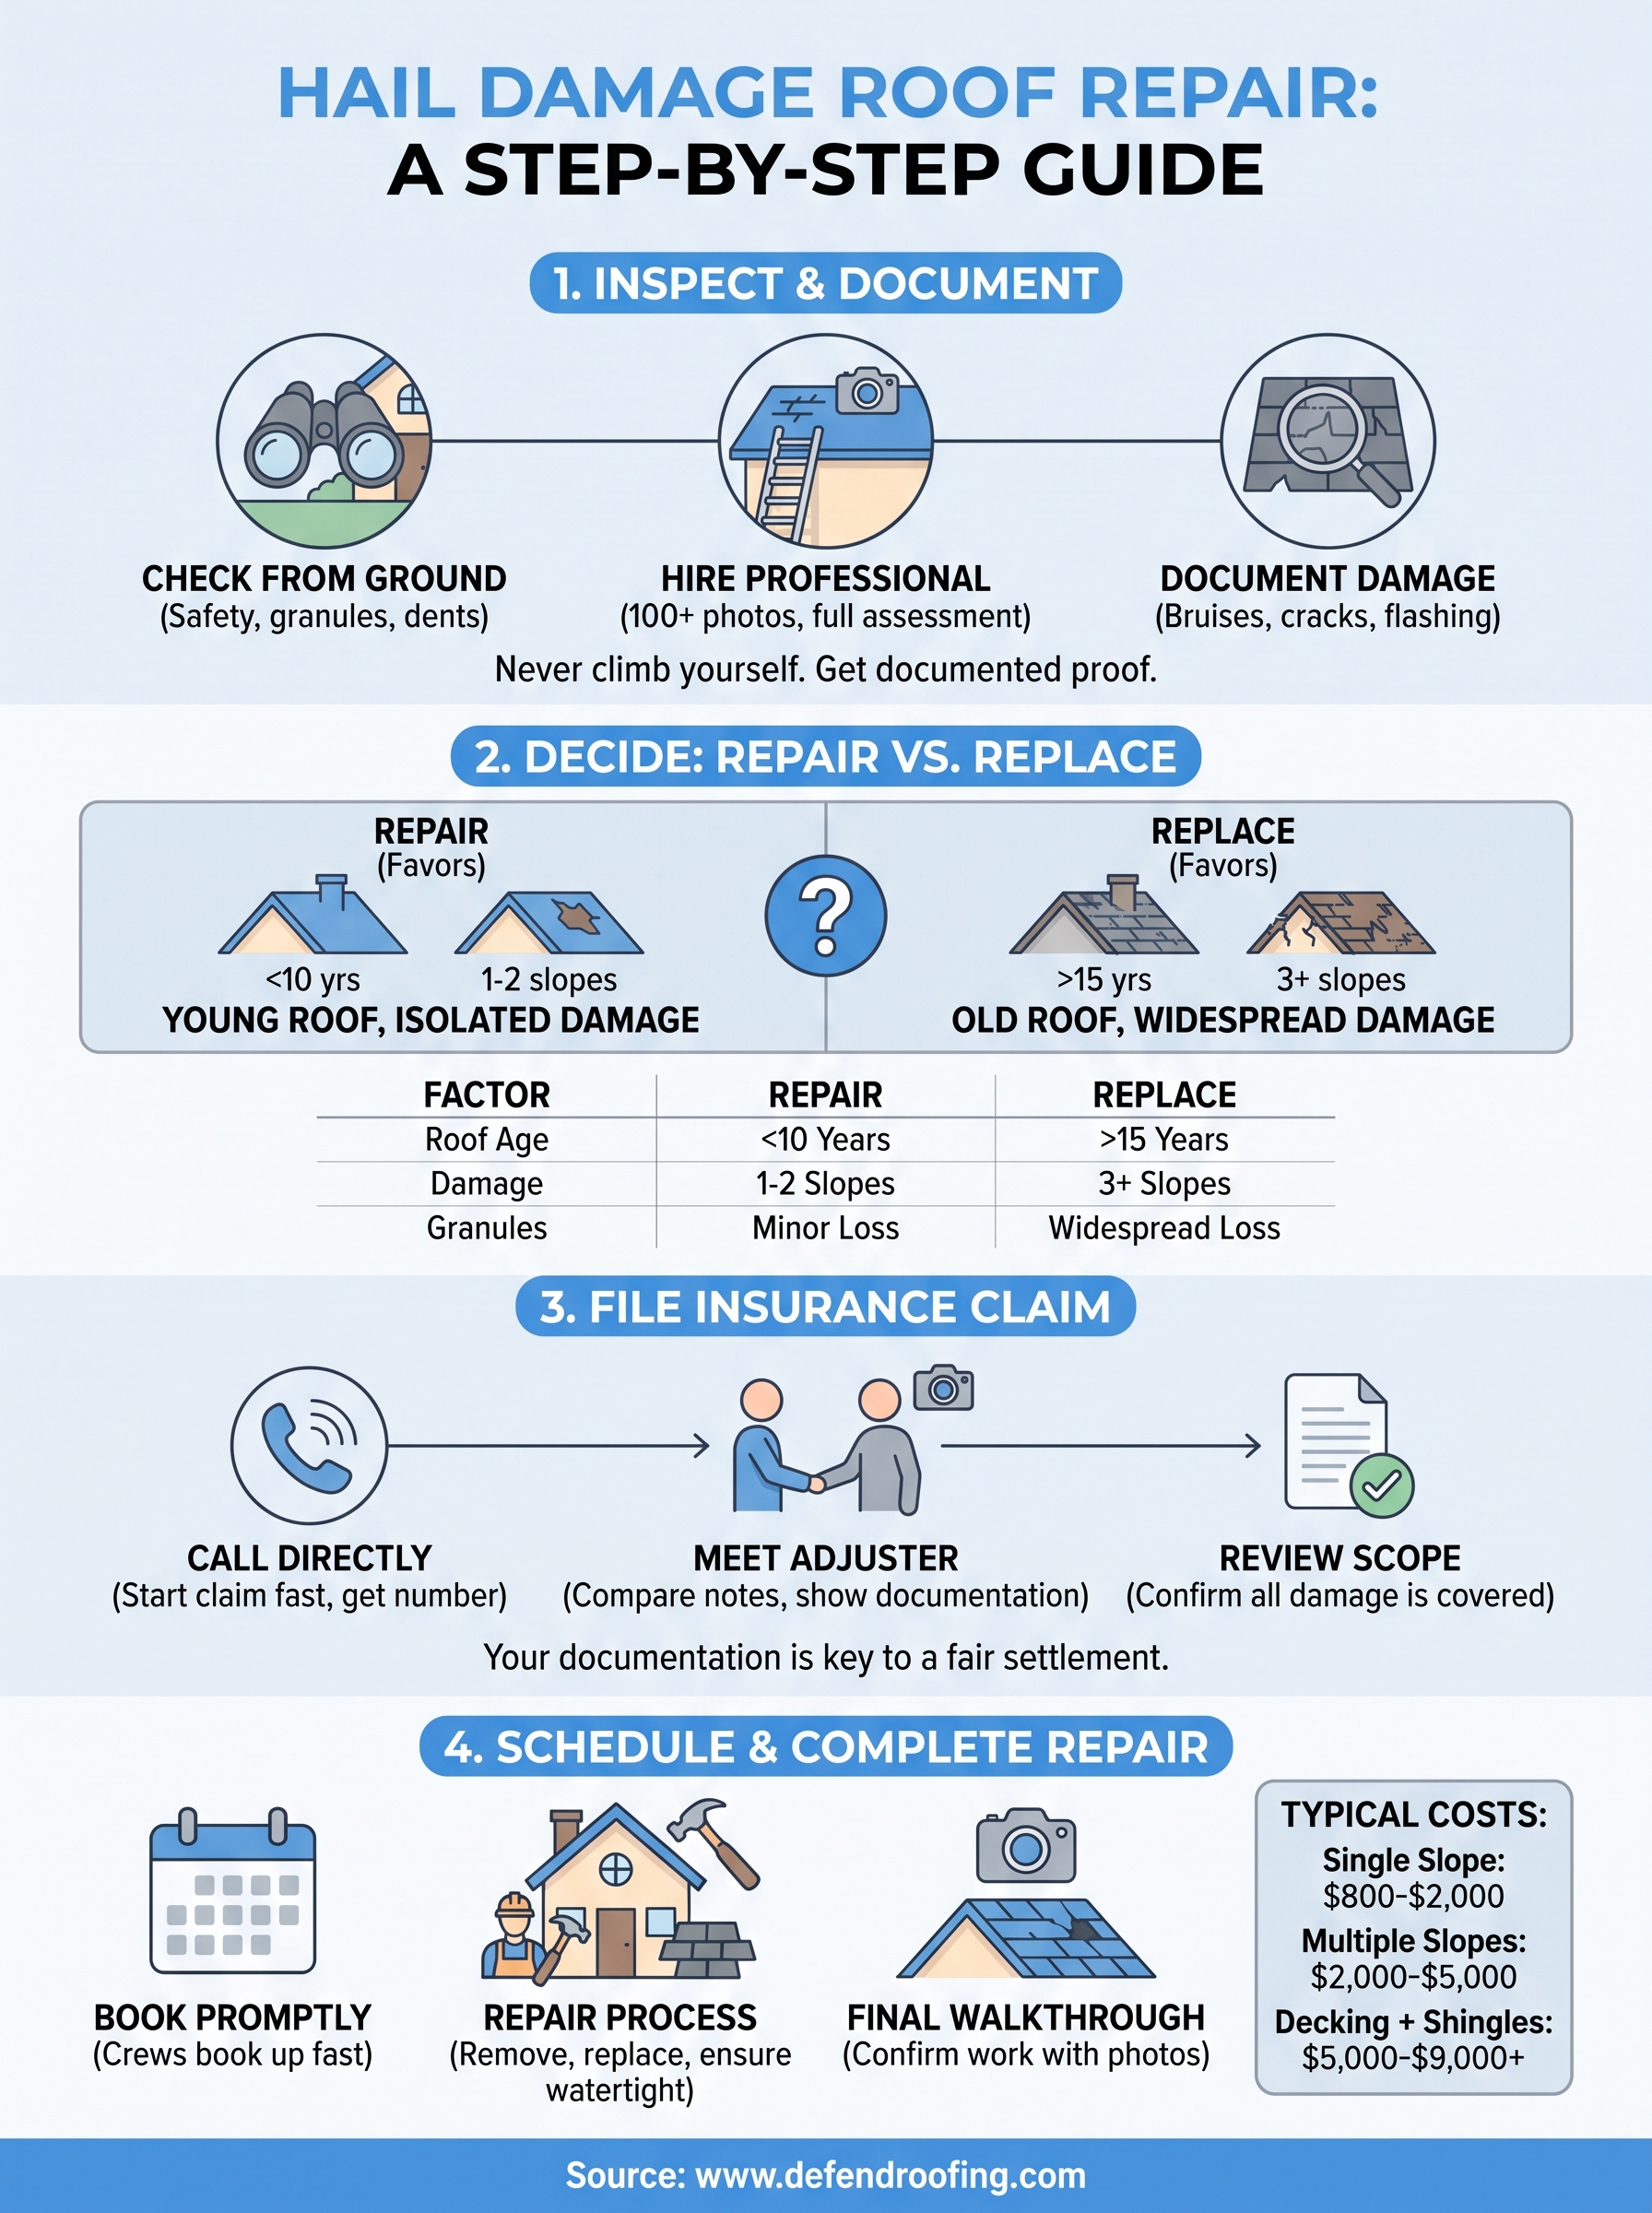
Hail damage rarely announces itself the way a fallen tree limb does. It hides in bruised mats and cracked seals until a slow leak forces your hand months later, usually at the worst possible time. Following the steps above, from that first ground-level check to the closeout photos, keeps you ahead of that timeline instead of reacting to it after the damage spreads.
Getting a hail damage roof repair right the first time comes down to documentation and honesty about what the roof actually needs, not what pads a bigger invoice. That's the standard we hold every Central Texas job to, from the initial 100+ photo assessment through the final walkthrough.
If you're staring at dented gutters or missing granules right now, don't wait for the leak to confirm what you already suspect. Call, text, or get an instant quote for hail damage roof repair and get a straight answer on your roof from our team.