Learn how to do a roof inspection for hail damage safely, ground checks, ladder tips, photo evidence, and when to call Defend Roofing's Austin pros.
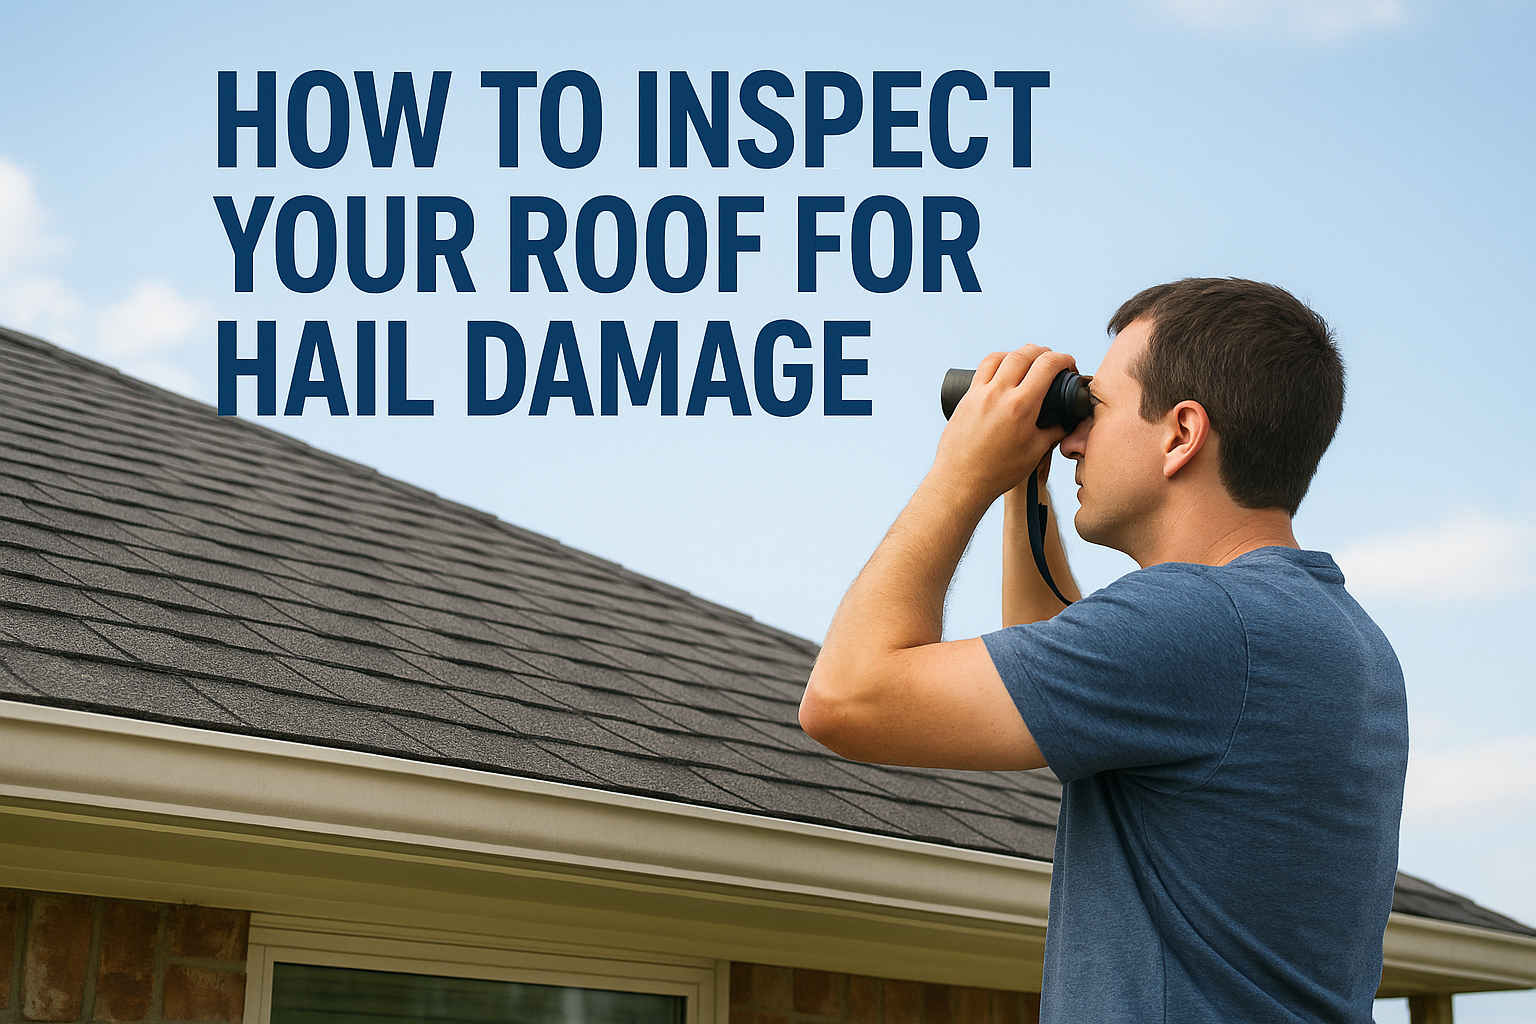
A hailstorm rolls through Central Texas, and the next morning you're standing in your driveway squinting up at your shingles wondering if you need a new roof or if it's fine. A roof inspection for hail damage is how you get a real answer instead of a guess, and the difference matters when your insurance deductible or a full replacement is on the line.
Hail damage isn't always obvious from the ground. You're looking for bruised or dented shingles, granule loss that shows up as dark patches in your gutters, cracked flashing, and dented gutters or vents that often reveal impact before the shingles do. Timing matters too: most insurance policies give you a window, often a year, to file a claim after a storm.
This guide walks you through exactly how to check your roof safely from the ground and with binoculars, what damage patterns actually mean, and when a DIY look isn't enough. We'll also cover why a documented professional assessment carries far more weight with adjusters than photos taken on your phone, and how Defend Roofing's 100+ photo Precision Roof Assessment gives Austin-area homeowners the evidence they need for a fair claim.
Skipping a hail damage roof inspection after a storm is one of the more expensive mistakes a homeowner can make. Hail rarely announces itself with obvious holes or missing shingles. It usually shows up as bruised shingle mats that look fine from the driveway but have already lost the granules that protect them from UV rays and water. Leave that kind of damage alone for a season, and you're not looking at a simple patch job anymore. You're looking at rotted decking, interior water stains, and a repair bill that costs several times more than catching it early would have.
Getting on the roof quickly also protects your ability to file a claim at all. Most Texas homeowner policies give you a set window, often 12 months from the storm date, to report hail damage to your insurer. Miss that window and even obvious impact damage can get denied outright, no matter what your policy covers for hail. Adjusters also weigh the freshness of your documentation heavily. Photos taken the week after a storm carry more credibility than a claim filed six months later when weather, birds, and foot traffic have altered the evidence. If you already suspect damage, start your roof claim file now rather than waiting to see if a leak develops.
A roof inspection you do this week is worth more to your claim than one you do next spring.
Not every hailstorm causes the same level of damage, and knowing what hit your neighborhood helps you set expectations before you ever get on a ladder. The National Weather Service tracks hail size reports for storms across the region, and that data can tell you whether you're dealing with cosmetic dings or structural impact.
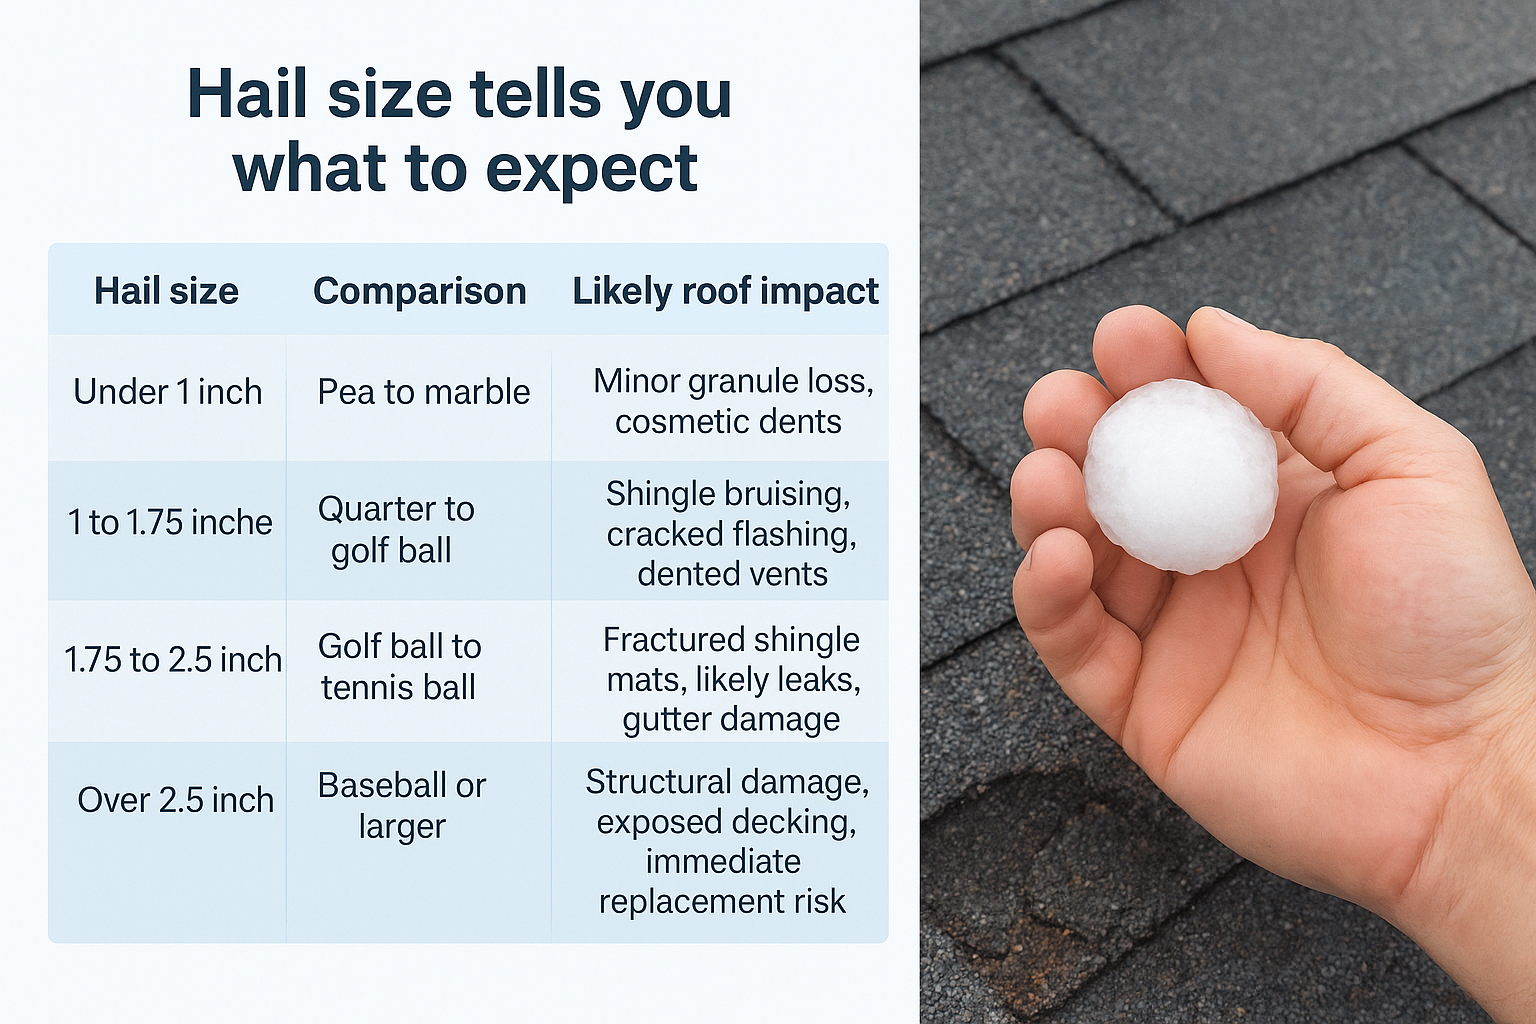
| Hail size | Comparison | Likely roof impact |
|---|---|---|
| Under 1 inch | Pea to marble | Minor granule loss, cosmetic dents |
| 1 to 1.75 inches | Quarter to golf ball | Shingle bruising, cracked flashing, dented vents |
| 1.75 to 2.5 inches | Golf ball to tennis ball | Fractured shingle mats, likely leaks, gutter damage |
| Over 2.5 inches | Baseball or larger | Structural damage, exposed decking, immediate replacement risk |
If local reports put your storm in the golf ball range or above, and you know the hail sizes that actually damage a roof, treat a full roof damage inspection after hail as urgent, not optional.
Steep-slope roofs, wet shingle surfaces, and unstable footing send more homeowners to the emergency room every spring than most people realize. A roof that took a beating from hail is often more slippery and more fragile than usual, since impact damage can weaken the shingle surface you're standing on. Never inspect a roof during or right after rain, and skip the climb entirely if you have a steep pitch, a two-story home, or any doubt about your ladder setup. Ground-level and binocular checks, which we'll cover next, get you most of the information you need without the risk.
Quality matters as much as speed when it comes to proving hail damage to an insurance adjuster. A handful of blurry phone photos rarely settles a claim dispute, especially when the adjuster's own inspection contradicts what you captured. This is where a professional, systematic approach, like Defend Roofing's Precision Roof Assessment, pays for itself. A documented inspection built around claim-ready photos with 100-plus images, measurements, and clear damage patterns gives your insurer far less room to argue, and it gives you a paper trail if the claim ever needs to be appealed.
Before you ever touch a ladder, walk your property and look at the things hail hits first. Ground-level evidence often tells you everything you need to know about whether a full roof check is worth the risk. Soft metal surfaces bruise and dent long before shingles show visible cracking, so they act as a preview of what's happening above your head.
Check your air conditioning unit for dented fins, since the coils are thin aluminum that dents almost as easily as a soda can. Look at your gutters, downspouts, and any exposed flashing for small circular dings that weren't there before the storm. Mailboxes, window screens, and car hoods parked outside during the storm all bruise the same way a roof does, and they're far easier to inspect from the ground.
If your gutters and AC unit are dented, assume your shingles took a hit too.
Next, look down instead of up. Torn leaves, stripped branches, and bruised siding around your home's exterior are strong indicators that hail hit with enough force to damage roofing material as well. Pay attention to which side of the house shows the most damage, since wind-driven hail usually hits one direction harder than others, and that same side of your roof deserves the closest look once you get up there.
Grab a pair of binoculars and scan your roofline from multiple angles in your yard, from the driveway, and from any second-story window that gives you a clear line of sight. You're looking for irregular dark patches on shingles, which usually mean granule loss, along with any shingles that look curled, cracked, or knocked loose, all visual clues that hail hit your roof. This step alone catches a surprising amount of damage without ever risking a fall.
Run through this quick checklist before deciding whether a ladder inspection is even necessary:
If you check two or more boxes, move forward carefully to Step 2. A hail damage roof inspection doesn't need to start on a ladder, but it almost always needs to end there if the ground evidence points to real impact.
Once ground evidence points to real hail impact, you need the right setup before you climb. Ladder safety is where most roof inspection injuries actually happen, not on the roof itself, so treat this step with the same seriousness you'd give the inspection.
Wear rubber-soled shoes with real tread, not sneakers with worn-out grip, since hail-damaged shingles are often more slippery than a normal roof surface. Bring a soft-soled shoe, work gloves, and a hard hat if you're inspecting anywhere near overhead branches or power lines. Skip the inspection entirely on a windy day. Gusts over 15 mph make ladder work genuinely dangerous and can shift your footing at the worst possible moment.
Place your ladder on firm, level ground, never on mulch, gravel, or a slope, and use the 4-to-1 rule: for every 4 feet of height to the roofline, move the base out 1 foot from the wall. Have a second person hold the base steady while you climb, and extend the ladder at least 3 feet above the roofline so you have something solid to grab as you transition on and off.
A ladder set at the wrong angle causes more injuries than the roof inspection itself.
Some roofs simply aren't safe for a DIY check, no matter how careful you are. Steep pitches above a 6:12 slope, roofs with any standing water or ice, and two-story homes with no safe landing point all call for a professional instead. Texas homeowners insurance claims don't require you personally to climb onto the roof, so there's no upside to risking a fall just to snap your own photos.
Here's a quick pre-climb checklist to run through every time:
Verify the roofline itself before you step off the ladder. Weight distribution matters once you're up there too. Stay near the edges and over rafters rather than walking flat across the field of the roof, since hail-weakened shingle mats can flex more than you'd expect under a person's full weight. If anything about the setup feels off, climb back down and call a professional rather than pushing forward on a roof you're not fully confident in.
Once you're safely on the roof, slow down and look at each shingle the way an adjuster would. Hail impact marks look different from normal wear, and learning to tell them apart is the core skill of any roof inspection for hail damage. Run your hand lightly over suspicious spots, since hail bruises often feel soft or slightly sunken even when they're hard to see in direct sunlight.
Genuine hail damage shows up as random, circular impact marks scattered across the roof rather than a pattern that follows foot traffic or age. Look for dents with soft centers, black or dark discoloration where the mat is exposed, and cracks that radiate outward from a single point of impact. Wear from age or UV exposure tends to show up as uniform curling or fading across the whole slope instead, so knowing the clear signs that separate hail damage from age keeps the repair conversation honest.
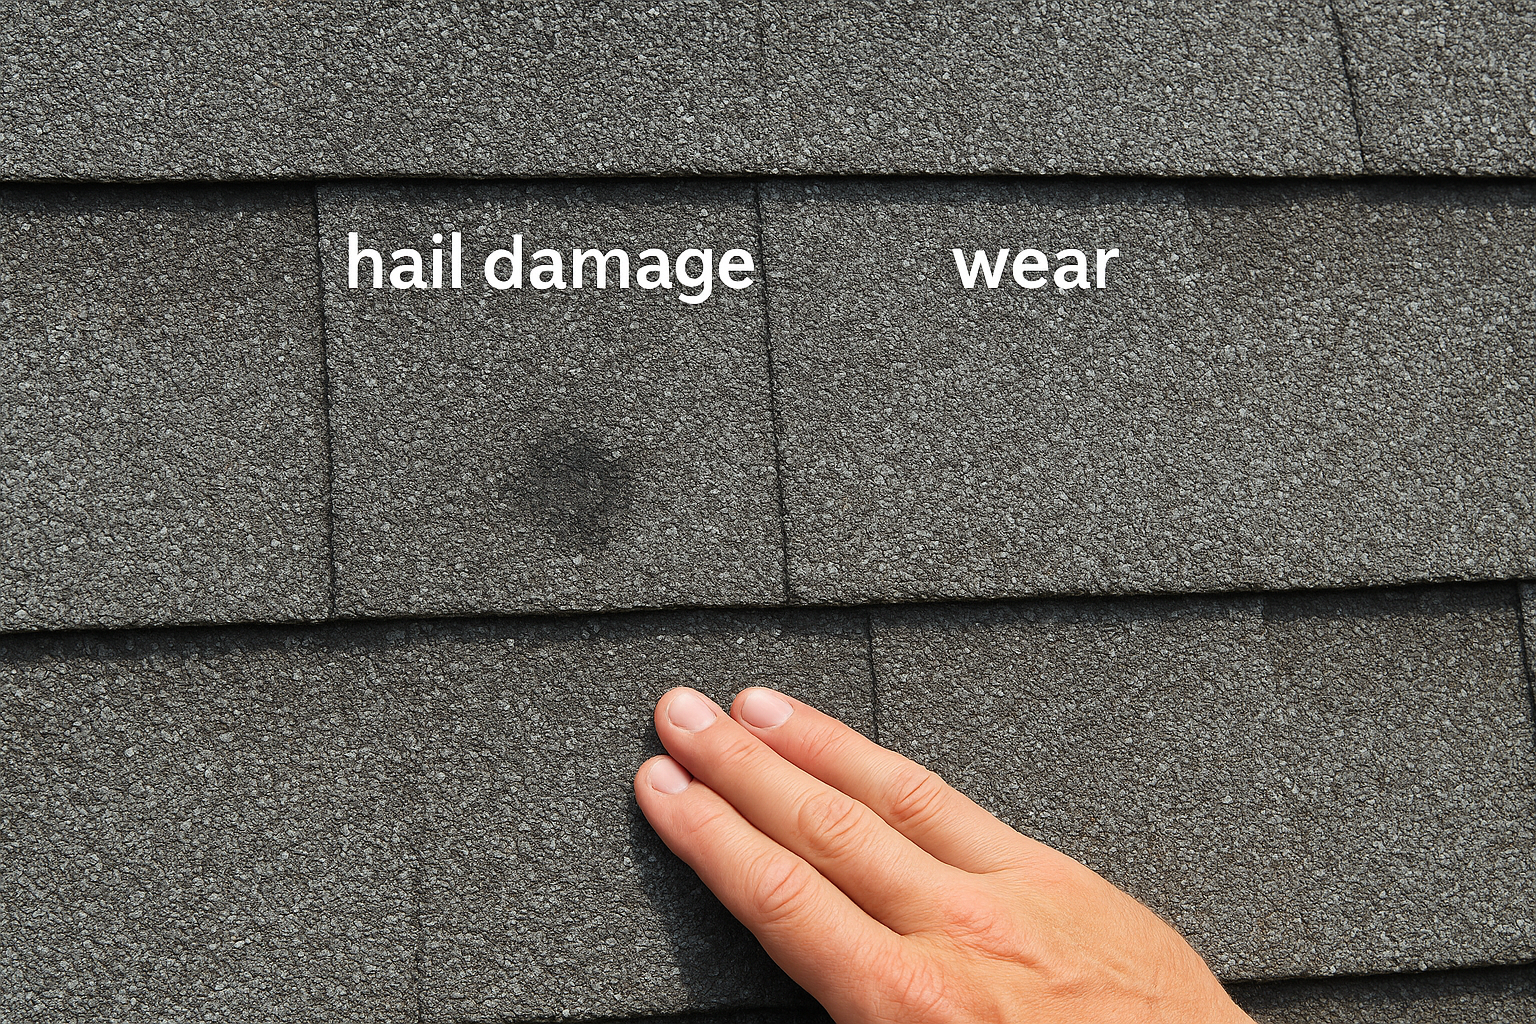
A single random dent with an exposed dark center is hail. A uniform faded slope is just age.
Granules protect the asphalt mat underneath from sun and water, so their absence is one of the clearest signs of impact. Examine ridge caps, valleys, and south-facing slopes first, since these areas typically catch the most direct hail exposure. Test any bald spot by pressing gently. If the mat feels tacky or exposed asphalt shows through, that shingle has lost its protective layer and needs replacing regardless of whether you can see a crack.
Different shingle materials react to hail in distinct ways, and knowing how long each type of shingle roof lasts helps you avoid dismissing real damage as cosmetic.
| Shingle type | Typical hail damage pattern |
|---|---|
| 3-tab asphalt | Cracked mats, torn tabs, exposed fiberglass |
| Architectural/dimensional | Bruising, granule loss, soft spots without visible cracks |
| Wood shake | Splits, chipped edges, discoloration |
| Metal panels | Dents without material loss, visible circular marks |
Understanding your specific shingle type keeps you from writing off soft, bruised architectural shingles as fine just because they lack an obvious crack.
Before moving to the next section of roof, mark each suspected hit with chalk or removable tape so you don't lose track once you start photographing. Working methodically in sections, rather than scanning the whole roof at once, keeps you from missing damage tucked into valleys or behind vent pipes, both of which we'll cover in the next step.
Shingles get most of the attention, but hail does just as much damage to the smaller components tying your roof together. Roof accessories like vents, flashing, and pipe boots are made of softer materials than shingles, so they often show clearer, more obvious impact marks. Skipping this step is a common reason homeowners underreport damage on their insurance claim, since adjusters look at these spots closely and expect you to have documented them too.
Plastic and metal roof vents dent and crack under hail the same way a soda can does, so run your hands over every vent cap on the roof looking for circular impact dents or hairline cracks around the edges. Pay close attention to rubber pipe boots, the collars that seal around plumbing vent pipes, since hail can split the rubber or crack the plastic base, creating one of the most common sources of a roof leak that won't show up until the next hard rain. Turbine vents and ridge vents deserve the same treatment. A bent turbine blade or a dented ridge cap is a clear, easy-to-photograph piece of evidence.
A cracked pipe boot causes more leaks than a dented shingle ever will.
Flashing, the metal strips sealing joints around chimneys, skylights, and roof-to-wall transitions, is thin enough that hail dents it almost as easily as gutters. Look at chimney flashing and skylight edges for dents, lifted seams, or gaps where the metal has pulled away from the surface it's sealing. Step flashing along dormers and sidewalls is easy to miss since it sits mostly hidden under the shingle line, so lift the shingle edge gently to check underneath if you suspect impact in that area.
Gutters and downspouts already showed you ground-level evidence in Step 1, but a closer look from the roofline reveals dents you couldn't see from below. Check any satellite dish mounts, solar panel brackets, or antenna hardware attached to the roof deck, since these fixtures often show sharper, more defined dents than the surrounding shingles because of their harder surface material.
Run through this list section by section as you move across the roof:
Every item on this list is a potential claim line, so treat each one with the same attention you gave the shingles before moving on to photographing what you've found.
Every mark you found in Steps 3 and 4 is worthless to an insurance adjuster if it isn't captured clearly. Photo documentation turns a homeowner's word into evidence, and this step is where most DIY inspections fall short compared to a professional roof damage inspection after hail. Take your time here. A rushed set of blurry photos gives an adjuster room to dispute what you're claiming, while a thorough set makes denial much harder to justify.
Start each section of roof with a wide shot showing the general area, then move in for a close-up photo of the actual impact mark. Include a coin, tape measure, or chalk marker in the close-up so the adjuster can judge the size of the hit without guessing. Repeat this wide-then-close pattern for every mark you flagged, since a single photo without context rarely holds up on its own.
A photo without a size reference is a photo an adjuster can argue with.
Also photograph slopes and sections that show no damage at all. Undamaged areas give an adjuster a baseline for comparison and prove you looked at the entire roof rather than cherry-picking a few spots. Shoot each roof face from at least two angles, and include the ridge line, valleys, and eaves in your coverage even if you didn't spot anything unusual there.
Writing notes as you go matters just as much as the images themselves. Log the date and time of each photo, the location on the roof, and a brief description of what you're seeing, since phone photo timestamps alone rarely satisfy an adjuster's request for a full damage narrative. Keep this log in the same folder as your photos so nothing gets separated before you file your claim.
Organize everything before you ever call your insurer. A disorganized folder of random photos slows down your claim and gives an adjuster reason to ask for more.
A file this complete is close to what Defend Roofing's Precision Roof Assessment delivers automatically, minus the professional-grade equipment and 100-plus photo standard our crews use on every job.
Exterior evidence tells you where hail hit, but interior evidence tells you whether that hit already compromised your roof's ability to keep water out. Interior water stains often show up weeks after a storm, long after the exterior damage has been photographed, so a thorough roof inspection for hail damage always finishes with a walk through the attic and top-floor rooms.
Grab a flashlight and climb into your attic on a clear day, ideally with sunlight streaming in, since daylight leaks through the roof deck are one of the fastest ways to confirm hail has already punched through the shingle mat. Look at the underside of the decking for dark streaks, dampness, or a slightly spongy texture where wood has started absorbing moisture. Check around every nail that penetrates the deck, since hail impact can loosen nail heads and create a pinhole leak path that's invisible from outside, which is where tracing a roof leak from the attic pays off.
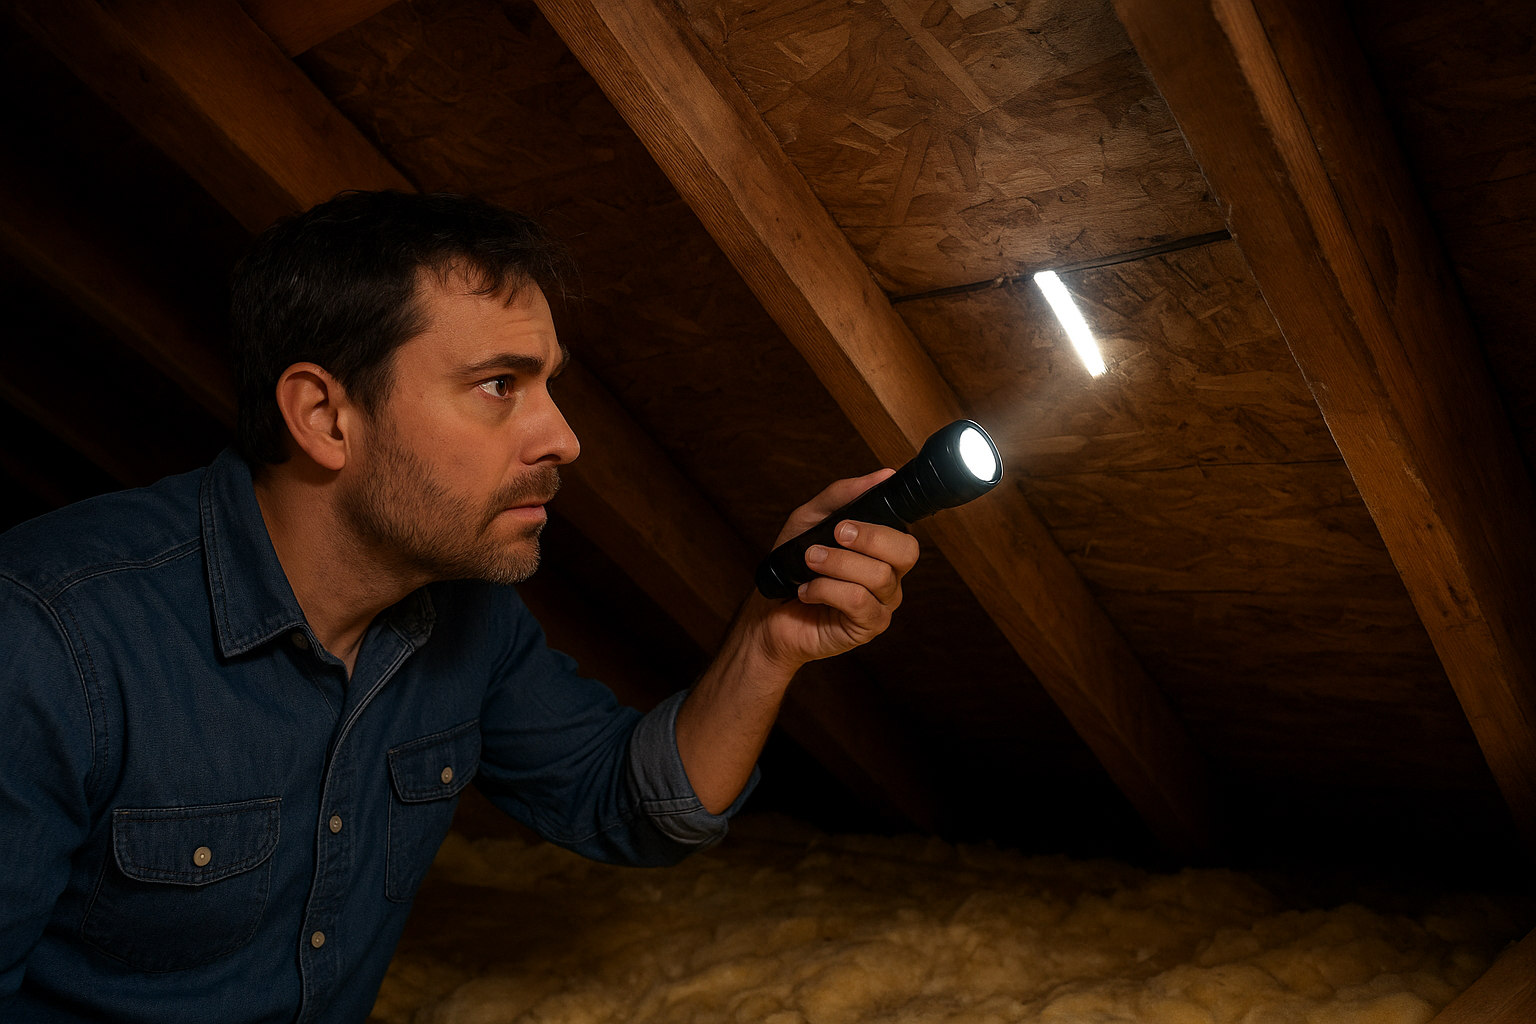
A single beam of daylight in your attic means water is already getting through.
Walk every room on your top floor and look up. Ceiling stains that show as yellow or brown rings, bubbling paint, or a soft sagging patch of drywall are all roof damage warning signs Texas homeowners shouldn't ignore, pointing to an active or recent leak somewhere above. Check closets and corners too, since water often travels along a rafter before it drips through drywall, which means the stain you find isn't always directly under the actual hole.
A musty smell in a closet or attic space is often the first sign of a leak before any visible stain appears, since trapped moisture behind drywall or insulation starts growing mold within days. Run through this quick interior checklist before you close out your inspection:
Finding even one of these signs means the exterior damage you documented in Steps 3 through 5 isn't cosmetic anymore. It's an active leak, and it belongs at the top of the list when you call your insurer or a professional roofer.
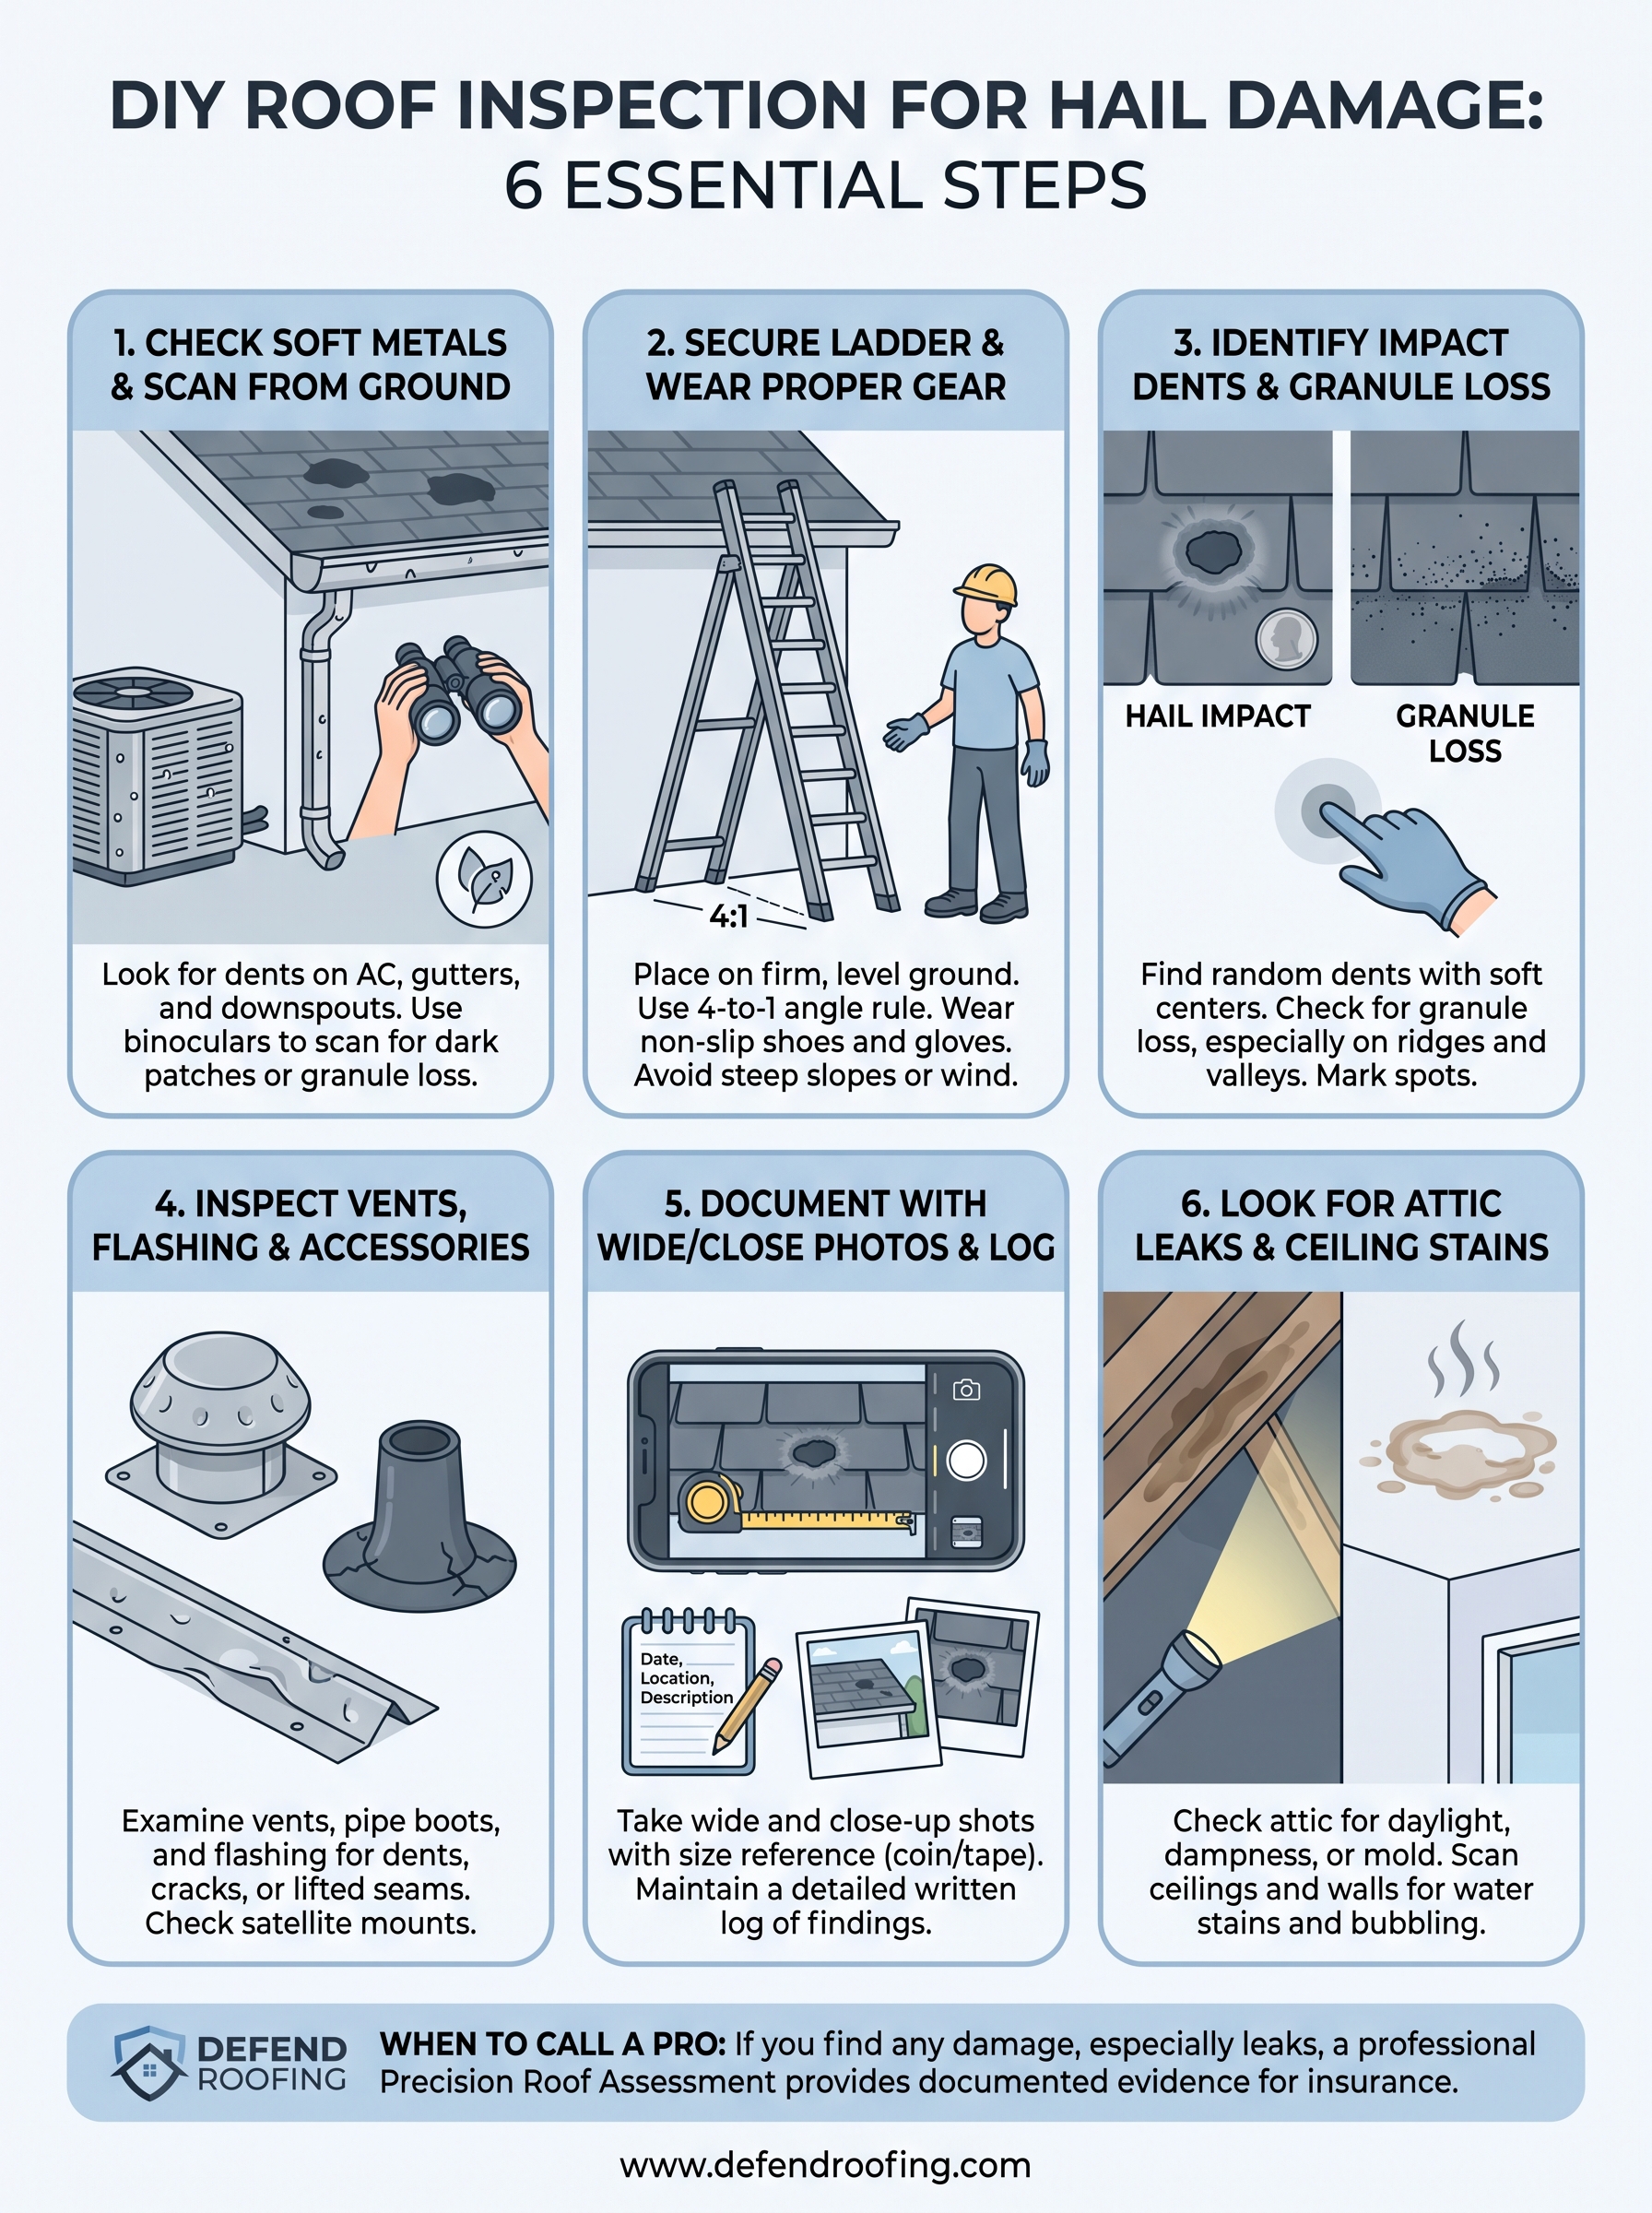
Walking your own roof gives you a real answer, not a guess, about whether hail left its mark. But a DIY inspection has limits. You can spot dented vents and bruised shingles, yet you likely won't catch every soft spot an adjuster will scrutinize, and you can't match 100-plus photos taken with professional equipment. Once you've found even one sign of impact, from a cracked pipe boot to a beam of daylight in your attic, that's your cue to stop relying on phone photos and learn what a professional roof inspection actually covers.
That's exactly where Defend Roofing fits in. Our Precision Roof Assessment gives Austin-area homeowners the documented evidence adjusters expect, without the guesswork or upselling. If your roof took a hit this season, don't wait for a leak to confirm it. Get an instant online quote and book your hail damage inspection before your claim window closes.